Cosmo COS-HZ5230 Скачать руководство пользователя страница 5


‚


USING THE GAS COOKTOPS                           

GAS BURNERS 

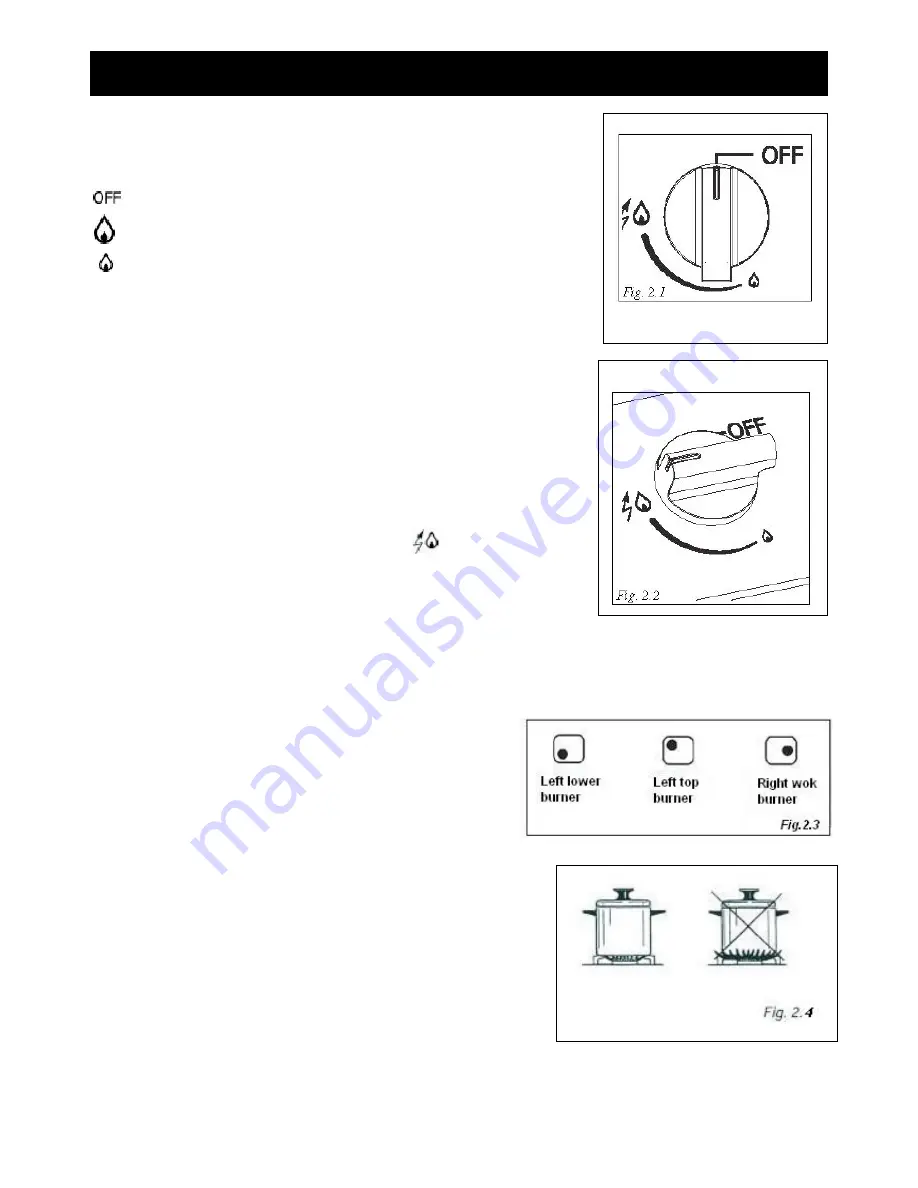
Gas flow to the burners are adjusted by turning the knobs(illustrated in (fig.2.1) 
which control the valves. 
Turning the knob so that the indicator line points to the symbols printed on the                                                                       
panel achieves to following functions: 


  =closed valve 

        =maximum rate 


        =minimum rate 


The maximum aperture position permits rapid boiling of liquids whereas the minimum   
aperture position allows slimming or warming of food and maintaining boiling conditions 
of liquids. 
To reduce the gas flow to minimum, rotate the knob further anti-clockwise to point the 
indicator towards the OFF position. 
Other operating adjustments can be achieved by positioning the indicator between the   
maximum and minimum aperture positions and never between the maximum aperture   
and OFF positions. 
N.B. When the cooktops is not being used, set the gas knobs to their OFF positions and   
also close the gas shut-off valve placed on the main gas supply line. 
 

LIGHTING GAS BURNERS 

In order to light the burner, you must: 

1- turn the knob in an anti-clockwise direction up to the 

  position (maximum 

rate), push in and hold the knob until the flame has been lit (fig.2.2). 
If after 15 seconds the burner has not lit, stop operating the device and open the   
compartment door and /or wait at least 1 min before attempting a further ignition   
of the burner. 
In the event of the burner flames being accidentally extinguished, turn off the burner   
control and do not attempt to re-ignite the burner for at least 1 min 
 
2- Adjust the gas valve to the desired position. 
To re-light the burner, return the knob to the OFF position and repeat the 
operations for lighting. 
 

CHOICE OF BURNER(fig.2.4) 

The symbols printed on the panel beside the gas knobs (see fig.2.3) 
indicate the correspondence between the knob and the burner. 
The most suitable burner is to be chosen according to the diameter and 
volume capacity of the container to be warmed. 
It is important that the diameter of the pots or pans suitably match the heating   
potential of the burners in order not to jeopardize the efficiency of the burners,   
bring about a waste of gas fuel. 
A small diameter pot or pan placed on a large burner does not necessarily mean 
that boiling conditions are reached quicker. 
This instruction is based on safety considerations. 
 

Caution! 

The cooktops becomes very hot during operation. Keep children well out of reach.


Содержание COS-HZ5230

Страница 1: ...IMPORTANT SAFETY INSTRUCTIONS Carefully read the following Important information redarding installation safety and maintenance Keep these instruction for future reference...

Страница 2: ...He will issue you with a gas certificate A manual gas shut off valve must be installed in the gas supply ahead of the appliance in the gas stream for safety and ease of service Do not store or use ga...

Страница 3: ...o could play with old appliances l The appliance should be installed and all the gas electrical connections made by a qualified engineer in compliance with local regulations in force and following the...

Страница 4: ...NTS 1 Auxiliary A 2 Rapid R 3 Semi rapid SR 4 Triple flame T 5 Hotplate H CAUTION If the burner flames are accidentally extinguished turn the gas off at the control knob and wait at least 1 minute bef...

Страница 5: ...rate push in and hold the knob until the flame has been lit fig 2 2 If after 15 seconds the burner has not lit stop operating the device and open the compartment door and or wait at least 1 min befor...

Страница 6: ...port may scratch the hob STAINLESS STEEL ELEMENTS Stainless steel parts must be rinsed with water and dried with a soft and clean cloth or with a chamois leather For difficult dirt use a specific non...

Страница 7: ...rious problems In appliances with electric ignition check that the electrode S fig 3 1 is always clean to ensure trouble free sparking The ignition plug must be very carefully cleaned CORRECT POSITION...

Страница 8: ...Screwdriver Wrench T handle wrench Tape measure Angle hexagon key Pencil Adjustable pliers Adjustable wrench Burner and Nozzle Specifications Liquid Towngas Burner Thermal Power Nozzle Flow Thermal Po...

Страница 9: ...d ventilation air 8 Disconnect the electrical supply to the appliance before servicing 9 When removing appliance for cleaning and or service A Shut off gas at main supply B Disconnect AC power supply...

Страница 10: ...ION INTO THE CABINET Please take the cut out size according to the cooktops dimension 34 20 20 17 7 16 1 31 33 18 9 29 21 3 23 6 22 18 9 21 3 min 2 min 2 min 2 min 21 3 min 1 6 min 1 6 min 1 6 min 1 8...

Страница 11: ...ter height 3 The maximum upper cabinet depth recommended is 13 330mm Wall cabinet above the cooktops must be a minimum of 30 762mm above the countertop for a width of minimum 11 13 32 290mm it has to...

Страница 12: ...reached quickly in the event of an emergency Do not block access to the shutoff valve The valve is for turning on or shutting off gas to the appliance 2 Pressure Regulator figures 5 2 a AlI heavy dut...

Страница 13: ...13 GAS CONNECTION SPECIFICATION...

Страница 14: ...or is recommended for connecting this cooktops to the gas supply line Do not kink or damage the flexible connector when moving the cooktops The pressure regulator has 3 8 NPT female pipe threads You w...

Страница 15: ...ssed in hundredths of a millimeter are marked on the body of each injector SETTING THE PRESSURE REGULATOR Fig 5 3 Attention The regulator is pre adjusted for both valves Aside from the turning of the...

Страница 16: ...When passing suddenly from maximum to minimum flame To regulate the flame follow the instructions below l Light the burner l Set the gas valve to minimum On gas valves provided with adjustment screw i...

Страница 17: ...ded ground method For your personal safety this cooktops must be grounded This cooktops is equipped with a 3 prong ground plug To minimize possible shock hazard the cord must be plugged into a matchin...

Страница 18: ...18 WIRING DIAGRAM IGNITION...

Отзывы: