- 10 -
Assembly Instruction
Fig.5
a. Insert the 70*50 Plug(#68) into the part(#11,#13).
b. Attach the part(#13) to the part(#6) using (1)M10*75 Hex Bolt(#93).
c. Attach the part(#11) to the part(#7) using (2)M10*90 Hex Bolts(#91).
d. Attach the part(#11,#13) to the part(#10) using (2)M10*75 Hex Bolts(#93).
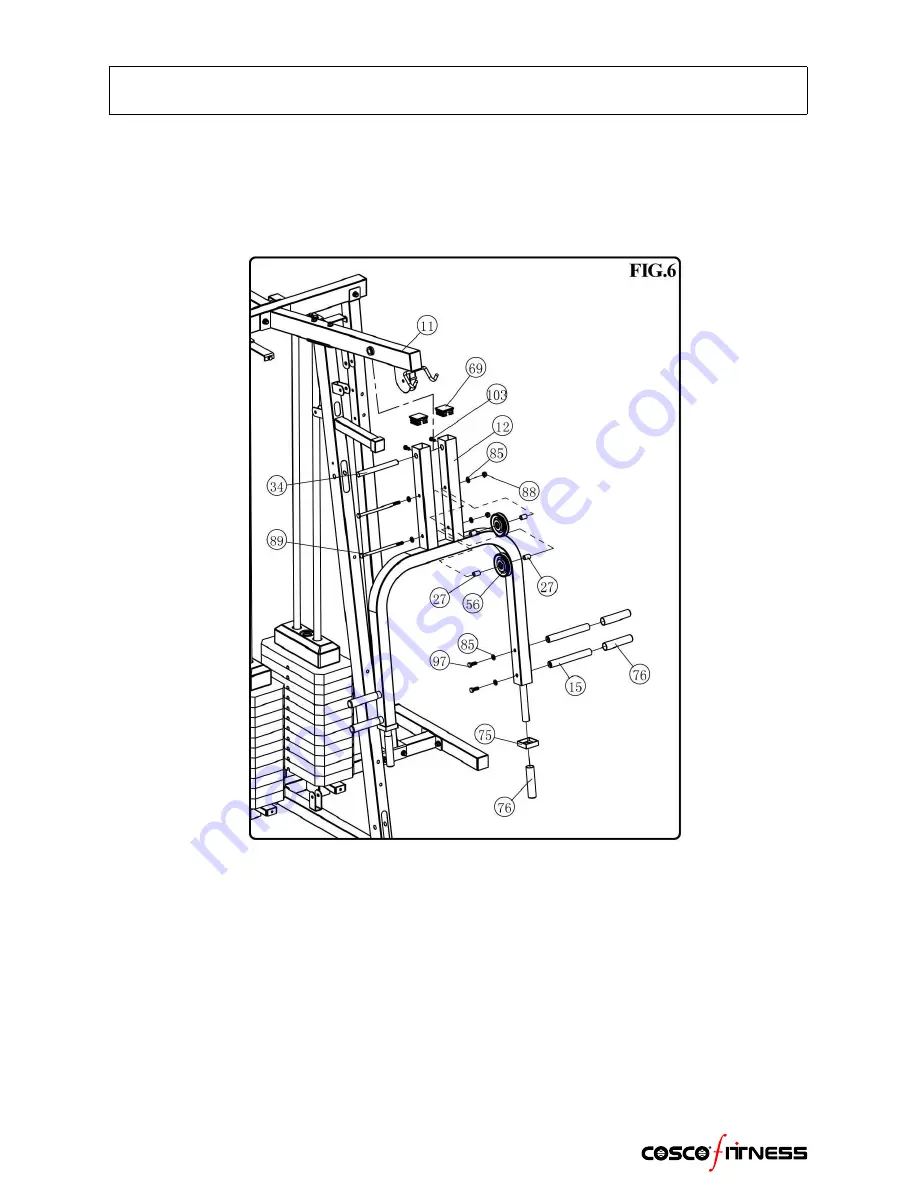
Fig.6
a. Insert the 50*50 Plug(#69) into the part(#12). Use a mallet, insert the Shaft(#34) through the part(#12) and
through the part(#11) until it is flush with both ends. Attach the Shaft(#34) to the part(#12) using (2)M8*20
Hex Bolts(#103).
b. Set the End Cap with hole(#75) and the Comfort Grip(#76) onto the part(#12).
c. Attach the Pulley(#56) and the Long Pulley Bushing(#27) to the part(#12) using (2)M10*185 Hex Bolts(#89).
d. Set the Comfort Grip(#76) onto the Handlebar(#15). Attach the Handlebar(#15) to the part(#12) using
(4)M10*25 Hex Bolts(#97).
Содержание CHG-402
Страница 1: ......
Страница 3: ...2 Part List...
Страница 4: ...3 Part List...
Страница 5: ...4 Part List...
Страница 6: ...5 Part List...


