background image

Page  13

SRP-003-545 • Issue 4 • July 2004

14. Maintenance

The unit requires very little maintenance to
make sure fibers and parts remain in good
condition.

Loose Parts

: Check nuts, bolts and screws for

looseness and tighten.

Moisture:

 Check the housing for accumulated

moisture and place moisture absorbent
packets as needed.

Fiber Bends:

 Check fiber optic cable to make

sure bends do not exceed the minimum bend
radius. Check cable for unnecessary strain.
Check cable entries and exits for crimping
or crushing.

Documentation:

 Check record label to make

sure it is clear and accurate.

15. Specifications

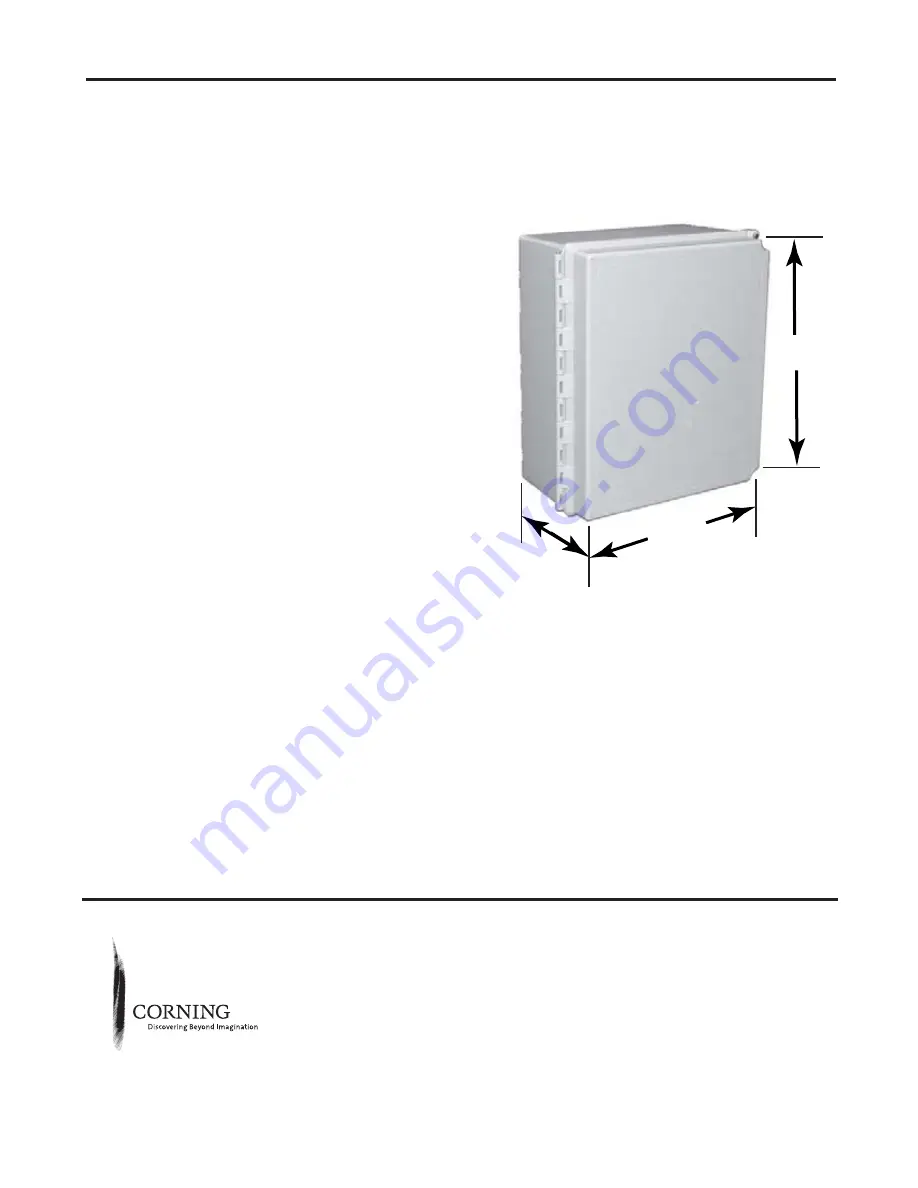
The unit weighs 6.9 kg (15.2 lb).

21 cm
(8.3 in.)

37 cm
(14.5 in.)

42 cm
(16.5 in.)

Corning Cable Systems reserves the right to improve, enhance and modify the features and specifications
of Corning Cable Systems’ products without prior notification. Discovering Beyond Imagination is a
trademark of Corning Incorporated. LANscape is a trademark of Corning Cable Systems Brands, Inc. All
other trademarks are the properties of their respective owners. Corning Cable Systems is ISO 9001
certified.
© 1999, 2000, 2004 Corning Cable Systems. All rights reserved. Published in the USA.
p/n 003-545 / July 2004

Customer Service—US or Canada:  1-800-743-2671
International: +1-828-901-5000
Fax:  +1-828-325-5060

Corning Cable Systems LLC, PO Box 489, Hickory, NC 28603-0489 USA

http://www.corning.com/cablesystems

Содержание EDC-06P-NH

Страница 1: ...mounted and how the distribution cable and drop cable will be routed to the unit 2 Description 2 1 The EDC that stores and protects fiber optic connections and splices in an outdoor environment The ca...

Страница 2: ...pieces of fiber stick to your clothing or drop in the work area where they can cause injury later Use tweezers to pick up cut or broken pieces of the glass fibers and place them on a loop of tape kept...

Страница 3: ...igure 2 5 2 An installation kit is provided that includes cable ties central member strain relief hardware a sheath retention kit and a quick release latch kit 6 Unpacking Stubbed Units Follow the dir...

Страница 4: ...Figure 4 Figure 5 b Drive 1 4 inch screws or wall anchors through the stabilizer bracket and into the mounting surface Do not install a screw in the bottom hole of the stabilizer bracket at this time...

Страница 5: ...tside of the armor and sheath Tap the sheath above the ground clamp base to set the teeth Stop Base Plate Position the top plate and lock nut on the outer sheath over the base plate Tighten with a 10...

Страница 6: ...ed washer f Arrange the buffer tubes to ensure clearance around the central member clamp assembly and hardware g Tighten the hex nut h Install the two flat washers i Loosely install the other hex nut...

Страница 7: ...irect connectorization per manufacturer s instructions If installing BTF kits proceed to section 12 Figure 12 Figure 13 Figure 14 Splice Tray Holder Splice Tray Holder Bracket NOTE Pigtails are fiber...

Страница 8: ...els into the connector support bracket Figure 16 10 6 Repeat for all required panels Figure 15 11 Splicing 11 1 The unterminated ends of pigtails are spliced to buffered fibers in a splice tray Figure...

Страница 9: ...he cable tie too tightly 11 4 Splice fibers as described in instructions for the splicing method you are using 11 5 As you complete a splice label the connector end of the pigtail with its port identi...

Страница 10: ...es and each successive loop should be in the section above the previous loop d At the third loop reinstall the splice tray holder and trays Figure 21 NOTE Cable ties can be loosely attached to organiz...

Страница 11: ...o avoid damaging the connectors during installation 12 7 Label the connector end of the pigtail with its port identifier Record information appropriately on the record label inside the front door Figu...

Страница 12: ...r Figure 27 d Tighten the hex nut e If the central member is metallic place the eye of a ground wire 6 AWG purchased separately in appropriate length from any electrical supply store under the U shape...

Страница 13: ...fications The unit weighs 6 9 kg 15 2 lb 21 cm 8 3 in 37 cm 14 5 in 42 cm 16 5 in Corning Cable Systems reserves the right to improve enhance and modify the features and specifications of Corning Cabl...

Отзывы: