background image

29. El peso de los alimentos que se coloca en la bandeja de alimentos / rejilla no puede superar los 3,0 kg. 

Solo como referencia


La comida no puede concentrarse en un lado de la Bandeja de comida / Parrilla 

de alambre, es mejor que intentes hacer que la comida se coloque en la Bandeja de comida / Parrilla de 

manera uniforme

30. Para electrodom

é

sticos con accesorio tipo Y, si el cable de alimentación está dañado, debe ser 

reemplazado por el fabricante, su agente de servicios o personas calificadas de manera similar para evitar 

riesgos a 

31. La superficie posterior de los electrodomésticos debe colocarse contra una pared. 

32.ADVERTENCIA: Este aparato incluye una función de calefacción. Las superficies, que no sean las 

superficies funcionales, pueden desarrollar altas temperaturas. Dado que las temperaturas son percibidas 

de manera diferente por diferentes personas, este dispositivo debe usarse con PRECAUCIÓN. Sujete el 

aparato exclusivamente para sujetar superficies destinadas a sostener y utilizar medidas de protección 

contra el calor como guantes de protección contra el calor o soportes para ollas. Las áreas que no están 

destinadas a agarrar deben tener suficiente tiempo para enfriarse. 

33. No lo coloque sobre o cerca de un quemador de gas o eléctrico caliente, o en un horno caliente. 

34. Se debe tener extrema precaución al mover un aparato que contenga aceite caliente u otros l

í

quidos 

calientes. 

35. Los aparatos no están diseñados para funcionar mediante un temporizador externo o un sistema de control 

remoto independiente 

PRECAUCIÓN: LAS SUPERFICIES DEL APARATO ESTÁN CALIENTES DESPUÉS DEL USO. SIEMPRE use 

guantes protectores aislados para horno cuando toque el horno caliente o platos calientes y alimentos, o 

cuando inserte o retire la rejilla, sartenes o platos para hornear. 

GUARDA ESTAS INSTRUCCIONES 

Antes de usar su 

Horno


Sobremesa


Antes de usar su horno eléctrico de convección por primera vez, asegúrese de: 

1. Desembale la unidad. 

2. Retire todas las parrillas y sartenes. Lave las parrillas y sartenes con agua jabonosa caliente o en el 

lavavajillas. 

3. Seque completamente todos los accesorios y vuelva a armarlos en el horno. Conecte el horno a la toma de 

corriente y estará listo para usar su nuevo Horno 

Sobremesa

4. Después de volver a armar su horno, le recomendamos que lo haga funcionar a la temperatura MÁXIMA 

durante aproximadamente 15 minutos para eliminar cualquier aceite de embalaje que pueda quedar después 

del envío.


Содержание 8436555985837

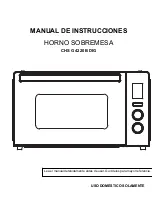
Страница 1: ...MANUAL DE INSTRUCCIONES HORNO SOBREMESA CHS G 4220 B DIG USO DOMÉSTICO SOLAMENTE Lea el manual detenidamente antes de usar Guárdelos para mayor referencia ...

Страница 2: ...éctrica 14 Puede ocurrir un incendio si el horno está cubierto o toca material inflamable incluyendo cortinas cortinas paredes y similares cuando está en funcionamiento No almacene ningún artículo en el horno durante la operación 15 Se debe tener extrema precaución cuando se usan recipientes construidos si no son de metal o vidrio 16 No coloque ninguno de los siguientes materiales en el horno cart...

Страница 3: ...stán destinadas a agarrar deben tener suficiente tiempo para enfriarse 33 No lo coloque sobre o cerca de un quemador de gas o eléctrico caliente o en un horno caliente 34 Se debe tener extrema precaución al mover un aparato que contenga aceite caliente u otros líquidos calientes 35 Los aparatos no están diseñados para funcionar mediante un temporizador externo o un sistema de control remoto indepe...

Страница 4: ... 7 Parrilla para transportar alimentos para cocinar La cantidad máxima de alimentos en este estante es de 400 g 8 Manija de la bandeja de alimentos para retirar la rejilla o la bandeja HORQUILLA ROTISSERIE CON CONSEJOS 1 Inserte la horquilla en la varilla hasta cerca del extremo de la varilla y luego asegure con el tornillo 2 Inserte la comida desde el otro lado de la barra 3 Coloque el segundo fu...

Страница 5: ... función parpadeará en la pantalla LED cuando se seleccione la función 3 kno Perilla TEMP TIME la temperatura hora se puede ajustar con esta perilla FterDespués de seleccionar la función gire la perilla para configurar la temperatura de cocción deseada presione la perilla una vez cambie al modo de ajuste de tiempo gire la perilla para configurar el tiempo de cocción deseado Presionar la perilla re...

Страница 6: ...cambiar de la configuración de temperatura a la configuración de tiempo y viceversa presionando la perilla TEMP TIME 4 Presione el botón INICIAR CANCELAR para iniciar la operación El tiempo cuenta atrás Nota El tiempo y la temperatura de cocción son ajustables mientras el horno está funcionando Para cancelar la operación presione el botón START CANCEL Sin configuración de pausa CheckPara revisar o...

Страница 7: ...o help side food in and out 5 Cuando se complete el ciclo de trabajo la unidad se detendrá automáticamente y emitirá pitidos mostrando 00 00 en la pantalla LED hasta que el usuario presione el botón INICIAR CANCELAR Abra la puerta por completo y retire la comida con la manija PRECAUCIÓN los alimentos cocinados la barra bandeja metálica y la puerta pueden estar muy calientes manipúlelos con cuidado...

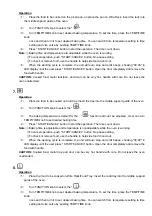
Страница 8: ...ocinados la rejilla bandeja metálica y la puerta pueden estar muy calientes manipúlelos con cuidado No deje el horno desatendido 7 Operación 1 Coloque la comida a cocinar en la bandeja de comida Inserte la bandeja en la guía de soporte central del horno 2 Gire la perilla FUNCTION para seleccionar 3 La temperatura de horneado es la predeterminada para la función y no se puede ajustar El usuario pue...

Страница 9: ...mperatura a la configuración de tiempo y viceversa presionando el botón TEMP TIME 4 Presione el botón INICIAR CANCELAR para iniciar la operación El tiempo cuenta atrás Nota El tiempo y la temperatura de cocción son ajustables mientras el horno está funcionando Para cancelar la operación presione el botón START CANCEL Sin configuración de pausa CheckPara revisar o retirar alimentos use la manija pa...

Страница 10: ...en un mesa o mostrador o estantería de armario Aparte de la limpieza recomendada no más mantenimiento por parte del usuario Debería ser necesario Cualquier otro servicio debe ser realizado por un representante de servicio autorizado ALMACENAR Desenchufe la unidad deje que se enfríe y límpiela antes de guardarla Guarde el horno eléctrico en su caja en un lugar limpio y seco Nunca almacene el electr...

Страница 11: ...INSTRUCTION MANUAL Electric Oven CHS G 4220 B DIG HOUSEHOLD USE ONLY Please read the manual carefully before use Keep them for further reference ...

Страница 12: ...en in operation Do not store any item on the oven during operation 15 Extreme caution should be exercised when using containers constructed if anything other than metal or glass 16 Do not place any of the following materials in the oven cardboard plastic paper or anything similar 17 Do not store any materials other than manufacturer s recommended accessories in this oven when not in use 18 Always ...

Страница 13: ...nce containing hot oil or other hot liquids 35 Appliances are not intended to be operated by means of an external timer or separate remote control system CAUTION APPLIANCE SURFACES ARE HOT AFTER USE ALWAYS wear protective insulated oven gloves when touching hot oven or hot dishes and food or when inserting or removing rack pans or baking dishes SAVE THESE INSTRUCTIONS Before Using Your Electric Ov...

Страница 14: ... 400g 8 Food Tray Handle For removing rack or tray ROTISSERIE FORK USING TIPS 1 Insert the fork into the rod until near the end of the rod and then secure with thumbscrew 2 Insert the food from the other side of the rod 3 Place second fort into other side of the rod and then secure with thumbscrew Check that the food is in the center of the rod firmly 4 Insert the rod with food into the oven Inser...

Страница 15: ...d 3 TEMP TIME knob The temperature time can be adjusted by this knob After the selected the function turn the knob to set the desired cooking temperature press the knob once switch to the time setting mode turn the knob to set the desired cooking time Pressing the knob repeatedly can switch the temperature and time setting mode repeatedly OPERATION INSTRUCTIONS 1 Operation 6 Place the food to be c...

Страница 16: ...stable while the oven is working To cancel operation push START CANCEL button No pause setting To check or remove food use the handle to help side food in and out 7 When the working cycle is complete the unit will auto stop and emit beeps showing 00 00 in LED display until the user press START CANCEL button Open the door completely and remove the food with handle CAUTION Cooked food metal rack tra...

Страница 17: ...il the user press START CANCEL button Open the door completely and remove the food with handle CAUTION Cooked food metal rod tray and door can be very hot handle with care Do not leave the oven unattended 5 Operation 1 Place the food to be cooked on the Wire Rack food tray Insert the rack tray into the middle support guide of the oven 2 Turn FUNCTION knob to select the 3 Turn TEMP TIME knob to set...

Страница 18: ...ooked on food tray Insert the tray into the middle support guide of the oven 2 Turn FUNCTION knob to select the 3 The baking temperature is default for the function and can t be adjusted User can turn TEMP TIME knob to set desired baking time 4 Press START CANCEL button to start the operation The time count down Note Baking time is adjustable and temperature is nonadjustable while the oven is work...

Страница 19: ...RT CANCEL button No pause setting To check or remove food use the handle to help side food in and out 5 When the working cycle is complete the unit will auto stop and emit beeps showing 00 00 in LED display until the user press START CANCEL button Open the door completely and remove the food with handle CAUTION Cooked food metal rack tray and door can be very hot handle with care Do not leave the ...

Страница 20: ...her than the recommended cleaning no further user maintenance should be necessary Any other servicing should be performed by an authorized service representative TO STORE Unplug unit allow it to cool and clean before storing Store the Electric Oven in its box in a clean dry place Never store appliance while it is hot or still plugged in Never wrap cord tightly around the appliance Do not put any s...

Страница 21: ... caída o cualquier otra causa de fuerza mayor Si el aparato ha sido manipulado por personal no autorizado Las averías producidas o derivadas como consecuencia de un uso inadecuado por defectos de instalación o por introducir modificaciones en el aparato que alteren su funcionamiento Puestas en marcha mantenimiento limpiezas componentes sujetos a desgaste lámparas piezas estéticas oxidaciones plást...

Отзывы: