


Part Number: PIB01054
Page 8 of 18
Revision: A
Revision Date: June 2020
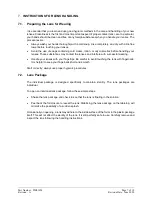
7.3.
Handling the Lenses
•
Develop the habit of always working with the right lens first to avoid mix-ups.
•
Remove the right lens from its storage case and examine it to be sure that it is moist, clean,
clear, and free of any nicks or tears. If the lens appears damaged, do not use it. Use a new
lens.
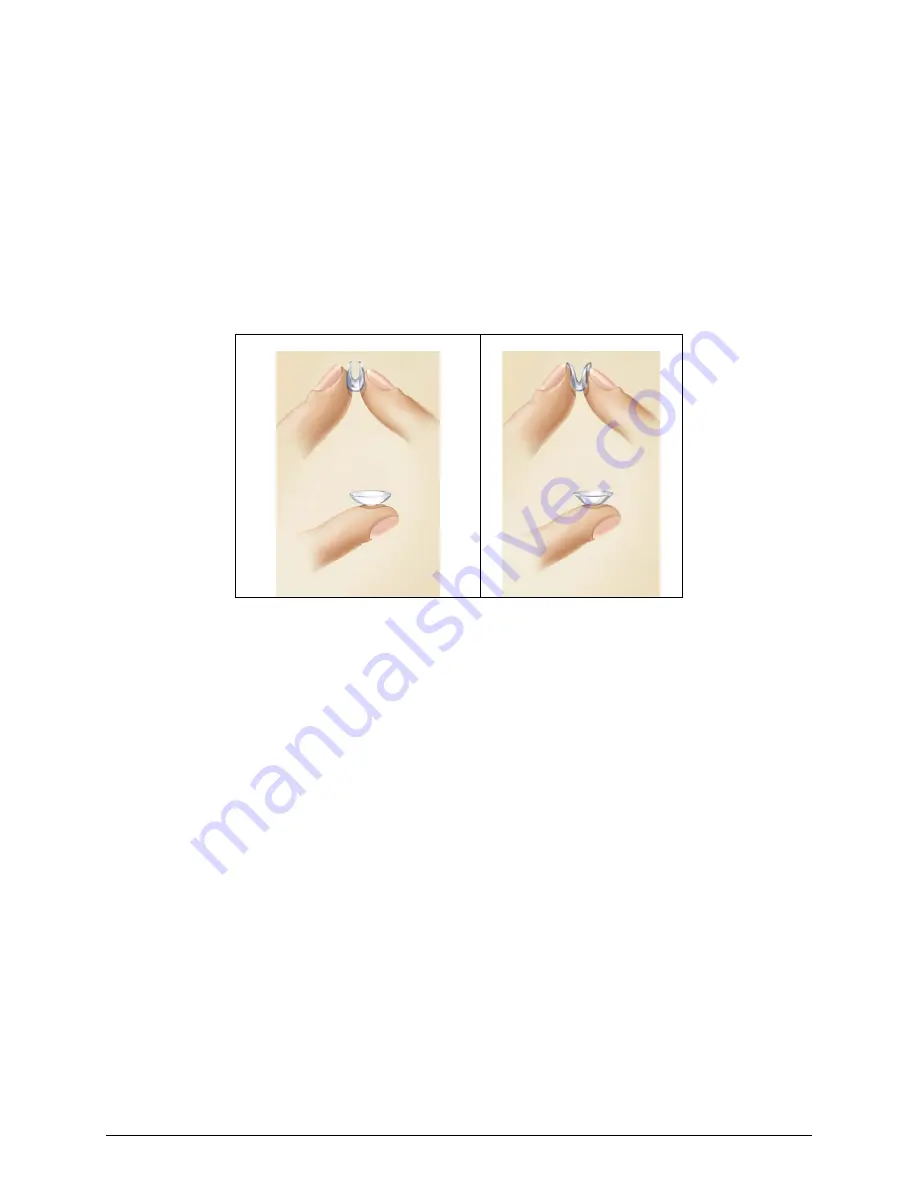
Verify that the lens is not turned inside out by placing it on your forefinger and checking its profile.
The lens should assume a natural, curved, bowl-like shape (Fig. A). If the lens edges tend to point
outward, the lens is inside out (Fig. B).
Another method is to gently squeeze the lens between the thumb and forefinger. The edges should
turn inward (Fig A). If the lens is inside out, the edges will turn slightly outward (Fig. B).
Fig. A
Fig. B
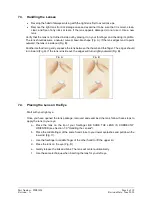
7.4.
Placing the Lens on the Eye
Start with your right eye.
Once you have opened the lens package, removed and examined the lens, follow these steps to
apply the lens to your eye:
a. Place the lens on the tip of your forefinger. BE SURE THE LENS IS CORRECTLY
ORIENTED (see Section 7.3 "Handling the Lenses").
b. Place the middle finger of the same hand close to your lower eyelashes and pull down the
lower lid (Fig. C).
c. Use the forefinger or middle finger of the other hand to lift the upper lid.
d. Place the lens on the eye (Fig. D).
e. Gently release the lids and blink. The lens will center automatically.
f.
Use the same technique when inserting the lens for your left eye.


