7
For Windows® Users:
PC
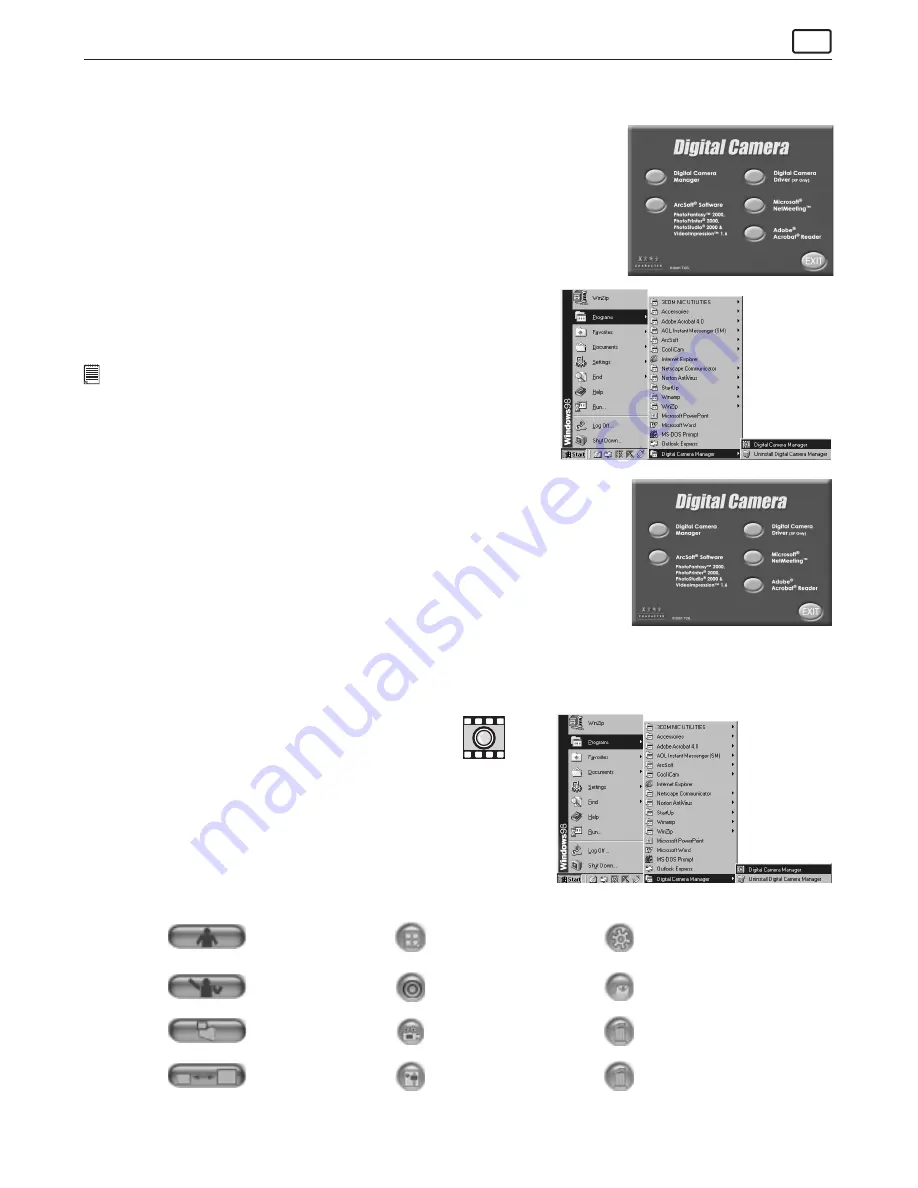
6.2 How to Install Digital Camera Software
Your Digital Camera Manager should be installed rst. After you have installed the Digital Camera Manager and restarted
your PC, attach one end of the USB cable to your Pocket C@m and connect the other end to your PC.
6.2.1 Installing your Digital Camera Manager (For 98SE, Me, 2000 only)
1. Insert the CD-ROM disc into the CD-ROM drive and close the CD ROM drawer.
2. An installation wizard will automatically launch.
3. Click “Digital Camera Manager” icon.
4. Follow the instructions presented on the screen to complete the installation.
5. Microsoft® Windows® will ask you to restart your PC. After you have restarted your
PC, you should connect your
Pocket C@m
via the USB cable, to the USB port on your
PC.
6.2.2 Uninstalling your Digital Camera Manager
To uninstall Digital Camera Manager, click the “Start Menu” on your Windows®
desktop, choose Digital Camera Manager folder under Program and choose
“Uninstall Digital Camera Manager”. Follow the onscreen instructions.
Notes:
If the setup screen doesn’t appear after loading the CD, then you can manually
start it by double-clicking the “My Computer” Icon on your desktop, then double-
clicking the icon for the CD-ROM drive. When the CD-ROM window opens, double-click
the “INSTALL-E.EXE” icon.
6.2.3 How to Install Digital Camera Driver (XP users only)
1. Insert the CD-ROM disc into the CD-ROM drive and close the CD-ROM drawer.
2. An installation wizard will automatically launch.
3. Click on the “Digital Camera Driver (XP only)”.
4. Follow the on-screen prompts.
6.3 Uploading Images from Your
Pocket C@m
You can use the Digital Camera Manager to upload images captured by your
Pocket C@m
at any time whether or not the
Pocket C@m
is full. Connect your
Pocket C@m
to your PC via the USB cable. Plugging the USB connector into the
C@m
will cause it to reset and issue a double beep but all stored images will remain.
Note: For XP Users, use PhotoStudio® 2000 to retrieve your images. Please refer to Section 6.6.
6.3.1 Running the Digital Camera Manager
shortcut icon on
desktop
Digital Camera Manager
• Select the Digital Camera Manager icon from the
Digital Camera Manager program group on the
Windows Start Menu or double-click the Digital
Camera Manager short-cut icon on the desktop.
• The program will ask you to set up default album’s path in your hard disk
when you run this program rst time.
• You can now start to upload your images by following these
steps:
6.3.2 Quick Reference
DSC Mode
(Digital Still Camera)
Capture Still Image(s)
(In DSC Mode)
Live Video Mode
Adjust Resolution
(In Live Video Mode)
Create New Folder
Save Still Image(s)/
Capture snap shot
(In Live Video Mode)
Save Video/
Start or Stop Recording (In
Live Video Mode)
Adjust Color
Delete Album
Send E-mail
Adjust Frame Rate
Delete Image(s)/
Movie Clips(s)


