


4
PC150 Operators Manual
PC150 Calibration Instructions
Many problems associated with incorrect crimp diameters are caused by
incorrect calibration.
The calibration procedure can be accomplished without a hose and fitting assembly.
Step 1:
Lubricate the inside of the compression ring as well as the bottom and
tapered sides of each die segment with the high pressure grease included with each
crimper. An optional aerosol grease is also available (PN900-aerosol lube). As it is
important to lubricate the bottom of each die segment and the tapered sides of the
die fingers, do so each time that the die set is removed from the crimper.
Step 2:
Set the micrometer at “0”. At the “0” setting the crimper should completely
close the dies to the ID of the die set, which is etched on the OD of the die ring.
Step 3:
With the pusher installed and the micrometer set at “0”, depress the
pneumatic start/stop switch bringing the ram and pusher down on top of the
compression ring. Hold the start/stop switch until the pusher has compressed
the die set to its fully closed position or the minimum ID. The bottom of the
micrometer will make contact with the automatic stop switch and will shut off the
electric pump approximately 1 second after the die set has reached its fully closed
position. If the die set does not reach a fully closed position or the pump runs for
significantly longer than 1 second after the die set is fully closed, the crimper must
be recalibrated. Proceed to Step 4.
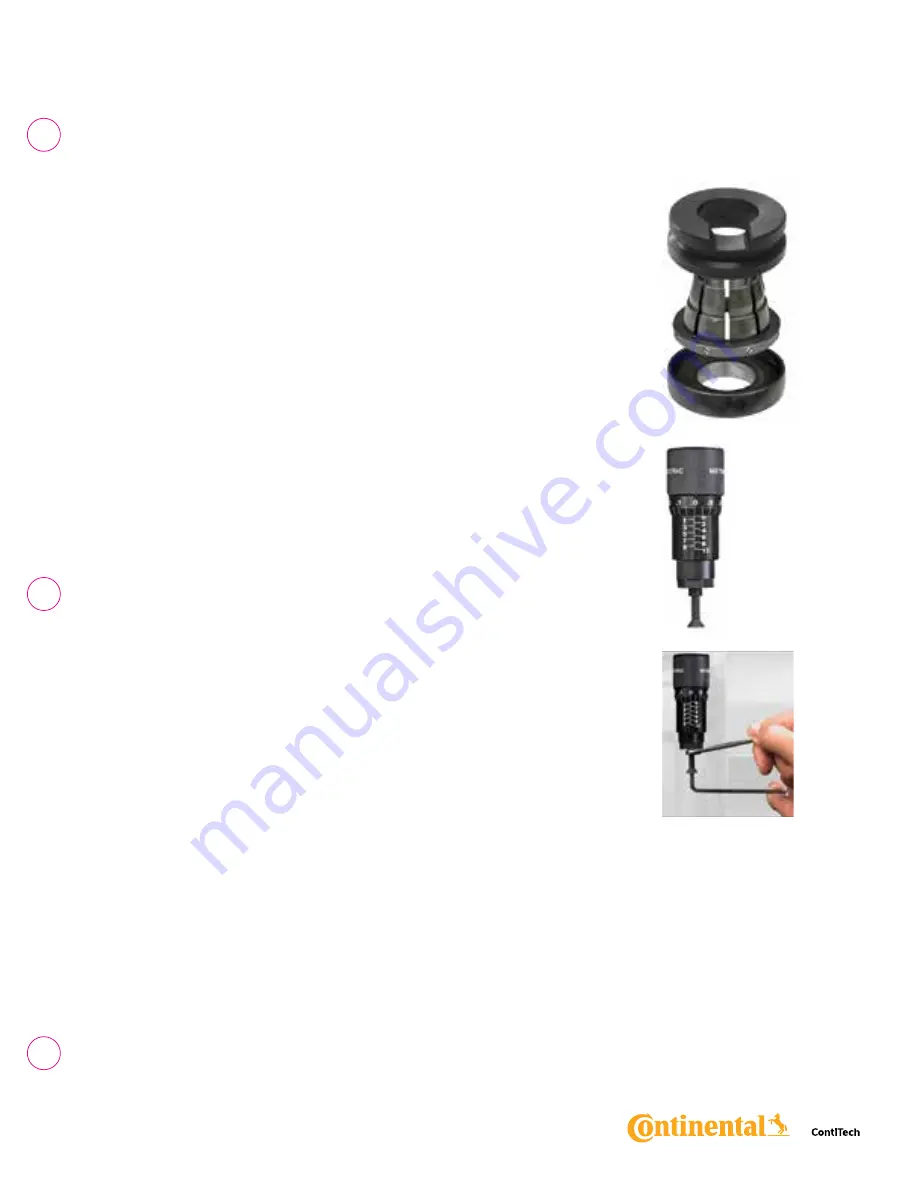
Refer to Page 2 images of the PC150 for the location of the pusher, micrometer,
start/stop switch, automatic stop switch and calibration adjustment screw.
Step 4:
If recalibration is necessary, hold the bottom of the micrometer with a 5/16”
open end wrench and adjust the calibration screw with a 5/32 hex key wrench.
Turn the adjusting screw either in or out as necessary to adjust the contact with the
automatic stop switch to allow full closure of the die set and pump shut off within the
recommended time frame. Turning the adjusting screw out will shut the pump off
sooner, and turning the screw in will let the pump run longer and allow the die set
to close further. Note that each complete turn of the calibration screw will affect the
finished crimp diameter by approximately 0.5mm. After adjustment, lock the jam nut
and repeat Step 3 to check calibration.
When the above conditions are met, the crimper is properly calibrated and ready
for use.
Содержание ContiTech Perma-Crimp PC150-1
Страница 13: ...12 PC150 Operators Manual Notes ...
Страница 14: ...PC150 Operators Manual 13 Notes ...
Страница 15: ......