background image

English

   - 34 -

Features

Remote controlled colour LCD TV.

• 

Fully integrated Terrestrial digital TV (DVB-T - MPEG2-

• 

MPEG4) 
HDMI connectors for digital video and audio. This 

• 

connection is also designed to accept high definition 

signals.
USB input.

• 

1000 programmes (adigital).

• 

OSD menu system.

• 

Integrated tuner MPEG2, MPEG4 compatible.

• 

Scart socket for external devices (such as video, 

• 

video games, audio set, etc.).
Stereo sound system. (Nicam)

• 

Teletext, fastext, TOP text.

• 

Headphone connection.

• 

Automatic programming system.

• 

Forward or backward manual tuning.

• 

Sleep timer / Child lock.

• 

Automatic sound mute when no transmission.

• 

NTSC playback. 

• 

AVL (Automatic Volume Limiting).

• 

Auto power down.

• 

PLL (Frequency Search).

• 

PC input. 

• 

Plug&Play for Windows 98, ME, 2000, XP, Vista, 

• 

Windos 7.
Game Mode 

• 

Introduction

Please  read  the  corresponding  instructions  of  this 

handbook prior to the first usage of the device, even 

when  the  usage  of  electronic  devices  is  familiar 

to  you.  Notice  especially  the  chapter  SAFETY 

PRECAUTIONS.  Carefully  keep  the  handbook  as 

future reference. When selling the device or giving it 

away, absolutely give these direction for use.
Thank you for choosing this product. This manual will 

guide  you for the proper operation of your TV. 

Before  operating  the  TV,  please  read  this 

manual  thoroughly.  Please  do  keep  this 

manual in a safe place for future references.
This device is intended to receive and display TV
programs. The different connection options make
an additional expansion of the reception and display
sources  possible  (receiver,  DVD  player,  DVD 

recorder,
VCR,  PC  etc.). This  device  is  only  suitable  for  the 

operation in dry interiors. This appliance is intended 

solely for private domestic use and may not be used 

for industrial and commercial purposes. We exclude 

liability  in  principle,  if  the  device  is  not  used  as 

intended, or unauthorized modifications have been 

made. To operate your LCD TV in extreme ambient 

conditions may cause the damage of the device.

Preparation

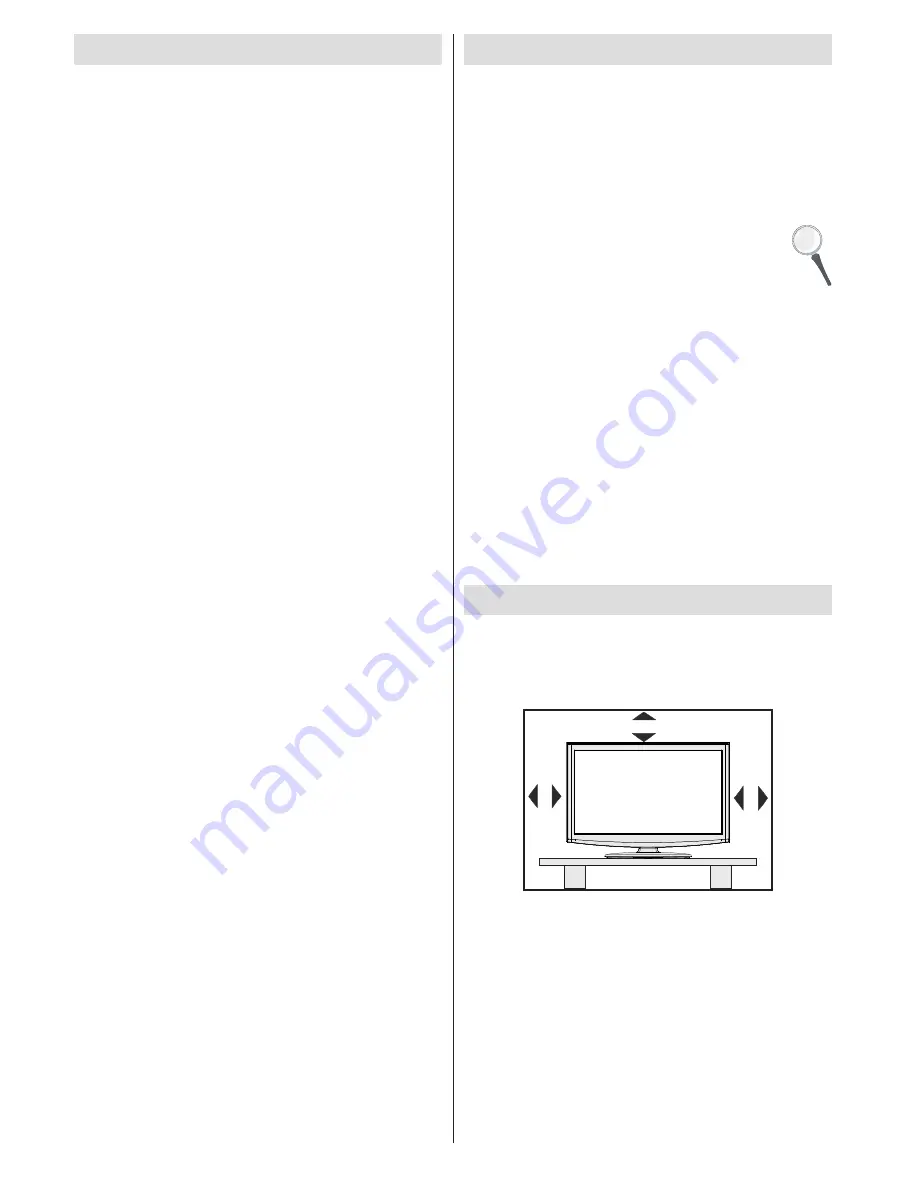
For ventilation, leave a free space of at least 10 cm 

all around the set. To prevent any fault and unsafe 

situations, please do not place any objects on top of 

the set. Use this device in moderate climates.

10  cm

10

 cm

10

 c

m

Содержание 22HD3

Страница 1: ...LOI MANUAL DE INSTRUCCIONES BEDIENUNGSANLEITUNG OPERATING INSTRUCTIONS Lisez toutes les instructions avant d utiliser ce téléviseur et conservez le manuel d utilisation dans un lieu sûr pour pouvoir vous y référer ultérieurement ...

Страница 2: ...gique 15 Première installation 15 Effacer la liste des chaînes 15 Gestion des chaînes Liste des chaînes 16 Fonctionnement de la liste des chaînes 16 Déplacer une chaîne 16 Supprimer une chaîne 16 Renommer une chaîne 16 Verrouiller une chaîne 16 Gestion des chaînes Favoris 17 Fonctions des boutons 17 Gestion des chaînes Trier une liste de chaînes 17 Information à l écran 17 Lecture de medias via na...

Страница 3: ...xion offrent une possibilité supplémentaire pour la réception et l affichage des sources disponibles récepteur lecteur de DVD enregistreur de DVD magnétoscope PC etc Le fonctionnement de cet appareil doit se faire uniquement à l abri de l humidité Il a été fabriqué exclusivement pour être utilisé à titre privé et ne peut par conséquent être utilisé ni à titre commercial ni à titre industriel Toute...

Страница 4: ...ualifié Ne retirez pas le couvercle vous même car ceci peut entraîner une décharge électrique Mise au rebut Instructions pour la mise au rebut L emballage et les éléments qui aident dans l emballage sont recyclables et doivent être recyclés Les matériaux d emballage comme le sac en feuille d aluminium doivent être tenus hors de portée des enfants Les piles même celles ne contenant pas de métal lou...

Страница 5: ...if fournissant l isolation électrique inférieure à une certaine plage de fréquence isolateur galvanique voir EN 60728 11 Le bouton Marche Arrêt ne sépare pas complètement cet appareil du secteur De plus l appareil continue de consommer de l électricité en mode veille Pour couper complètement l alimentation de l appareil du secteur débranchez sa fiche de la prise secteur Pour cette raison l apparei...

Страница 6: ...téléviseur hors tension ou le débrancher de la prise secteur lorsqu il n est pas en marche Cette précaution réduira également la consommation d énergie Débranchez le complètement au moment de vous y éloigner pendant une durée prolongée Remarquez qu en un an l utilisation du téléviseur en mode d économie d énergie est moins économique que son débranchement de la prise secteur contrairement au mode ...

Страница 7: ...que de programme dans les 17 chaînes DVB Programme précédent Programme suivant 18 dans les chaînes DVB Minuteur de mise en veille 19 Sélection du mode image Change le mode 20 Image en mode vidéo du Navigateur média Ok Confirmer Retenir en mode TXT 21 Modifier la liste des chaînes Curseur Bas 22 Quitter Retour Page d index en mode TXT 23 Touche curseur vers la droite Souspage en 24 mode TXT Curseur...

Страница 8: ... réservées à un périphérique doté d une prise HDMI Votre téléviseur LCD peut afficher des images haute définition à partir de périphériques tels qu un récepteur de satellite haute définition ou un lecteur de DVD Ces périphériques doivent être connectés via les prises HDMI ou les prises en composantes Ces prises peuvent accepter les signaux 720p ou 1080p Aucun branchement audio n est nécessaire pou...

Страница 9: ...ement latéral audio vidéo sert à connecter les signaux vidéo et audio de périphériques externes Pour effectuer une connexion vidéo vous devez utiliser le câble de branchement AV fourni pour activer la connexion Pour commencer branchez la seule fiche du câble à la prise AV située sur le côté de l appareil Ensuite insérez le connecteur de votre câble vidéo non fourni dans l entrée JAUNE située sur l...

Страница 10: ...hez vos périphériques USB à l entrée USB du téléviseur Vous pouvez brancher un périphérique USB à votre téléviseur à l aide de l entrée USB du téléviseur Remarque Il est possible que certains types de lecteurs de disque dur ne soient pas pris en charge Connexion du téléviseur LCD à un PC Afin d afficher l image de l écran de votre ordinateur sur votre téléviseur LCD vous pouvez connecter votre ord...

Страница 11: ...ez également brancher à travers le PERITEL HDMI 1 SPDIF Coax OUT Le périphérique externe Remarque Ces trois procédés de branchement réalisent la même fonction mais à des niveaux de qualité différents Il n est pas nécessaire d effectuer la connexion en recourant à toutes les trois méthodes Caméra Câble de connexion AV fourni Câble AV non fourni Casque SIDE AV Pour écouter le son en provenance du té...

Страница 12: ...ur éteindre complètement le téléviseur débranchez le cordon d alimentation de la prise secteur Remarque Lorsque le téléviseur est en mode veille le voyant lumineux du mode veille clignote pour signifier que des options comme Recherche en mode veille téléchargement automatique ou Minuterie sont actives Sélection d entrée Après avoir branché les systèmes externes à votre téléviseur vous pouvez passe...

Страница 13: ... numériques Lorsque la durée d appui est expirée pour le deuxième numéro seul le premier programme numérique s affichera Appuyez directement sur le numéro de programme pour sélectionner à nouveau les programmes à un chiffre Affichage du guide électronique de programmes EPG Vous pouvez afficher le guide de programme électronique EPG pour lire les informations concernant les programmes disponibles P...

Страница 14: ...nre sélectionné Les informations disponibles dans le guide des programmes seront recherchées et les résultats correspondants à vos critères seront listés Maintenant Affiche le programme en cours Première installation IMPORTANT Assurez vous que l antenne est branchée avant d allumer le téléviseur pour la première fois Pendant la première installation de votre téléviseur un assistant d installation ...

Страница 15: ...ur afficher l écran de menu suivant Sélectionnez l option Balayage de chaînes automatique en appuyant sur la touche et sur OK Les options de recherche automatique de chaînes s afficheront Vous pouvez sélectionner l option Antenne numérique Antenne analogique ou Antenne numérique analogique en appuyant sur les touches et OK Fonctionnement du menu Recherche automatique de chaînes Numérique Recherche...

Страница 16: ...aintenant appuyer sur le bouton OK pour commencer la recherche Une fois le multiplex repéré toute nouvelle chaîne ne figurant pas sur la liste sera mémorisée Réglage fin analogique Sélectionnez l option Réglage fin analogique à partir du menu d installation à l aide des boutons ou et OK L écran de réglage fin s affichera La fonction de réglage fin analogique ne sera pas disponible en cas d absence...

Страница 17: ... est à présent déplacée Supprimer une chaîne Vous pouvez appuyer sur le bouton VERT pour sélectionner désélectionner toutes les chaînes appuyer sur le bouton JAUNE pour sélectionner désélectionner une seule chaîne Sélectionnez la chaîne à supprimer et sélectionnez l option Supprimer Appuyez sur la touche OK pour continuer Un écran d avertissement apparaîtra Sélectionnez OUI pour supprimer ou NON p...

Страница 18: ...ffusion à partir de la liste en utilisant les boutons et OK Information à l écran Vous pouvez appuyer sur le bouton INFO pour afficher les informations à l écran Les détails de la station et du programme en cours seront affichés dans le bandeau d informations Le bandeau d informations donne des informations sur la chaîne sélectionnée ainsi que sur les programmes de cette dernière Le nom de la chaî...

Страница 19: ...résentés à l écran Sauter Touches numériques saute le fichier sélectionné en utilisant les touches numériques OK affiche l image sélectionnée en plein écran Diaporama touche verte Démarre le diaporama en utilisant toutes les images Boucle Lecture aléatoire touche Bleue Appuyez une fois pour activer l option Boucle Appuyez à nouveau pour activer les options Boucle et Aléatoire Appuyez une nouvelle ...

Страница 20: ...porama Afficher le sous titre Règle la préférence d activation du sous titre Langue de sous titrage Règle la langue de sous titre prise en charge Position du sous titre Définit la position du sous titre en tant que haut ou bas Taille de police du sous titre Définit la taille de police du sous titre max 54pt Changement de la taille d une image Formats d image Les programmes peuvent être regardés da...

Страница 21: ...eure de l image sont légèrement coupées Cinéma Ce mode agrandit l image format d image 16 9 pour en faire un plein écran Configuration des réglages d image Vous pouvez utiliser différentes configurations de paramètres d image dans les détails Appuyez sur la touche MENU et sélectionnez l icône Image grâce à la touche ou Appuyez sur OK pour afficher le menu Paramètres d image Fonctionnement des élém...

Страница 22: ... PC Réglages de l image du PC Pour ajuster les éléments de l image du PC procédez comme suit Appuyezsurlatouche ou poursélectionnerl icône Image Le menu image apparaît à l écran Les paramètres de Contraste Luminosité Couleur Temp Couleur et Image Zoom contenus dans ce menu sont identiques aux réglages définis dans le menu Image TV sous Système de menu principal LesparamètresSon RéglagesetSourceson...

Страница 23: ...ple le niveau de volume des publicités tend à être plus élevé que celui des programmes Basse dynamique La basse dynamique est utilisée pour augmenter l effet de la basse du téléviseur Sortie Digitale Règle le type de sortie audio numérique Configuration des paramètres de votre téléviseur Les paramètres détaillés peuvent être configurés en fonction de vos préférences personnelles Appuyez sur la tou...

Страница 24: ...le bouton MENU et sélectionnez la deuxième icône en utilisant le bouton ou Appuyez sur OK pour afficher le menu Paramètres Utilisez le bouton ou pour sélectionner Accès Conditionnel et appuyez sur OK pour afficher les éléments du menu Configuration des préférences linguistiques Vous pouvez faire fonctionner les paramètres linguistiques du téléviseur grâce à ce menu Appuyez sur le bouton MENU et sé...

Страница 25: ...ctionnement du menu Réglage parental Sélectionnez une rubrique en utilisant le bouton ou Utilisez le bouton ou pour sélectionner une rubrique Appuyez sur la touche OK pour afficher plus options Verrouillage Menu L option Verrouillage Menu active ou désactive l accès au menu Vous pouvez désactiver l accès au menu d installation ou tout le système de menu Verrouillage Maturité en option Après instal...

Страница 26: ...bdomadaire Utilisez le bouton ou pour sélectionner une option Appuyez sur le bouton VERT pour mémoriser la minuterie Appuyez sur la touche ROUGE pour annuler Changement Effacer Règle les paramètres parentaux sur les minuteries Modification d une minuterie Sélectionnez la minuterie à modifier en appuyant sur le bouton ou Appuyez sur la touche VERTE L écran Modifier minuterie s affichera Une fois la...

Страница 27: ... ou pour sélectionner une option Appuyez sur OK pour afficher un sous menu Temporisation du menu Change la durée de temporisation des écrans de menu Balayage des chaînes cryptées Lorsque ce paramètre est activé le processus de recherche localisera également les chaînes cryptées Si le réglage est paramétré sur Désactivé les chaînes cryptées ne seront pas localisées en recherche automatique ou manue...

Страница 28: ...ion Utilisez les touches ou pour sélectionner Recherche en mode de veille et appuyez sur le bouton ou pour activer ou désactiver Si vous passez de l option Recherche en mode de veille à l option Arrêt cette fonction ne sera pas disponible Pour utiliser la recherche en mode de Veille veuillez vous assurer de l activer Si l option Recherche en mode de veille est définie sur Activé lorsque le télévis...

Страница 29: ...s images fantômes peuvent s afficher en même temps qu une image persistante La persistance de l image du téléviseur LCD peut disparaître après quelque temps Essayez d éteindre le téléviseur pendant un moment Pour éviter qu une telle situation ne se produise ne laissez pas l écran en image fixe pendant longtemps Pas d alimentation Si votre téléviseur n est pas alimenté veuillez vérifier le câble d ...

Страница 30: ...768 60 Hz 11 1280x1024 60 Hz 12 1360x768 60 Hz Annexe B Compatibilité des signaux AV et HDMI types de signal d entrée Source Signaux pris en charge Disponible EXT SCART PAL 50 60 O NTSC 60 O RGB 50 O RGB 60 O AV latéral PAL 50 60 O NTSC 60 O YPbPr 480I 60Hz O 480P 60Hz O 576I 50Hz O 576P 50Hz O 720P 50Hz O 720P 60Hz O 1080I 50Hz O 1080I 60Hz O 1080P 50Hz O 1080P 60Hz O HDMI1 480I 60Hz O 480P 60Hz ...

Страница 31: ...chier Format Remarques Vidéo Audio Résolution maximale Débit binaire etc Lecture mpg dat vob mkv rmvb ts trp tp MPEG1 MPEG Layer 1 2 3 20Mbit sec MPEG2 MPEG2 XviD 3ivx PCM MP3 Version XviD jusqu à 1 1 2 Mpeg2 TS H264 TS EAC3 AC3 20Mbit sec RMVB IMA LBR 10Mbit sec MPEG4 PCM MP3 avi MS ISO MPEG4 PCM MP3 Prend en charge SP et ASP MJPEG PCM 30fps VGA Musique m4a Fréquence de test 8K 48KHz Bit Rate 24k...

Страница 32: ...démarrage 2 Recherche à 3 00 H et mode de mise à jour Si l option Recherche automatique du menu Options de mise à jour est active le téléviseur se met automatiquement en marche à 3 heures du matin et lance la recherche de chaînes de diffusion pour la mise à jour du nouveau logiciel Si un nouveau logiciel est trouvé et téléchargé avec succès le téléviseur commence à fonctionner avec la nouvelle ver...

Страница 33: ...UE W 40 W max 1 W Veille PANNEAU Écran 16 9 Taille de l écran 22 DIMENSIONS mm PxLxH Avec pied 117 x532 x375 Poids en Kg 4 35 PxLxH Sans pied 34 x532x 347 Poids en Kg 4 10 Réception numérique APPAREIL MHEG 5 conforme à l ISO IEC 13522 5 UK engine Profile 1 Pour le RU Support conforme à l ISO IEC 135818 6 et au profil UK DTT Gamme de fréquence 474 850 MHz pour les modèles du RU 170 862 MHz pour les...

Страница 34: ...ar Service List 47 Managing Stations Channel List 47 Operating the Channel List 47 Moving a Channel 47 Deleting a Channel 47 Renaming a Channel 47 Locking a Channel 48 Managing Stations Favourites 48 Button Functions 48 Managing Stations Sorting Channel List 48 On Screen Information 48 Media Playback Using Media Browser 49 Viewing Photos via USB 49 Media Browser Settings 50 Changing Image Size Pic...

Страница 35: ...efully keep the handbook as future reference When selling the device or giving it away absolutely give these direction for use Thank you for choosing this product This manual will guide you for the proper operation of your TV Before operating the TV please read this manual thoroughly Please do keep this manual in a safe place for future references This device is intended to receive and display TV ...

Страница 36: ...n electric heater Ensure that no open flame sources such as lighted candles are placed on top of the TV Batteries should not be exposed to excessive heat such as sunshine fire or the like Lightning In case of storm and lightning or when going on holiday disconnect the power cord from the wall outlet Replacement Parts When replacement parts are required make sure that the service technician has use...

Страница 37: ...ided through a device providing electrical isolation below a certain frequency range galvanic isolator see EN 60728 11 The Standby Off On button doesn t separate this device completely from mains Moreover the device consumes power in the standby operation In order to separate the device completely from mains the mains plug has to be pulled from the mains socket Because of that the device should be...

Страница 38: ... in Power Save Mode When the TV is not in use please switch off or disconnect the TV from the mains plug This will also reduce energy consumption Disconnect power when going away for longer time Note that annually using the TV set in Power Save Mode has more power efficiency than disconnecting the TV from the mains plug instead of keeping stand by mode Therefore disconnect the TV from the mains pl...

Страница 39: ...ronic programme guide in DVB channels 17 Programme Up Page down in DVB channels 18 Sleep Timer 19 Picture mode selecion Changes picture mode 20 in Media Browser video mode Okay Confirm Hold in TXT mode Edit 21 Channel List Cursor Down 22 Exit Return Index page in TXT mode 23 Cursor Right Subpage in TXT mode 24 Cursor Up 25 Previous programme 26 Yellow button Pause in Media Browser 27 Timeline Sche...

Страница 40: ...I sockets or Component Socket These sockets can accept either 720p or 1080p signals No sound connection is needed for an HDMI to HDMI connection RF Input 2 connects to an aerial antenna system Note that if you use a decoder or a media recorder you should connect the aerial cable through the device to the television with an appropriate antenna cable as shown in the illustration in the following pag...

Страница 41: ...First plug singular jack of the cable to the TV s Side AV socket Afterwards insert your video cable s not supplied connector into the YELLOW input located on the plural side of the supplied AV connection cable Colours of the connected jacks should match To enable audio connection you must use RED and WHITE inputs of the side AV connection cable Afterwards insert your device s audio cable s connect...

Страница 42: ...nect a usb device to your TV by using the USB input of the TV Note It is possible certain types of hard disk drives are not supported Connecting the LCD TV to a PC For displaying your computer s screen image on your LCD TV you can connect your computer to the TV set Power off both computer and display before making any connections Use 15 pin D sub display cable to connect a PC to the LCD TV When t...

Страница 43: ...has an HDMI socket you can connect via HDMI for better video and audio quality HDMI 1 SPDIF Coax OUT External device not supplied HDMI Cable When you connect to DVD player as illustrated above switch to the connected HDMI source See Input Selection section for more information on changing sources Connecting to a DVD Player via Component Sockets YPbPr or Scart Cable Some DVD players are connected t...

Страница 44: ...s on the TV Main menu OSD cannot be displayed via control buttons buttons will function as volume up down as default Even if you set other functions for these buttons buttons will perform as default after a short while Volume Setting Press P V AV button once and then use buttons to increase or decrease volume so a volume level scale slider will be displayed on the screen While Tv is on button can ...

Страница 45: ...es of the next time slice Yellow button Prev Day Displays the programmes of previous day Blue button Next day Displays the programmes of the next day Numeric buttons Jump Jumps to the preferred channel directly via numeric buttons OK Options Displays programme options including Select Channel option Text button Filter Views filtering options INFO Details Displays the programmes in detail Red butto...

Страница 46: ...ssing or button select the country you want to set and press button to highlight Teletext Language option Use or button to select desired Teletext Language Press button after setting Teletext Language option Scan Encrypted will be then highlighted You can set Scan Encrypted as Yes if you want to scan coded stations Afterwards select the desired Teletext Language Press OK button on the remote contr...

Страница 47: ...s feature can be used for direct broadcast entry Select Manual Channel Scan from the Installation menu by using and OK buttons Manual Scan options screen will be displayed Select the desired Search Type using or button Manual search options will change accordingly Use button to highlight an item and then press or button to set an option You can press MENU button to cancel Digital Manual Search In ...

Страница 48: ...ct Edit Channel List Operating the Channel List Press or button to select the channel that will be processed Press or button to select a function on Channel List menu Use P P buttons to move page up or down Press BLUE button to view filtering options Press MENU button to exit Moving a Channel First select the desired channel Select Move option in the channel list and press OK button Edit Number sc...

Страница 49: ...n YELLOW Tag untag a channel GREEN Tag untag all channels BLUE Displays filtering options Managing Stations Sorting Channel List You can select broadcasts to be listed in the channel list To display specific types of broadcast you should use Active channel list setting Select Active channel list from the Channel list menu by using or button Press OK button to continue You can select a broadcast ty...

Страница 50: ...ile The following menu will be displayed while playing a video file Play RED button Starts the video playback Stop BLUE button Stops the video playback Pause OK button Pause the video playback Rewind button Goes backward Forward button Goes forward Subtitle Audio LANG button Sets subtitle Audio Yellow Opens subtitle time correction menu Press RETURN button to switch back to previous menu Viewing P...

Страница 51: ...abled functions with the change of the icons Media Browser Settings You can set your Media Browser preferences by using the Settings dialog Press or button to highlight an item and use or button to set View Style Sets default browsing mode Slide Show Interval Sets slide show interval time Show Subtitle Sets subtitle enabling preference Subtitle Language Sets supported subtitle language Subtitle Po...

Страница 52: ...ed as panaromic 14 9 Zoom Cinema or Subtitle 14 9 This zooms up the wide picture 14 9 aspect ratio to the upper and lower limits of the screen 14 9 Zoom This option zooms to the 14 9 picture 4 3 Use to view a normal picture 4 3 aspect ratio as this is its original size Panoramic This stretches the left and right sides of a normal picture 4 3 aspect ratio to fill the screen without making the pictu...

Страница 53: ...be loaded Note When Game Mode is on some items in the Picture Settings menu will be unavailable to be set Picture Zoom Sets the picture size to Auto 16 9 Subtitle 14 9 14 9 Zoom 4 3 Panoramic or Cinema Reset Resets the picture settings to factory default settings While in VGA PC mode some items in Picture menu will be unavailable Instead VGA mode settings will be added to the Picture Settings whil...

Страница 54: ...one volume AVL Automatic Volume Limiting AVL function sets the sound to obtain fixed output level between programmes For instance volume level of advertisements tend to be louder than programmes Dynamic Bass Dynamic Bass is used to increase bass effect of the TV set Digital Out Sets digital out audio type Configuring Your TV s Settings Detailed settings can be configured to suit your personal pref...

Страница 55: ...hange depending on the service provider Press MENU button and select the icon by using or button Press OK button to view Settings menu Use or button to highlight Conditional Access and press OK to view menu items Configuring Language Preferences You can operate the TV s language settings using this menu Press MENU button and select the fifth icon by using or button Press OK button to view Settings...

Страница 56: ...d press OK to continue To display parental lock menu options PIN number should be entered Factory default PIN number is 4725 After coding the correct PIN number parental settings menu will be displayed Parental Settings Menu Operation Select an item by using or button Use or button to set an item Press OK button to view more options Menu Lock Menu lock setting enables or disables the menu access Y...

Страница 57: ... an ending time using the numeric buttons Duration Displays duration between the starting and ending time Repeat Sets a timer to be repeated as Once Daily or Weekly Use or buttons to select an option Press GREEN button to save the timer Press RED button to cancel Change Delete Controls parental settings on timers Editing a Timer Select the timer you want to edit by pressing or button Press GREEN b...

Страница 58: ... Timeout Changes timeout duration for menu screens Scan Encrypted When this setting is on search process will locate the encrypted channels as well If it is set as Off encrypted channels will not be located in automatic search or manual search Backlight optional This setting controls the backlight level and it can be set to Auto Maximum Minimum Medium and Eco Mode optional Power Save Mode Use or b...

Страница 59: ...setting as On or Off If you change Standby Search to Off this function will be unavailable To use Standby search please make sure that you select Standby Search as On If the Standby Search is set to On when the TV is in standby mode available broadcasts will be searched If the TV locates any new or missing broadcasts a menu screen will be displayed asking you whether or not to execute these change...

Страница 60: ...e Please note that ghosting may occur while displaying a persistent image LCD TVs image persistence may disappear after a short time Try turning off the TV for a while To avoid this do not leave the screen in still picture for extended periods No Power If your TV system has no power please check the main power cable and connection to the mains socket outlet Poor Picture Have you selected the corre...

Страница 61: ...12 1360x768 60 Hz Appendix B AV and HDMI Signal Compatibility Input Signal Types Source Supported Signals Available EXT SCART PAL 50 60 O NTSC 60 O RGB 50 O RGB 60 O Side AV PAL 50 60 O NTSC 60 O YPbPr 480I 60Hz O 480P 60Hz O 576I 50Hz O 576P 50Hz O 720P 50Hz O 720P 60Hz O 1080I 50Hz O 1080I 60Hz O 1080P 50Hz O 1080P 60Hz O HDMI1 480I 60Hz O 480P 60Hz O 576I 50Hz O 576P 50Hz O 720P 50Hz O 720P 60H...

Страница 62: ...File Extension Format Remarks Video Audio Maximum resolution Bit rate etc Movie mpg dat vob mkv rmvb ts trp tp MPEG1 MPEG Layer 1 2 3 20Mbit sec MPEG2 MPEG2 XviD 3ivx PCM MP3 XviD Verson up to 1 1 2 Mpeg2 TS H264 TS EAC3 AC3 20Mbit sec RMVB IMA LBR 10Mbit sec MPEG4 PCM MP3 avi MS ISO MPEG4 PCM MP3 Support SP and ASP MJPEG PCM 30fps VGA Music m4a Sample Rate 8K 48KHz Bit Rate 24kbps 384Kbps mp3 MPE...

Страница 63: ...continue with the reboot operation 2 3 AM search and upgrade mode If Automatic scanning in Upgrade Options menu is enabled TV wakes up at 03 00 and searches broadcast channels for new software upgrade If new software is found and downloaded successfully with next power up TV opens with new software version Note on reboot operation Reboot is the last step in software upgrade operation if download o...

Страница 64: ... max 1 W Standby PANEL 16 9 display 22 Screen Size DIMENSIONS mm DxLxH With foot 117 x 532 x 375 Weight Kg 4 35 DxLxH Without foot 34 x 532 x 347 Weight Kg 4 10 Digital Reception MHEG 5 ENGINE compliant with ISO IEC 13522 5 UK engine Profile 1 for UK Object carousel support compliant with ISO IEC 135818 6 and UK DTT profile Frequency range 474 850 MHz for UK models 170 862 MHz for EU models Transm...

Страница 65: ...e Feineinstellung 78 Erstinstallation 78 Sender verwalten Kanalliste 78 Steuern der Kanalliste 78 Kanäle verschieben 78 Kanäle löschen 78 Kanäle umbenennen 79 Kanäle sperren 79 Sender verwalten Favoriten 79 Tastenfunktionen 79 Sender verwalten Kanalliste sortieren 79 OSD Informationen 80 Medien Wiedergabe durch Benutzen des Medienbrowsers 80 Anzeigen von Fotos über USB 80 Medienbrowser Einstellung...

Страница 66: ... für den Betrieb in trockenen Innenräumen geeignet Das Gerät dient ausschließlich für den privaten Gebrauch und darf nicht für industrielle oder gewerbliche Zwecke verwendet werden Wir lehnen prinzipiell jegliche Haftung ab wenn das Gerät nicht bestimmungsgemäß verwendet wird oder unerlaubte Änderungen daran vorgenommen wurden Ein Betrieb des LCT TV Geräts unter extremen Umgebungsbedingungen kann ...

Страница 67: ... Gefahren verursachen Servicearbeiten Ü b e r l a s s e n S i e a l l e Wartungsarbeiten dem qualifizierten Kundendienstpersonal Öffnen Sie das Gehäuse nicht selbst da dies einen elektrischen Schlag nach sich ziehen kann Entsorgung Hinweise zur Entsorgung Verpackung und Verpackungshilfen sind recyclebar und sollten grundsätzlich wiederverwertet werden Verpackungsmaterial wie z B Plastiktüten darf ...

Страница 68: ...t vollständig vom Netz getrennt werden Außerdem verbraucht das Gerät auch im Standby Betrieb Strom Um das Gerät vollständig vom Netz zu trennen muss der Netzstecker aus der Steckdose gezogen werden Aus diesem Grund muss das Gerät so aufgestellt werden dass der ungehinderte Zugang zur Steckdose garantiert ist damit im Notfall der Netzstecker sofort gezogen werden kann Um Brandgefahr auszuschließen ...

Страница 69: ...ie es bitte ab oder trennen Sie es vom Netzstecker Dadurch wird der Energieverbrauch reduziert Trennen Sie das Gerät vom Netz wenn Sie für längere Zeit Ihr Heim verlassen Beachten Sie dass über das Jahr betrachtet der Energiesparmodus ein größeres Einsparungspotential bietet als wenn Sie das TV Gerät statt in den Standby Modus zu schalten vom Netz trennen Daher empfehlen wir den Energiesparmodus z...

Страница 70: ...mmführer bei DVB 17 Kanälen Programm zurück Seite weiter bei DVB 18 Kanälen Ausschalttimer 19 Auswahl Bildmodus Ändert den Bildmodus im 20 Medienbrowser Videomodus OK Bestätigen Halten im TXT Modus 21 Kanalliste bearbeiten Cursor nach unten 22 Return Verlassen Indexseite im TXT Modus 23 Cursor Links Subseiten im TXT modus 24 Cursor nach oben 25 Vorheriges Programm 26 Taste Gelb Pause im Medienbrow...

Страница 71: ...luss eines Geräts mit einer HDMI Buchse Ihr LCD TV Gerät kann High Definition Bilder von Geräten wie High Definition Satellitenreceivern oder DVD Playern anzeigen Diese Geräte müssen über die HDMI Buchse oder die Component Buchsen angeschlossen werden Diese Anschlüsse können 720p oder 1080p Signale empfangen Für einen Anschluss von HDMI zu HDMI ist keine Audioverbindung erforderlich RF Eingang 2 f...

Страница 72: ...sten 3 Die 4 seitlichen Audio und Videoeingänge werden zum Anschließen der Audio und Videosignale von Zusatzgeräten verwendet Um die Videoverbindung herzustellen müssen Sie das mitgelieferte AV Anschlusskabel verwenden Stecken Sie zuerst den Einzelstecker des Kabels an den seitlichen AV Anschluss des Fernsehgeräts an Stecken Sie dann den Anschluss des Videokabels nicht mitgeliefert in den GELBEN E...

Страница 73: ...Gerät in den USB Eingang am TV Gerät ein Sie können über den USB Eingang am TV Gerät USB Geräte an das TV Gerät anschließen Hinweis Unter Umständen werden bestimmte Arten von Festplattenlaufwerken nicht unterstützt Anschließen des LCD TVs an einen PC Zur Anzeige des Computerbilds auf Ihrem LCD TV können Sie dieses an einen Computer anschließen Schalten Sie Computer und Display aus bevor Sie die An...

Страница 74: ...hlüsse vornehmen Hinweis Beachten Sie dass nicht alle in derAbbildung gezeigten Kabel im Lieferumfang enthalten sind HatIhrDVD Playereine HDMI Buchse könnenSieihn über HDMI anschließen um eine bessere Video und Audioqualität zu genießen HDMI 1 SPDIF Coax OUT Zusatzgerät nicht mitgeliefert HDMI Kabel Schalten Sie auf HDMI als Quelle wenn Sie den DVD Player wie unten abgebildet anschließen Weitere I...

Страница 75: ...s TV Gerät ganz abzuschalten ziehen Sie den Netzstecker aus der Steckdose Hinweis Wenn das TV Gerät in den Standby Modus geschaltet wird kann die LED blinken um anzuzeigen dass bestimmte Funktionen wie die Standby Suche Download über Antenne oder ein Timer aktiv sind Eingangsauswahl Wenn Sie externe Geräte an Ihr TV angeschlossen haben können Sie dieses auf unterschiedliche Eingabequellen schalten...

Страница 76: ...scher Programmführer EPG Mit dem elektronischen Programmführer EPG können Sie Informationen über verfügbare Programme anzeigen lassen Drücken Sie die Taste GUIDE auf der Fernbedienung um das EPG Menü aufzurufen Drücken Sie die Taste um in den Kanälen zu navigieren DrückenSiedieTaste uminderProgrammliste zu navigieren Das EPG Menü zeigt die verfügbaren Informationen zu allen Kanälen an Beachten Sie...

Страница 77: ...estätigen Sie diese Zahl indem Sie sie erneut eingeben Drücken Sie anschließend auf die Schaltfläche OK um den Vorgang abzuschließen Stimmen die beiden eingegebenen PIN Nummern überein wurde Ihre neue persönliche Geheimzahl erfolgreich eingerichtet Als nächstes wird der Bildschirm mit den Sprachauswahlmöglichkeiten angezeigt Drücken Sie die Tasten oder um Ihre Sprache auszuwählen Bestätigen Sie zu...

Страница 78: ...uchlauf zu starten und Nein um abzubrechen oder und OK Nach der Einstellung und Bestätigung des Automatischen Sendersuchtyps wird der Installationsvorgang gestartet Ein Fortschrittsbalken wird angezeigt Zum Abbrechen drücken Sie die Taste MENU In diesem Fall werden die gefundenen Kanäle nicht gespeichert Manuelle Einstellung TIPP Diese Funktion wird zur direkten Eingabe von Sendern verwendet Wähle...

Страница 79: ...d drücken Sie die Taste OK Wählen Sie Ja indem Sie die Taste oder drücken und drücken Sie anschließend OK um alle Kanäle zu löschen Sender verwalten Kanalliste Das TV Gerät sortiert alle gespeicherten Sender in der Kanalliste Sie können mit Hilfe der Kanallistenoptionen diese Kanalliste bearbeiten Favoriten festlegen oder aktive Sender festlegen Drücken Sie die Taste MENU um in das Hauptmenü zu ge...

Страница 80: ...ichtet haben für die elterliche Kontrolle einzugeben Drücken Sie die Taste OK wenn der gewünschte Kanal ausgewählt ist um den Kanal zu sperren bzw die Sperre aufzuheben Das Sperrsymbol wird neben dem gewählten Kanal eingeblendet Sender verwalten Favoriten Sie können eine Liste mit Favoritenprogrammen erstellen Drücken Sie die Taste MENU um in das Hauptmenü zu gelangen Wählen Sie die Option Kanalli...

Страница 81: ...ienung und wählen Sie dann die Option Medienbrowser durch Drücken der Taste oder Drücken Sie die Taste OK um fortzusetzen Die Menüoptionen des Medienbrowsers werden angezeigt Außerdem wird der Medienbrowserbildschirm automatisch eingeblendet wenn Sie ein USB Gerät einstecken Sie können die Musik Bild und Video Dateien von demangeschlossenenUSB Speicherstickwiedergeben Verwenden Sie die Tasten oder...

Страница 82: ...m an Wiedergabe von Musik über USB Wenn Sie Fotos aus den Hauptoptionen wählen werden die verfügbaren Fotodateien gefiltert und am Bildschirm angezeigt 0 9 Zifferntasten Springt zur gewählten Datei Aktuelle Datei Taste OK Gibt die ausgewählte Datei wieder Wiedergabe Taste Grün gibt alle Mediendateien im Ordner beginnend mit der ausgewählten Datei wieder Stop Taste Rot Stoppt die Wiedergabe Pause T...

Страница 83: ...m Bildseitenverhältnis von 16 9 die zu einem normalen Bild Bildseitenverhältnis von 4 3 verkleinert worden sind verwenden Sie zur Wiederherstellung des ursprünglichen Formats den 16 9 Modus Untertitel Mit dieser Funktion wird ein breites Bild Bildseitenformat von 16 9 mit Untertiteln auf volle Bildschirmgröße gezoomt Hinweis Sie können den Bildschirminhalt nach oben oder unten verschieben indem Si...

Страница 84: ...tionen eingestellt werden Niedrig Mittel Hoch oder Aus Spielemodus Wenn der Spielemodus auf Ein gestellt ist werden spezielle Spieleinstellungen die für eine bessere Videodarstellung optimiert sind geladen Hinweis Ist der Spielmodus aktiv können einige Optionen im Menü Bildeinstellungen nicht verändert werden Bildzoom Stellt die Bildgröße auf Auto 16 9 Untertitel 14 9 14 9 Zoom 4 3 Panorama oder K...

Страница 85: ...die Taste MENU um abzubrechen Optionen des Menüs Klangeinstellungen Lautstärke Stellt die Lautstärke ein Entzerrer Drücken Sie die Taste OK um das Untermenü Equalizer anzuzeigen Im Equalizer Menü kann die Voreinstellung auf Musik Film Sprache Flat Klassik und Benutzer eingestellt werden Drücken Sie die Taste MENU um zum vorhergehenden Menü zurückzukehren Hinweis Die Einstellungen des Menüs Equaliz...

Страница 86: ...dul CAM notwendig Dieses Modul muss in den CI Steckplatz Ihres TV Geräts eingesetzt werden Besorgen Sie sich durch die Anmeldung bei einem Pay TV Anbieter das CAM Modul und die Smartcard und setzen Sie sie wie folgt in das TV Gerät ein Stecken Sie das CAM Modul und die SmartCard in den Steckplatz der sich im Anschlussfach auf der Rückseite des TV Geräts befindet Die CAM Module sollten korrekt eing...

Страница 87: ...fest Hinweis Wenn die Option Land auf Dänemark Schweden Norwegen oder Finnland eingestellt ist funktioniert das Menü Spracheinstellungen wie folgt Spracheinstellungen Markieren Sie im Menü Einstellungen die Option Spracheinstellungen über die Tasten oder Drücken Sie OK Daraufhin wird das Untermenü Spracheinstellungen eingeblendet Verwenden Sie die Tasten oder um die Menüoptionen zu markieren und d...

Страница 88: ...nstellen schreiben Sie diesen bitte auf und bewahren Sie ihn an einem sicheren Ort auf Timer Drücken Sie die Taste MENU und wählen Sie das Symbol Kanalliste mit den Tasten oder aus Drücken Sie die Taste OK um das Kanallistenmenü anzuzeigen Verwenden Sie die Taste oder um die Option Timer zu markieren und drücken Sie OK um fortzusetzen Einstellen des Ausschalttimers Diese Einstellung dient dazu das...

Страница 89: ...tzone nicht eingestellt werden Wenn MANUELL ausgewählt wird kann die Zeitzone geändert werden Wählen Sie die Option Zeitzone durch Drücken der Taste oder aus Verwenden Sie dieTasten oder um die Zeitzone zwischenGMT 12oderGMT 12zuändern Die aktuelle Zeit oben im Menü ändert sich dann entsprechend der eingestellten Zeitzone Die Einstellungen werden automatisch gespeichert Drücken Sie MENU um abzubre...

Страница 90: ...dien wie Filmen und Fernsehen Ein Erzähler beschreibt die Darstellung und das Geschehen auf dem Bildschirm in den natürlichen Pausen im normalen Audiokanal und manchmal falls erforderlich auch während der Dialoge Sie können diese Funktion nur verwenden wenn der Sender die zusätzliche Audiospur unterstützt TV Autoabschaltung Hier können Sie den Zeitwert für die automatischeAbschaltung einstellen Is...

Страница 91: ...urückbleibendes Bild Beachten Sie dass bei der Anzeige von stehenden Bildern Geisterbilder auftreten können Solche Bildstörungen auf LCD TVs verschwinden meist nach einer Weile wieder Schalten Sie das Gerät für eine Weile ab Um solche Störungen von vornherein zu vermeiden sollten Sie keine stehenden Bilder lange Zeit anzeigen lassen Kein Strom Wenn das Gerät keinen Strom hat überprüfen Sie bitte d...

Страница 92: ...Hz 12 1360x768 60 Hz Anhang B AV und HDMI Signalkompatibilität Eingangssignaltypen Quelle Unterstützte Signale Verfügbar EXT SCART PAL 50 60 O NTSC 60 O RGB 50 O RGB 60 O Seiten AV PAL 50 60 O NTSC 60 O YPbPr 480I 60Hz O 480P 60Hz O 576I 50Hz O 576P 50Hz O 720P 50Hz O 720P 60Hz O 1080I 50Hz O 1080I 60Hz O 1080P 50Hz O 1080P 60Hz O HDMI1 480I 60Hz O 480P 60Hz O 576I 50Hz O 576P 50Hz O 720P 50Hz O 7...

Страница 93: ...iformate Medium Datei erweiterung Format Hinweise Video Audio Max Auflösung Bitrate etc Film mpg dat vob mkv rmvb ts trp tp MPEG1 MPEG Layer 1 2 3 20Mbit sec MPEG2 MPEG2 XviD 3ivx PCM MP3 XviD Version bis 1 1 2 Mpeg2 TS H264 TS EAC3 AC3 20Mbit sec RMVB IMA LBR 10Mbit sec MPEG4 PCM MP3 avi MS ISO MPEG4 PCM MP3 SP und ASP unterstützt MJPEG PCM 30fps VGA Musik m4a Sample Rate 8K 48KHz Bit Rate 24kbps...

Страница 94: ... die Option Automatische Suche im Menü Upgradeoptionen aktiviert ist schaltet sich das Gerät um 3 00 früh ein und sucht auf den Übertragungskanälen nach neuen Softwareupgrades Wird eine neue Software gefunden und erfolgreich heruntergeladen arbeitet das TV Gerät ab dem nächsten Einschaltvorgang mit der neuen Softwareversion Hinweis zum Rebootvorgang Das Rebooten ist der letzte Schritt beim Upgrade...

Страница 95: ... W 40 W max 1 W Standby PANEL 16 9 Display 22 Bildschirmgröße ABMESSUNGEN mm TxLxB Mit Standfuß 117 x 532 x 375 Gewicht Kg 4 35 TxLxB Ohne Standfuß 34 x 532 x 347 Gewicht Kg 4 10 Digitaler Empfang MHEG 5 Engine erfüllt ISO IEC 13522 5 UK Engine Profile 1 für UK Object carousel Support erfüllt ISO IEC 135818 6 und UK DTT Profil Frequenzbereich 474 850 MHz für UK Modelle 170 862 MHz für EU Modelle Ü...

Страница 96: ...al 108 Borrado de Listas de Servicios 108 Administración de Programas Lista de Canales 109 Utilizacion de la Lista de Canales 109 Desplazar un Canal 109 Borrado de Canales 109 Renombrar Canales 109 Bloqueo de Canales 109 Administración de Canales Favoritos 110 Funciones de los Botones 110 Administración de Emisoras Ordenar la Lista de Canales 110 Información en Pantalla 110 Reproducción de Archivo...

Страница 97: ...tá destinado a recibir y mostrar emisiones de programas de televisión Las diferentes opciones de conexión a otros dispositivos ofrecen una ampliación adicional de las posibles fuentes de origen de recepción de señales receptores grabadores y reproductores de DVD aparatos de vídeo ordenadores etc El aparato está diseñado para funcionar en interiores secos Está diseñado sólo para uso doméstico y no ...

Страница 98: ...ciclables y deberían reciclarse Los materiales de embalaje como por ejemplo las bolsas deben mantenerse lejos de los niños Las pilas inclusive aquellas que no contienen metales pesados no deberán desecharse con los desechos del hogar Deseche las pilas usadas de manera segura para el medio ambiente Infórmese sobre la normativa vigente que sea de aplicación en su región No intente recargar las pilas...

Страница 99: ...l cable de la toma de corriente Por ello debe garantizarse el acceso a la toma de corriente colocando el aparato en un lugar libre de obstrucciones de forma que en caso de una urgencia el cable se pueda desenchufar inmediatamente A fin de evitar riesgos de incendios debe desenchufar el cable de la toma antes de periodos prolongados de inactividad por ejemplo durante las vacaciones No deje aparatos...

Страница 100: ... está en uso apague o desconecte el aparato del enchufe de red Esto también disminuirá el consumo de energía Desconecte la energía eléctrica cuando abandone su domicilio por un periodo prolongado Tenga en cuenta que utilizar el televisor en el Modo de Ahorro de Energía logra un uso anual más eficiente de la energía eléctrica que desconectar el televisor del enchufe de red en lugar de mantenerlo en...

Страница 101: ...ección de Fuente 10 Selección de Modo Favorito en los canales 11 DVB Subir Volumen 12 Info Mostrar en modo TXT 13 Silencio mute 14 Bajar Volumen 15 Retroceder canal Avanzar página en los 16 canales DVB Guía electrónica de programación en los 17 canales DVB Avanzar Canal Retroceder página los canales 18 DVB Temporizador de Apagado 19 Selección de modo de imagen Cambia el 20 modo de imagen en el mod...

Страница 102: ...Alta Definición IMAD HDMI High Definition 1 Multimedia Interface Las Entradas HDMI se utilizan para conectar un dispositivo que cuente con una toma HDMI Su televisor LCD puede mostrar imágenes de alta definición High Definition desde aparatos tales como un receptor de satélite de alta definición o un reproductor de DVD Deberá conectar estos aparatos a través de la toma HDMI o de la toma de compone...

Страница 103: ...odos los canales a los que esté abonado Para más información lea la sección Acceso Condicional Entrada USB lateral 2 Botones de control del televisor 3 La 4 conexión lateral de audio vídeo sirve para conectar a señales de audio y vídeo de aparatos externos Para realizar una conexión de vídeo debe utilizar el cable de conexión AV con el fin de permitir la conexión Primero enchufe la clavija única d...

Страница 104: ...nte las entradas USB del televisor podrá conectar este tipo de dispositivos al mismo Nota Es posible que el aparato no admita algunos tipos de unidades de disco duro Conexión del TV LCD a un PC Puede conectar su PC al televisor a fin de poder ver la imagen del ordenador en la pantalla del televisor LCD Antes de realizar cualquier conexión primero desenchufe de la corriente el televisor y el ordena...

Страница 105: ...en incluidos Si su reproductor de DVD cuenta con una toma HDMI puede conectarlo a través de HDMI para obtener una mejor calidad de sonido e imagen HDMI 1 SPDIF Coax OUT no incluido Cable HDMI Reproductor de DVD Cuando conecte el aparato a un reproductor de DVD tal como se ilustra a continuación cambie a la fuente HDMI conectada Consulte el apartado Selección de Entradas para obtener más informació...

Страница 106: ...a para PC utilizando un cable conversor de YPbPr a PC no incluido Manejo Básico Puede manejar el televisor mediante el mando a distancia o los botones del propio televisor Manejo con los Botones del Televisor No es posible mostrar el menú principal en pantalla mediante los botones de control Los botones funcionarán por defecto para regular el volumen Aun cuando configure otras opciones para los mi...

Страница 107: ...uestra los programas de la franja horaria anterior Botón verde Siguiente Franja Horaria Muestra los programas de la franja horaria siguiente Botón amarillo Día muestra los programas del día anterior Botón AZUL Día muestra los programas del día siguiente Botones Numéricos Saltar acceden al canal preferido mediante los botones numéricos OK Opciones Muestra las opciones del programa incluyendo la sel...

Страница 108: ...eleccionar el Idioma de Teletexto deseado pulse o Pulse el botón tras configurar el Idioma del Teletexto Acontinuación se verá resaltada la opción de Buscar Codificados Puede elegir la opción Si en caso de que usted desee buscar canales codificados Después selecciones el Idioma de Teletexto deseado Pulse OK en el mando a distancia para seguir y se mostrará el siguiente mensaje Para seleccionar la ...

Страница 109: ...da manual se indica el número del multiplexor o frecuencia en el que se realizará la búsqueda de canales Tras seleccionar la búsqueda digital podrá introducir los números mediante los botones numéricos y pulsando OK para iniciar la búsqueda Búsqueda Manual de Canales Analógicos Tras seleccionar la búsqueda analógica pulse el botón para marcar la opción deseada pulse o para configurar dicha opción ...

Страница 110: ...ostrará un mensaje de advertencia Seleccione la opción SI si desea mover el canal y pulse OK a continuación Pulse OK para proceder El canal seleccionado se moverá a su nueva ubicación Borrado de Canales Pulsando el botón VERDE marcará o desmarcará todos los canales con el botón AMARILLO marcará o desmarcará un canal Seleccione el canal que desee borrar y seleccione la opción Borrar Pulse OK para c...

Страница 111: ...en pantalla En la barra de información se mostrarán los detalles de la emisora y el programa actual Dicha barra muestra la información sobre el canal seleccionado y los programas que se emiten en él El nombre del canal se mostrará junto al número del canal dentro de la lista Consejo No todos los canales emiten información sobre el programa En caso de que el nombre y el número del canal no estén di...

Страница 112: ...e Aleatorio botón Azul Pulse una vez el botón para activar la reproducción en bucle Púlselo de nuevo para activar tanto la reproducción en bucle como la aleatoria Púlselo de nuevo para activar sólo la reproducción aleatoria Púlselo de nuevo para desactivar todos Podrá observar cuáles son las opciones desactivadas al ver los cambios en los iconos Con los siguientes botones del mando a distancia Vd ...

Страница 113: ...or o inferior Tamaño de Letra de Subtítulos Establece el tamaño de la letra de los subtítulos máx 54 pt Cambio de Tamaño de Imagen Formatos de imagen Los programas pueden verse en distintos tamaños de imagen en función de la señal recibida Puede cambiar la relación de aspecto del televisor para ver la imagen con distintos modos de zoom Pulse varias veces el botón SCREEN para cambiar el formato de ...

Страница 114: ...Menú de Configuración de Imagen Pulse los botones o para marcar la opción deseada del menú Pulse los botones o para seleccionar una opción Para salir pulse el botón MENU Opciones del Menú de Configuración de Imagen Modo Paramodificarlaspreferenciasdevisualización puede configurar la opción Modo El modo de imagen puede configurarse como Cine Juego Dinámica y Natural Contraste Configura los valores ...

Страница 115: ...ón y Fuentes son idénticos a los ajustes explicados en el sistema principal de menús Posición PC Seleccione esta opción para ver el menú de posición PC Posic Autom Optimiza de forma automática la pantalla Pulse OK para optimizarla Posición H horizontal Esta opción desplaza la imagen horizontalmente hacia la derecha o a la izquierda de la pantalla Posición V Esta opción desplaza la imagen verticalm...

Страница 116: ...icional Controla los módulos de acceso condicional CAM si los hubiera disponibles Idioma Configura las opciones de idioma Parental Configura las opciones de control paterno Temporizadores Configura temporizadores para los programas seleccionados Fecha Hora Configura la fecha y hora Fuentes Activa o desactiva las opciones de la fuente elegida Otra Configuración Muestra las otras opciones del televi...

Страница 117: ...o admite De otro modo no será posible modificar la configuración Audio Cambia el idioma del sonido del canal actual Subtítulos Configura el idioma de subtítulos del canal actual Nota Si el País elegido es Dinamarca Suecia Noruega o Finlandia el menú de Configuración de Idioma funcionará tal como se describe a continuación Configuración de Idioma En el Menú de Configuración marque la opción Configu...

Страница 118: ... cambiarlo Temporizadores Para ver el menú de Temporizadores pulse el botón MENU y seleccione el icono Configuración con los botones o Para acceder al menú de Configuración pulse OK Mediante los botones o marque la opción Temporizadores y pulse OK Configuración del Temporizador de Apagado Esta función sirve para apagar automáticamente el televisor tras un cierto tiempo Marque la correspondiente op...

Страница 119: ...Zona Horaria podrá modificarse Seleccione Zona Horaria usando el botón o Utilice los botones ó para cambiar la zona horaria entre GMT 12 y GMT 12 La hora actual que se muestra en la parte superior de la lista de menús cambiará de acuerdo con la zona horaria elegida Los cambios se guardarán automáticamente Para salir pulse el botón MENU Configuración de Opciones de Fuentes Podrá activar o desactiva...

Страница 120: ...dicional durante la emisión de programas y películas para las personas invidentes o con dificultades de visión El narrador habla durante la presentación describiendo lo que sucede en la pantalla durante las pausas naturales del sonido y a veces también durante el diálogo si es necesario Sólo podrá utilizar esta función si el canal emisor admite esta pista de narración adicional Apagado Automático ...

Страница 121: ...o Cuando cambie el televisor de sitio agárrelo fuertemente por la parte inferior Persistencia de Imágenes Tenga en cuenta que pueden aparecer imágenes dobles cuando se muestre una imagen persistente La persistencia de imágenes en un televisor LCD puede desaparecer al cabo de poco tiempo Apague el televisor durante un rato A fin de evitar este fenómeno no deje que la misma imagen permanezca inmóvil...

Страница 122: ...11 1280x1024 60 Hz 12 1360x768 60 Hz Apéndice B Compatibilidad de señales HDMI y AV tipos de señales de entrada Fuente Señales admitidas Disponible EXT SCART PAL 50 60 O NTSC 60 O RGB 50 O RGB 60 O AV Lateral PAL 50 60 O NTSC 60 O YPbPr 480I 60Hz O 480P 60Hz O 576I 50Hz O 576P 50Hz O 720P 50Hz O 720P 60Hz O 1080I 50Hz O 1080I 60Hz O 1080P 50Hz O 1080P 60Hz O HDMI1 480I 60Hz O 480P 60Hz O 576I 50Hz...

Страница 123: ...edio Extensión de Archivo Formato Notas Vídeo Audio Resolución máxima Bit rate etc Película mpg dat vob mkv rmvb ts trp tp MPEG1 MPEG Layer 1 2 3 20Mbit sec MPEG2 MPEG2 XviD 3ivx PCM MP3 Versión XviD hasta 1 1 2 Mpeg2 TS H264 TS EAC3 AC3 20Mbit sec RMVB IMA LBR 10Mbit sec MPEG4 PCM MP3 avi MS ISO MPEG4 PCM MP3 Admite SP y ASP MJPEG PCM 30fps VGA Música m4a Tasa de Muestreo 8K 48KHz Bitrate 24kbps ...

Страница 124: ...e reinicio 2 Búsqueda 3 AM y modo de actualización Si está activada la Búsqueda Automática del menú Opciones de Actualización el televisor se encenderá a las 3 00 y buscará actualizaciones de software Si encuentra y descarga una nueva actualización la próxima vez que se encienda contará con una nueva versión de software Nota en la operación de reinicio El reinicio es el último paso del proceso de ...

Страница 125: ...ANEL Pantalla de 22 en formato 16 9 TAMAÑO mm AxAxL con soporte 117 x 532 x 375 Peso Kg 4 35 AxAxL sin soporte 34 x 532 x 347 Peso Kg 4 10 Recepción Digital MOTOR MHEG 5 compatible con normativa ISO IEC 13522 5 motor UK perfil 1 Para el Reino Unido Admite transmisión de datos Object carousel compatible con normativa ISO EC 135818 6 y perfil UK DTT Gama de frecuencia De 474 a 850 MHz para los model...

Страница 126: ...50179569 www continentaledison com ...

Отзывы: