2
SLPIR
Motion Activated
Wireless Controller
The SLPIR controller is designed to control multiple SL heaters or SL receivers within the RF range. The RF range can
be extended if necessary *see product code SLEXT. The controller has 2 operating modes. The required mode must
be set prior to the installation by using the switches located on the back of the controller. These modes are:
Motion detection with Timer
Motion detection with Timer and Temperature Control
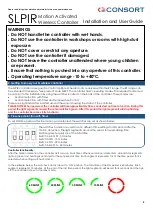
There are 4 light indicators located around the sensor showing the status of the controller.
PLEASE NOTE: When powered, the controller will take approximately 30 seconds start up time to function. During this
period the light segments around the sensor will flash green. After this period the light segments will stop flashing
and the controller becomes fully functional.
Please read this guide carefully and retain for future use and maintenance.
Installation and User Guide
2. Getting to know your SL wireless controller
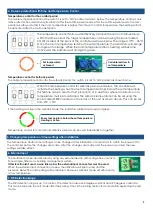
The switches 3 and 4 are used to set 4 different time settings for ON period after the
motion detection. The light segments around the sensor show remaining time.
Each segment equals 1/4 of the total time.
Switch 3 & 4 OFF - 5 minutes
Switch 3 ON - 15 minutes.
Switch 4 ON - 30 minutes
Switch 3 & 4 ON - 60 minutes
3. Presence detection with Timer
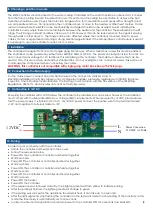
To set ON time period after the motion was detected, the switches are set as shown below.
60 MINS
45 MINS
30 MINS
15 MINS
Controller functionality :
After the motion detection, the controller acts as a run-back timer. Whenever motion is detected , all indicator segments
light up green and heating is activated for the set period of time. Each segment represents 1/4 of the time period that is
selected when setting switches
3 and 4.
In the example below, the switches 3 and 4 are set to ‘ON’ position. The total time of the ON period is 60 minutes. Each
segment represents 15 minutes. At the end of the last time period, the light segments will be red for 4 seconds and then go
off. The controller is now in stand-by mode.
WARNINGS
Do NOT handle the controller with wet hands.
Do NOT use the controller in workshops or rooms with high dust
exposure.
Do NOT cover or restrict any aperture.
Do NOT use the controller if damaged.
Do NOT leave the controller unattended where young children
are present.
Ensure that nothing is pushed into any aperture of this controller.
Operating temperature range -10 to +40ºC.


