


4
TAP AND HOLD
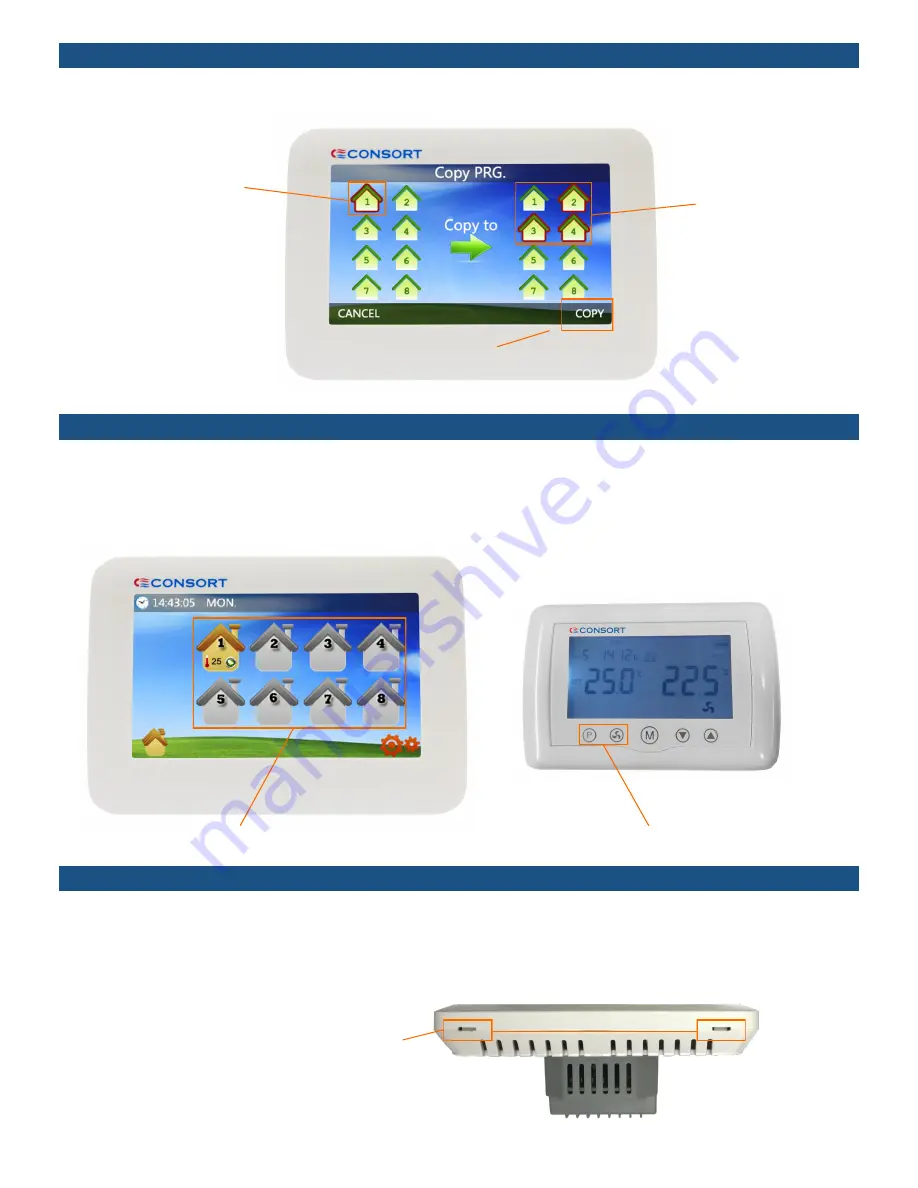
TAP AND HOLD ONE OF THE ZONE ICONS
TAP ZONE TO
COPY FROM
TAP ZONES
TO COPY TO
PRESS TO COPY
9. Copy Time Schedule To Other Zones
On the MRX1, tap and hold one of the zone icons until the screen changes. Now the display shows ‘waiting for connection’. On
the CRX2, tap and hold the P and FAN icons together until the screen changes and tap the P icon several times until the MRX
display shows CONNECTED. Tap BACK and the zone is now connected. To remove zone, tap REMOVE icon on the MRX1. After
the zone has been successfully connected, MRX1 display shows zone icon in different colour and information about the zone.
The CRX2 screen will show remote connection icon.
10. Connecting Zones to MRX1
MRX1 is mains powered only. It is supplied with two different power packs. The standard power pack is suitable for mounting
MRX1 onto a plasterboard without a back box or to be used with a deep metal back box. The second power pack is suitable for
25 - 32mm deep plastic or metal back box. The MRX1 should be wired to an outlet with a 3A fuse.
To mount the MRX1 the unit must be firstly opened.
11. MRX1 Installation
Gently insert and twist a flat head screwdriver
into the slots as per picture.
Once the front has separated from the back
The white lead can be unplugged from the
Screen. The choice between the two power
Supply choices can now be made see section
11.1 &11.2


