Transa PRO
‧
TransaView Console
12
Replaceable Touch Pad
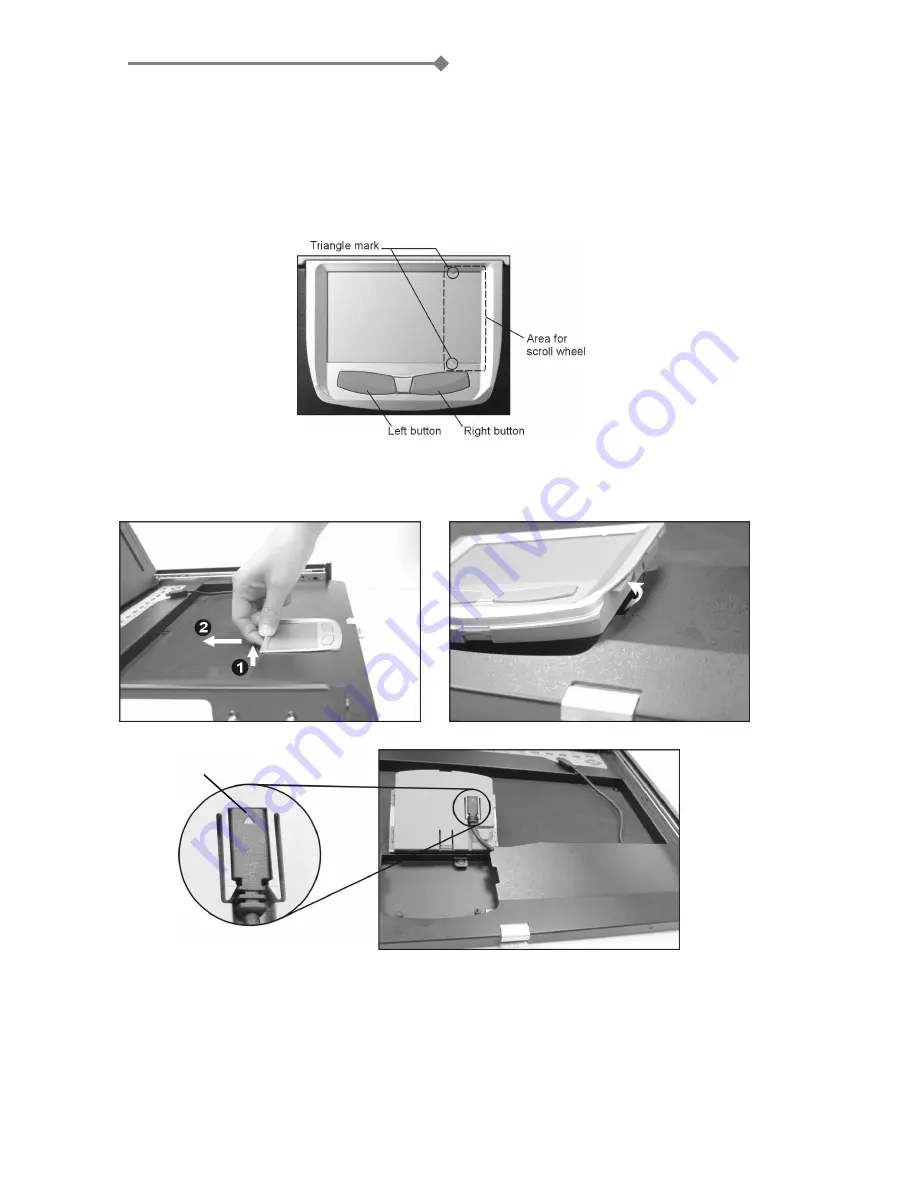
1. Touch Pad and Its “Wheel”
The Touch Pad simulates a “wheel mouse”. The area of the Touch Pad to the right side of the two small
triangular marks
is the simulated “wheel” as shown below.
2. Touch Pad Replacement
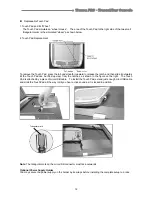
To remove the Touch Pad, press the tab underneath it upward to release the latch, and then slide it outwards
till the Touch Pad can be lifted up clear from the notches, as shown in the figure on the right. The Touch
Pad is attached by a piece of mini-USB cable. To install the Touch Pad, extend just enough mini-USB cable
and slide the Touch Pad all the way in till you hear a click sound as it is locked in position.
Note
: The triangular mark on the mini-USB connector must face outwards.
Optional Power Supply Holder
You may secure the power supply on the holder by tie wraps before installing the complete setup to a rack.
Triangular mark
Содержание Transa PRO 15
Страница 1: ......


