background image

CM210Q-W Router User Manual 

http://www.comset.com.au


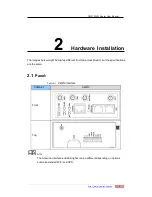
Table 2-2  

Router Interface 


Port 

Instruction 

Remark 

USIM 

Plug type SIM Slot, supports 1.8/3V/5V 
automatic detection. 


Main 

3G/4G antenna, SMA connector, 50Ω. 


Aux/GPS 

LTE MIMO antenna SMA connector, 
50Ω. 

GPS Optional 

Wi-Fi 

Two Wi-Fi antennas, SMA connector. 


LAN 

10/100Base-TX

MDI/MDIX self-adaption. 


WAN/LAN 

10/100Base-TX

MDI/MDIX self-adaption. 

Default as LAN 

Reset 

Reset button,(press and hold for at least 5 seconds) 


PWR 

Power connector. 

5  

~ 

32V DC 

I/O 

I/O-1 and I/O-2 are digital input.  I/O-3 is digital


output. 


Console 

RJ45-DB9 cable for CLI configuration. 


2.2 

LED Status 

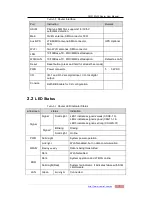
Table 2-3  

Router LED indicator Status 


silk-screen 

status 

Indication 


Signal 

Signal 

Solid Light 

LED1 indicates signal is weak (CSQ0~10). 
LED2 indicates signal is good (CSQ11~19. 
LED3 indicates signal is strong (CSQ20~31) 


Signal 1 

Blinking 

Dialing. 

Solid Light 

Online. 

PWR 

Solid Light 

System power operation. 


WLAN 

Solid light 

WLAN enabled, but no data communication. 

Blinking quickly 

Data is being transmitted. 

Dark 

WLAN disabled. 


ERR 

Dark 

System operation and LTE/3G online. 

Solid Light(Red) 

System fail indicator. It indicates failure with SIM 
card/module. 

LAN 

Green 

Solid light 

Connected. 

Содержание CM210Q-W

Страница 1: ...CM210Q W Router User Manual http www comset com au 1 18 Dual SIM 4G LTE WiFi Router CM210Q W V1 2 ...

Страница 2: ... registered holders Specifications are subject to change without notice No part of this manual may be reproduced without the consent of Comset All rights reserved WARNING Keep at least a 20CM distance between the user s body and the modem router device Address 37 125 Highbury Road Burwood VIC 3125 Australia Web http www comset com au Phone 61 3 9001 9720 Fax 61 3 9888 7100 ...

Страница 3: ...tus 7 2 3 Powering up the CM210 router 10 3 Router Configuration 12 3 1 Configuration from a local network 12 3 2 Basic Configuration 13 3 3 WLAN Settings 19 3 4 Advanced Network Settings 21 3 5 VPN Tunnel 27 3 5 4 1 IPSec Group Setup 31 3 5 4 2 IPSec Basic Setup 33 3 5 4 3 IPSec Advanced Setup 34 3 6 Administration 35 3 7 Debugging Settings 46 3 8 Reset Button to Restore Factory Settings 48 ...

Страница 4: ...PTP Server and Client L2TP and Open VPN to establish a secure connection over the 3G 4G network The durable and rugged design makes the CM210Q W the router of choice for remote harsh environments The compact design easy integration and rich built in features make it suitable for a wide range of industrial M2M applications including industrial automation building automation smart metering security ...

Страница 5: ...l data and private network APN VPDN RS 232 interface data transparent transmission and protocol conversion On demand dialing including time on off line voice or SMS control on off line data trigger online or link idle offline Bandwidth limiter to limit Download and Upload speeds TCP IP protocol stack Telnet HTTP SNMP PPP PPPoE network protocol VPN PPTP Server and Client L2TP GRE Open VPN IPSec HTT...

Страница 6: ...tion The images below might be slightly different from the actual product but the specifications are the same 2 1 Panel Table 2 1 CM210 Interface COMSET CM210 Front Top The Antenna interface and LED lights can be different depending on options such as extended WiFi and GPS ...

Страница 7: ...O I O 1 and I O 2 are digital input I O 3 is digital output Console RJ45 DB9 cable for CLI configuration 2 2 LED Status Table 2 3 Router LED indicator Status silk screen status Indication Signal Signal Solid Light LED1 indicates signal is weak CSQ0 10 LED2 indicates signal is good CSQ11 19 LED3 indicates signal is strong CSQ20 31 Signal 1 Blinking Dialing Solid Light Online PWR Solid Light System ...

Страница 8: ...lost The LED indicators can be different depending on additional options such as extended Wi Fi GPS function or single double SIM Dimensions Figure 2 2 CM210 Series Router Dimensions 2 3 Powering up the CM210 router 2 3 1 SIM UIM card installation If you are configuring a dual SIM router you need to insert both SIMs prior to configuring the router ...

Страница 9: ...uter serial port the other end connects to the console port of the router or the terminal block Before connecting the serial cable please disconnect any power source 2 3 4 Power Supply The CM210 router supports a wide range of DC voltage between 5VDC and 32VDC 2 3 5 Review After inserting the SIM UIM card s and connecting the Ethernet cable and antennas please connect the power adaptor or the powe...

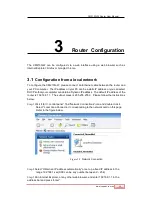
Страница 10: ...mputer can obtain a Dynamic IP address The default IP address of the router is 192 168 1 1 The subnet mask is 255 255 255 0 Please follow the instructions below Step 1 Click start control panel find Network Connections icon and double click it Select Local Area Connection corresponding to the network card on this page Refer to the figure below Figure 3 3 Network Connection Step 2 Select Obtain an ...

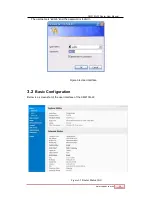
Страница 11: ...m 13 CM210Q W Router User Manual The username is admin and the password is admin Figure 3 4 User Interface 3 2 Basic Configuration Below is a screenshot of the user interface of the CM210Q W Figure 3 5 Router Status GUI ...

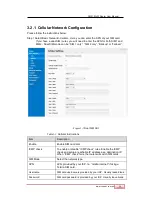
Страница 12: ...r Failover Figure 3 1 Dual SIM GUI Table 3 1 Cellular Instructions Item Description Enable Enable SIM card dial ICMP check To enable or disable ICMP check rules Enable the ICMP check and setup a reachable IP address as a destination IP When ICMP check fails the router will switch SIM cards SIM Mode Select the network type APN APN provided by your ISP I e telstra internet if using a Telstra SIM car...

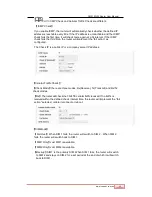
Страница 13: ...erver IP address Cellular Traffic Check Check Mode there are three modes Rx Receive Tx Transmit and Rx Tx check modes Rx The router will check the 3G LTE cellular traffic received If no traffic is received within the defined check interval time the router will implement the fail action selected cellular reconnect or reboot SIM Mode Fail Over When SIM 1 fails the router will switch to SIM 2 When SI...

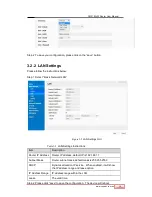
Страница 14: ...ngs GUI Table 3 2 LAN Settings Instructions Item Description Router IP Address Router IP address default IP is 192 168 1 1 Subnet Mask Router subnet mask default mask is 255 255 255 0 DHCP Dynamic allocation IP service When enabled it will show the IP address range and lease option IP Address Range IP address range within the LAN Lease The valid time Step 2 Please click save to save the configurat...

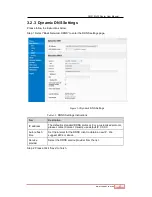
Страница 15: ...mic DNS Settings Table 3 3 DDNS Settings Instructions Item Description IP address The default is standard DDNS protocol For a customised protocol please contact Comset Usually use default IP 0 0 0 0 Auto refresh time Set the interval for the DDNS client to obtain a new IP We suggest 240s or above Service provider Select the DDNS service provider from the list Step 2 Please Click Save to finish ...

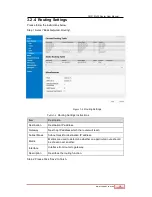
Страница 16: ...ettings Instructions Item Description Destination Destination IP address Gateway Next hop IP address which the router will reach Subnet Mask Subnet mask for destination IP address Metric Metrics are used to determine whether one particular route should be chosen over another Interface Interface from router to gateway Description Describes the routing function Step 2 Please Click Save to finish ...

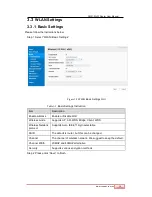
Страница 17: ...struction Item Description Enable wireless Enable or Disable WiFi Wireless mode Supports AP AP WDS Bridge Client WDS Wireless Network protocol Supports Auto IEEE 11b g n selectable SSID The default is router but this can be changed Channel The channel of wireless network We suggest to keep the default Channel Width 20MHZ and 40MHZ alternative Security Supports various encryption methods Step 2 Ple...

Страница 18: ...ients and or prohibit others from connecting to the WiFi network This feature is invalid on a wired connection Table 3 6 Wireless Client Filter Settings Instructions Item Description Disable Filter Choose to disable Permit only the following clients Allows only the listed MAC addresses to connect to the router via WiFi Block the following clients Prevents the listed MAC addresses from connecting t...

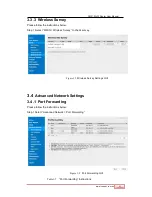
Страница 19: ...s below Step 1 Select WLAN Wireless Survey to check survey Figure 3 7 Wireless Survey Settings GUI 3 4 Advanced Network Settings 3 4 1 Port Forwarding Please follow the instructions below Step 1 Select Advanced Network Port Forwarding Figure 3 8 Port Forwarding GUI Table 3 7 Port Forwarding Instructions ...

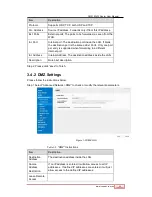
Страница 20: ... different internal port Int Address Internal Address The destination address inside the LAN Description Rule brief description Step 2 Please click save to finish 3 4 2 DMZ Settings Please follow the instructions below Step 1 Select Advanced Network DMZ to check or modify the relevant parameters Figure 3 9 DMZ GUI Table 3 8 DMZ Instructions Item Description Destination Address The destination addr...

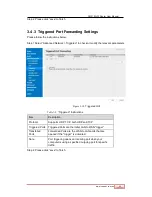
Страница 21: ...ers Figure 3 10 Triggered GUI Table 3 9 Triggered Instructions Item Description Protocol Supports UDP TCP both UDP and TCP Triggered Ports Triggered Ports are the initial LAN to WAN trigger Transferred Ports Forwarded Ports are the WAN to LAN ports that are opened if the trigger is activated Note Port triggering opens an incoming port when your computer is using a specified outgoing port for speci...

Страница 22: ...wall IP URL Filtering to check or modify the relevant parameter Step 2 Select Firewall Domain Filtering to check or modify the relevant parameter Figure 3 11 Domain Filtering Settings GUI Table 3 10 Domain Filtering Instructions Item Description Applies To White list Blocked Resources Black list Step 2 Please click save to finish ...

Страница 23: ...ut The router will wait for the set time to transmit data to the serial port Serial Timeout Serial Timeout is the waiting time for transmitting the data package that is less the Packet payload If the last package equals the Packet payload the serial port will transmit it immediately The default setting is 500ms Packet payload Packet payload is the maximum transmission length for serial port data p...

Страница 24: ... Settings Please follow the instructions below Step 1 Please go to Advanced Network Upnp NAT PMP to check or modify the relevant parameters Figure 3 13 UPnp NAT PMP Settings GUI Step 2 Click save to finish 3 4 7 Static DHCP Settings Please follow the instructions below Step 1 Select Advanced Network Static DHCP to check or modify the relevant parameters ...

Страница 25: ...re 3 14 Static DHCP Settings GUI Step 2 Click save to finish 3 4 8 Bandwidth Limiter Please follow the instructions below Step 1 Select Advanced Network Bandwidth Limiter to check or modify the relevant parameters Step 2 Click save to finish 3 5 VPN Tunnel ...

Страница 26: ...address which is a virtual IP address Tunnel Source Router s 3G 4G WAN IP address Tunnel Destination GRE Remote IP address Usually a public IP address Keep alive GRE tunnel keep alive to keep GRE tunnel connection Interval Keep alive interval time Retries Keep alive retry times After retry times GRE tunnel will be re established Description Step 2 Click save to finish 3 5 2 VPN Client Settings Ple...

Страница 27: ...www comset com au m 29 CM210Q W Router User Manual ...

Страница 28: ...user s configuration Encryption As per user s configuration Stateless MPPE As per user s configuration Accept DNS As per user s configuration Remote Subnet As per user s configuration Create NAT on Tunnel As per user s configuration Step 2 Click save to finish 3 5 3 VPN Server Settings Please follow the instructions below Step 1 Click VPN Tunnel VPN Server to check or modify the relevant parameter...

Страница 29: ...ec Group Setup Step 1 Select IPSec Group Setup to check or modify the relevant parameters Table 3 14 IPSec Group Setup Instructions Item Description IPSec Extensions Supports Standard IPSec GRE over IPSec L2TP over IPSec Local Security Interface Defines the IPSec security interface ...

Страница 30: ...CM210Q W Router User Manual www comset com au 32 Local Subnet Mask IPSec local subnet and mask ...

Страница 31: ...net Step 2 Click save to finish 3 5 4 2 IPSec Basic Setup Step 1 Select IPSec Basic Setup to check or modify the relevant parameters Table 3 15 IPSec Basic Setup Instructions Item Description Keying Mode IKE pre shared key Phase 1 DH Group Select Group1 Group2 Group5 from the list It must match the remote IPSec settings Phase 1 Encryption Supports 3DES AES 128 AES 192 AES 256 Phase 1 Authenticatio...

Страница 32: ...ase 2 SA Life Time IPSec Phase 2 SA lifetime Pre shared Key Pre shared Key Step 2 Click save to finish 3 5 4 3 IPSec Advanced Setup Step 1 Select IPSec Advanced Setup to check or modify the relevant parameters Table 3 16 IPSec Advanced Setup Instructions Item Description Aggressive Mode Default for main mode ID Payload Compress Enable ID Payload compress DPD To enable DPD service ICMP ICMP Check f...

Страница 33: ...ay modify the Router name Host name and Domain name as required Figure 3 16 Router Identification GUI Table 3 17 Router Identification Instructions Item Description Router name Default is router Can be changed Maximum 32 characters Host name Default is router Can be changed Maximum 32 characters Domain name Default is blank Can be changed Maximum 32 characters This is the WAN domain No need to con...

Страница 34: ... User Manual 3 6 2 Time Settings Step 1 Select Administrator time to check or modify the relevant parameters Figure 3 17 System Configurations GUI If the time update fails please try a different NTP Time Server Step 2 Click save to finish ...

Страница 35: ...ettings Please follow the instructions below Step 1 Select Administrator Admin to check and modify relevant parameters In this page you can configure the basic web parameters Please note the password is password Figure 3 18 Admin Settings GUI Step 2 Click save to finish ...

Страница 36: ...nstructions below Step 1 Select Administrator Schedule Reboot to check and modify relevant parameters Figure 3 19 Schedule Reboot Settings GUI Step 2 Click Save to finish 3 6 5 SNMP Settings Please follow the instructions below Step 1 Select Administrator SNMP to check and modify relevant parameters ...

Страница 37: ...210Q W Router User Manual Figure 3 20 SNMP Settings GUI Step 2 Click Save to finish 3 6 6 M2M Access Settings Step 1 Select Administrator M2M Access to check and modify relevant parameters Figure 3 21 M2M Access Settings GUI ...

Страница 38: ... 40 CM210Q W Router User Manual Step 2 Click Save to finish 3 6 7 DI DO Settings Step 1 Select Administrator DI DO Settings to check and modify relevant parameters Figure 3 22 DI DO Settings GUI 3 6 7 1 DI Configuration ...

Страница 39: ...he CM210 will trigger an alarm according to the Counter Action settings Counter Trigger Available when the DI is under Event Counter mode input from 0 to 100 0 means the alarm is not triggered The alarm will be triggered when the counter reaches the set value After the alarm is triggered the DI will keep counting but will not trigger the alarm again Counter Period It s a reachable IP address Once ...

Страница 40: ...ou can select one or more alarm sources DI Alarm The Digital Output gets triggered when there is an alarm from a Digital Input SMS Control The Digital Output gets triggered when receiving an SMS from a number in the phone book M2M Control Under development Alarm Action The Digital Output initiates an alarm action Select from OFF ON and Pulse OFF Open from GND when triggered ON Short contact with G...

Страница 41: ...Action Alarm Off Action High Available if Pulse is enabled in Alarm On Action Alarm Off Action In Pulse Output mode the selected Digital Output channel will generate a square wave as specified in the pulse mode parameters The high level widths are specified here Input from 1 to 30000 ms Output Available if Pulse is enabled in Alarm On Action Alarm Off Action The number of pulses input from 0 to 30...

Страница 42: ...Select Administrator Configuration to configure the backup settings Figure 3 23 Backup and Restore Configuration GUI Restore Default would lose all configuration information please be careful Step 2 After setting the backup and restore configuration the system will reboot automatically ...

Страница 43: ...uter User Manual 3 6 9 System Log Settings Step 1 Select Administrator Logging to start the configuration You can set the file path to save the log Local or remote sever Figure 3 24 System log Settings GUI Step 2 Click Save to finish ...

Страница 44: ...nnect the power when upgrading 3 6 11 System Reboot Step 1 Select Administrator Reboot to restart the router A pop up window will prompt you to confirm YES or NO before the next step Step 2 If you choose YES the system will restart All configuration updates will be effective after the reboot 3 7 Debugging Settings 3 7 1 Logs Settings Step 1 Select Debugging Logs to check and modify relevant parame...

Страница 45: ...ual Figure 3 26 Logs GUI 3 7 2 Ping Settings Step 1 Select Debugging Ping to check and modify relevant parameters Figure 3 27 Ping GUI 3 7 3 Trace Settings Step 1 Select Debugging Trace to check and modify relevant parameters Figure 3 28 Trace GUI ...

Страница 46: ...utton and keep holding for more than 8 seconds until the NET light stops blinking The system will be restored to factory default settings Table 3 20 System Default Instructions Item Default settings LAN IP 192 168 1 1 LAN Subnet Mask 255 255 255 0 DHCP server Enable User Name admin Password admin After the reboot the configuration will be deleted and restored to factory settings ...

Отзывы: