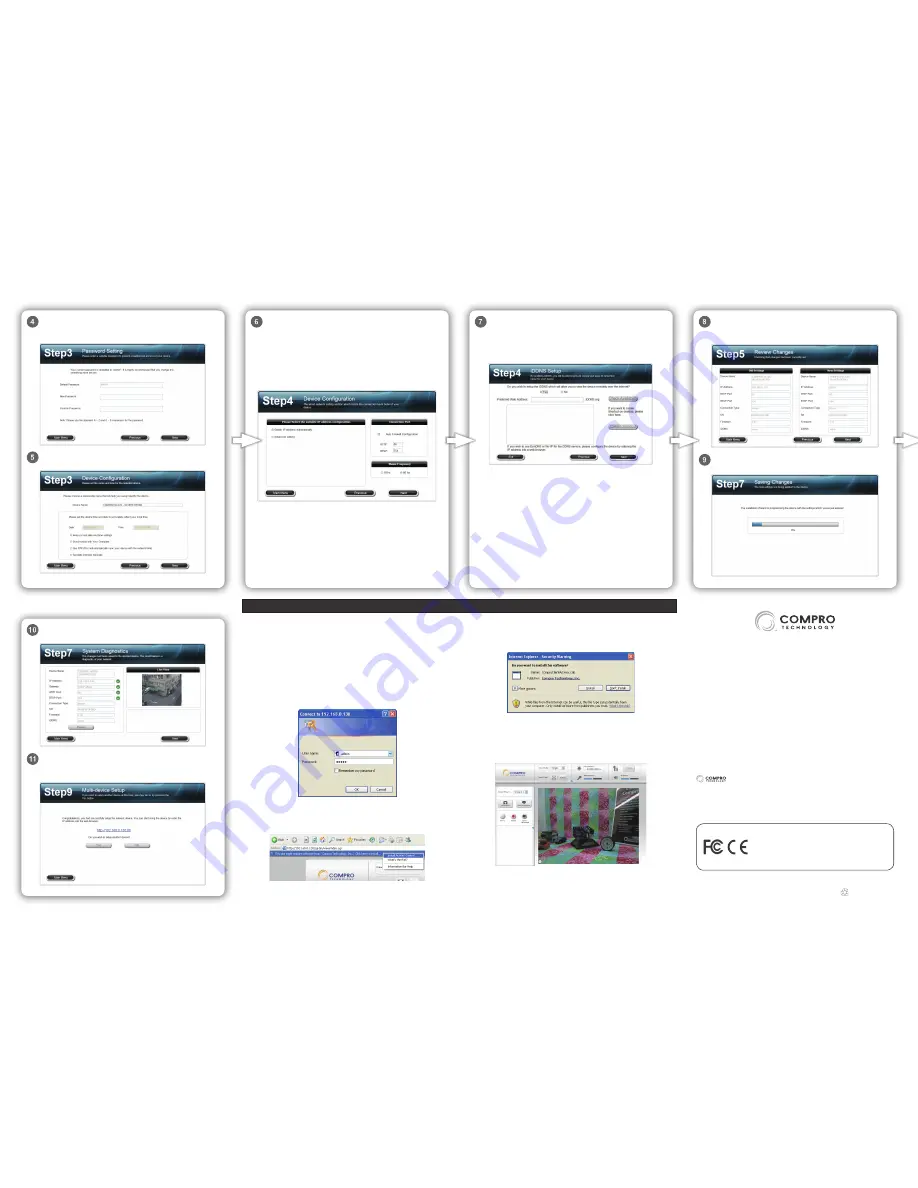
The iWizard will run system diagnosis based on your network
settings and alert you for inappropriate settings.
Click on the link to directly access your IP camera on the
web browser. Or click [Yes] to configure another device from
scratch. Or click [No] to install ComproView.
If you want to use iDDNS service, please click [Yes] and input
your desired address name. Then press [Check Availability]
button to check if the entered address name has been used.
When successful, you can hit [Create Shortcut] button to create
a shortcut on your desktop for convenient access.
Note:
The iDDNS is a free DDNS (Dynamic Domain Name
Service) service offered by Compro. If you are using floating IP,
you can apply for DDNS service to create a hostname that links
to your camera’s IP address, which provides easy-to-remember
URL for quick access of your IP camera on the web browser. If
your LAN network and router have a firewall to prevent hacker
attacks, you need to configure the HTTP port on your router to
allow connection from external network. If you set the HTTP
port as “2001” for your device, you need to attach the port
number to your device’s address, i.e. http://xxx (entered by you).
iddns.org:2001.
Select the configuration of your IP address. Choose [Obtain
IP address automatically] to let your IP camera automatically
acquire IP address from the DHCP server on your network. Or
select [Advanced setting] to manually input the IP address,
subnet mask, gateway address and DNS server. Then configure
the connection ports your IP camera will be using and choose
whether to allow iWizard to automatically configure your
firewall.
Finally, select the mains frequency of your local power. Click
[Next] when ready.
Here it displays the old and new settings. When okay, click
[Next]. Click [Previous] if you wish to change the settings
you’ve made so far.
The iWizard will load the new settings into your IP camera.
Please wait patiently and do not interrupt the process.
We recommend you enter a new password to protect your
device. You can also click [Next] to skip this step. (The default
password is “admin”.)
Please check the device name, and its date and time setting.
And click [Next].
Follow the steps below to access your IP camera via WebVUer platform
on the Internet Explorer:
1. Open the Internet Explorer.
2. Enter the IP camera’s address. (192.168.0.x). Use the iWizard to scan
for your camera should you forget its address.
3. A dialog box that request the user name and password appears;
enter a valid user name and password, and then press [OK]. The
default user name and password are both “admin”.
4. Internet Explorer shows a message asking for user permission to
install the software from “Compro technology, Inc.” Please click on
the message and choose to install the ActiveX.
5. And then the reconfirmation dialog box appears. Please click [Install]
twice to install both the “USActiveX.cab” and “ComproClientActivex.
cab” on your system.
6. Meanwhile, the Windows Security Alert dialog box may appear.
Please click [Unblock] to unblock it from firewall.
7. Now you can start using WebVUer on your web browser to watch
live video from your IP camera.
Accessing on Internet Explorer
P/N: 3GA0310712
Compro Technical Support Information
Before you request technical support, please check the troubleshooting
section in the user manual. You may fill out the online form (www.
comprousa.com/feedback/) or directly email to [email protected].
Compro Technology, Inc.
www.comprosecurity.com | Tel. +886 2 2918 0169 | Fax +886 2 2915 2389
3F, No.12, Alley 6, Lane 45, Pao Shin Road, Hsintien District, New Taipei
City 231, Taiwan, R.O.C.
© 2011 Compro Technology, Inc. All rights reserved.
No part of this document may be copied or reproduced in any form or by
any means without the prior written consent of Compro Technology, Inc.
Compro Technology reserves the right to make revisions to this publication
without obligation to notify any person or entity of any such changes.
Compro Technology is the registered logo of Compro Technology,
Inc. All other company and product names mentioned in this document are
registered trademarks of the respective companies.
This device complies with Part 15 of the FCC Rules.
Operation is subject to the following two conditions:
(1) This device may not cause harmful interference, and
(2) This device must accept any interference received,
including interference that may cause undesired operation.


