Compaq Presario V3000 - Notebook PC, Руководство пользователя
Ноутбук Compaq Presario V3000 - надежное устройство для работы и развлечений. Перед вами все необходимые инструменты в компактном корпусе. На сайте manualshive.com вы можете загрузить руководство пользователя бесплатно. Получите доступ к полезной информации для настройки и использования вашего ноутбука.
Поделиться
Скачать


Отзывы:
Нет отзывов
Похожие инструкции для Presario V3000 - Notebook PC

10005218 10012
Бренд: GFA Страницы: 24
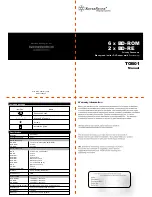
SST-TOB01
Бренд: SilverStone Страницы: 2

SK 750E Series
Бренд: Nord Drivesystems Страницы: 153

DL-PS/24-JB-OD-S Series
Бренд: Jesco Страницы: 2

USB 2.0 External DVD-R/RW
Бренд: Ikebana Страницы: 16

2K800
Бренд: ZF-DUOPLAN Страницы: 37

DVD Movie Writer
Бренд: HP Страницы: 24

CRD-8483B
Бренд: LG Страницы: 25

CRD-8320B
Бренд: LG Страницы: 16

CRD-8480B
Бренд: LG Страницы: 14

DRD-8120B
Бренд: LG Страницы: 16

GCE-8480B
Бренд: LG Страницы: 60

CRD-8481B
Бренд: LG Страницы: 14

GCE-8160B
Бренд: LG Страницы: 42

CRD-8402B
Бренд: LG Страницы: 25

GCC-4320B
Бренд: LG Страницы: 18

CRD-8522B
Бренд: LG Страницы: 14

CRD-8480M
Бренд: LG Страницы: 25


