COMO AUDIO SpeakEasy Скачать руководство пользователя страница 5

2.


18V/2.8A DC:

 Connect the included external Como Audio power supply to this input 

to power SpeakEasy and to charge its battery. Attach the appropriate snap-in plug 

to the power supply for your region. If the power supply is ever lost or damaged, use 

only a like replacement. 


3.


Reboot:

 Press briefly to reboot SpeakEasy if an issue occurs. Unlike the FDR button 

(#2 above), you will 

not

 lose any settings or need to repeat the setup in the Google 

Home app.  


4.


USB 5V/1A:

 Connect a smart phone for charging. Please be sure not to exceed the 5 

Volt/1 Amp rating. This jack will 

not

 play music from a USB thumb drive or an MP3 

player. 

 
5.


Speaker:

 Connect the optional wired SpeakEasy Speaker’s audio cable to this right 

channel output. Use only the Como Audio SpeakEasy Stereo Speaker with this 

output. 


6.


Mono/Stereo:

 Keep this switch in the Mono position unless the optional SpeakEasy 

Speaker is connected, in which case it should be placed in the Stereo position. In the 

stereo configuration, SpeakEasy will reproduce the left channel only and the 

SpeakEasy Speaker will reproduce the right channel only. Accordingly, it is suggested 

to position the optional SpeakEasy Speaker on the right side. The more distance 

between the two speakers, the better the channel separation and soundstage.  


7.


Battery compartment:

 The 2200mA 14.8V custom Li-Ion battery pack is user 

replaceable. Use only a genuine Como Audio replacement battery pack, as 

unauthorized batteries could pose a fire risk and are not covered under warranty. 

The display’s battery icon will illuminate whenever the battery is being charged. For 

more, see “Battery Playback”. 


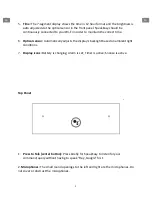
Bass Port/Carry Handle:

 Rest your palm on the top of the cabinet and insert 

your fingers inside the port to carry. Do not obstruct the bass port otherwise.  


Содержание SpeakEasy

Страница 1: ......

Страница 2: ... to unmute the microphones 3 Bluetooth Press briefly to place in Bluetooth mode Press and hold to discover new Bluetooth devices Open Bluetooth on your source device and search scan for the CA SpeakEasy name then pair and connect Once you ve paired you shouldn t need to do it again If your source device prompts you to enter a passcode enter 0000 Adjust the volume as desired 4 Assistant LEDs The 4 ...

Страница 3: ...ical sensor Automatically adjusts the display s backlight based on ambient light conditions 7 Display icons Battery is charging Alarm is set Timer is active Snooze is active Top Panel 1 Press to Talk center button Press briefly for SpeakEasy to listen for your command query without having to speak Hey Google first 2 Microphones The small round openings to the left and right are the microphones Do ...

Страница 4: ...o completely reset SpeakEasy have it power cycle and place it in Setup mode press and hold until the front panel assistant lights start to turn amber color then release the button All network settings and user specific settings will be lost ...

Страница 5: ...output 6 Mono Stereo Keep this switch in the Mono position unless the optional SpeakEasy Speaker is connected in which case it should be placed in the Stereo position In the stereo configuration SpeakEasy will reproduce the left channel only and the SpeakEasy Speaker will reproduce the right channel only Accordingly it is suggested to position the optional SpeakEasy Speaker on the right side The m...

Страница 6: ...network followed by Next 10 Enter your Wi Fi network password password is case sensitive Once this is done the clock will set automatically and the white LEDs will stop flashing initially the time might be incorrect but it will get updated in a minute 11 Partners select More and Next 12 Voice match select I Agree and speak the commands 13 Personal results select I Agree 14 Enter your address so Go...

Страница 7: ... device choose the same as entered in item 7 above and select Next 17 Select the name of your Wi Fi network 18 Enter your Wi Fi network password password is case sensitive and select Connect Once this is done the clock will auto set initially the time might be incorrect but it will get updated in a minute and the white LEDs will stop flashing 19 Set up Assistant select Next 20 Turn on settings for...

Страница 8: ... turn the alarm off while it is sounding briefly press the Play Pause knob or just say Hey Google stop the alarm The alarm will automatically turn itself off after 10 minutes if no action is taken but you ll still have to tell Google to cancel the alarm Timer To set the timer simply specify the amount of time in your command such as Hey Google set the timer for 20 minutes If you change your mind y...

Страница 9: ...The Como Audio Turntable via Bluetooth 1 Switch the Como Audio Turntable s Bluetooth switch On switch is located on right side of turntable 2 Press and hold SpeakEasy s Bluetooth knob last knob on right for 4 seconds and release You will hear a chime confirming connection 3 SpeakEasy s lights might continue to flash blue for some time This is normal If the turntable doesn t pair and connect within...

Страница 10: ...imer for 15 minutes How far away is the moon Be sure to locate SpeakEasy in an area without a lot of noise so the microphones can clearly pick up your voice SpeakEasy must be continuously connected to your Wi Fi network in order to work properly Troubleshooting Should you experience any unusual behavior please reboot your router before trying the rear panel FDR button described in the Rear Panel s...

Страница 11: ...er configuration soft dome tweeter and 3 custom woofer Wi Fi networks 802 11a b g n 2 4 Supported audio codecs MP3 WAV FLAC HE AAC LC AAC Vorbiz Opus Wi Fi frequency range 2400 2483 5MHz Energy efficiency Consumes 1 watt maximum in standby Consumes 37 watts at full volume 38 watts with the SpeakEasy Speaker connected Dimensions 242 mm H x 125 mm W x 130 mm D Weight 1 68kg 3 7 lbs This manual was w...

Страница 12: ... and Thomson Fraunhofer MPEG 4 HE LC AAC Audio decoder MPEG 4 HE AAC LC AAC audio coding technology licensed by Fraunhofer IIS http www iis fraunhofer de amm Certain features and services may not be available in all areas Subscription s may be required and additional terms conditions and or charges may apply For FAQs help videos blog articles and instruction manuals please visit www comoaudio com ...

Страница 13: ...r products using an external power supply use an exact replacement if lost or damaged 14 For added protection for this product during a lightning storm or when it is left unattended and unused for long periods of time unplug it from the wall outlet This will prevent damage to the product from lightning storms and power line surges 15 Unplug this product from the wall outlet and refer servicing to ...

Страница 14: ...or recycling Please contact your point of purchase for more details Como Audio models comply with the RoHS Restriction of Hazardous Substances directive Federal Communication Commission FCC Interference Statement FCC Part 15 This equipment has been tested and found to comply with the limits for a Class B digital device pursuant to Part 15 of the FCC Rules These limits are designed to provide reaso...

Страница 15: ... RSSs Operation is subject to the following two conditions 1 this device may not cause harmful interference and 2 this device must accept any interference including interference that may cause undesired operation of the device Le présent appareil est conforme aux CNR d Industrie Canada applicables aux appareils radio exempts de licence L exploitation est autorisée aux deux conditions suivantes 1 l...

Отзывы: