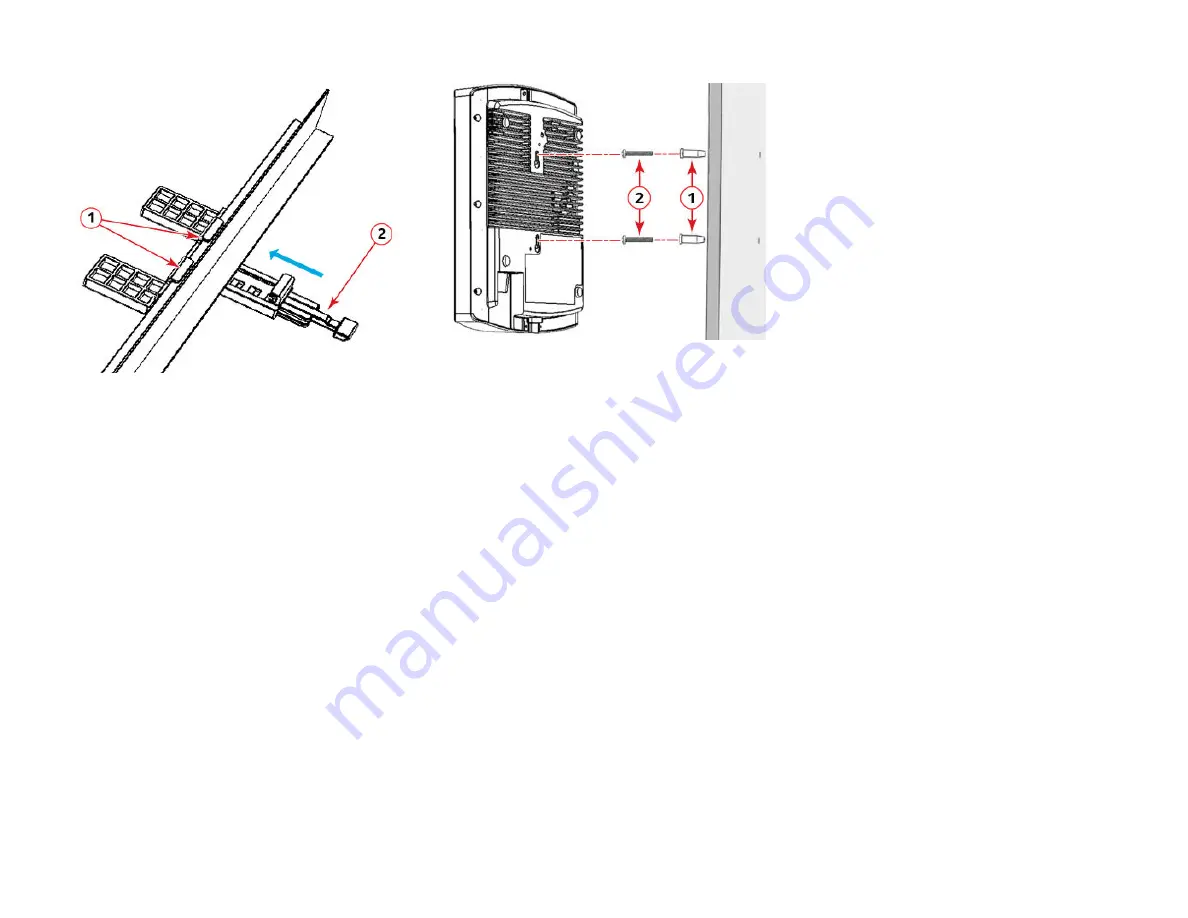
FIGURE 4 Attaching the T-bar bracket to the T-bar
7. (Optional) Attach a customer-supplied padlock through the bracket
AP retainer tab (2) to lock the AP to the T-bar bracket studs.
Mounting on a Flat Surface
The factory-supplied mounting screws and plastic wall anchors allow you
to attach the AP to a wall or other flat surface.
1. Use the Mounting Template on the last page of this Quick Setup
Guide to mark the locations for two drill holes on the mounting
surface.
2. Use a 4.75-mm (3/16-in.) drill bit to drill holes approximately 25-mm
(1-in.) deep into the mounting surface.
3. Insert the factory-supplied anchors (1 in the Figure below) and
mounting screws (2) into the mounting surface, leaving approximately
6-mm (1/4-in.) of the screw heads protruding for the AP enclosure.
FIGURE 5 Flat surface mounting
4. Place the AP onto the mounting screws so the screw heads enter the
keyholes on the AP enclosure, and push the AP down until the AP
retainer tab snaps into place.
5. (Optional) Attach a customer-supplied padlock through the integral
AP retainer tab to lock the AP to the mounting screw heads.
For More Information
For information on how to configure and manage the AP, refer to the
Ruckus Wireless Indoor Access Point User Guide, available from https://
support.ruckuswireless.com.
©
2020 CommScope, Inc. All rights reserved.
ARRIS, the ARRIS logo, CommScope, Ruckus, Ruckus Wireless, the Ruckus logo,
and the Big Dog design are trademarks of CommScope, Inc. and/or its affiliates.
Wi-Fi Alliance, Wi-Fi, the Wi-Fi logo, Wi-Fi Certified, the Wi-Fi CERTIFIED logo,
Wi-Fi Protected Access, the Wi-Fi Protected Setup logo, Wi-Fi Protected Setup,
Wi-Fi Multimedia and WPA2 and WMM are trademarks or registered
trademarks of Wi-Fi Alliance. All other trademarks are the property of their
respective owners.
Copyright
©
2020 CommScope, Inc. All rights reserved.
Page 3 of 4
Published April 2020, Part Number 800-72487-001 Rev B


