background image

Make sure to follow the instructions to prevent any danger or property losses.

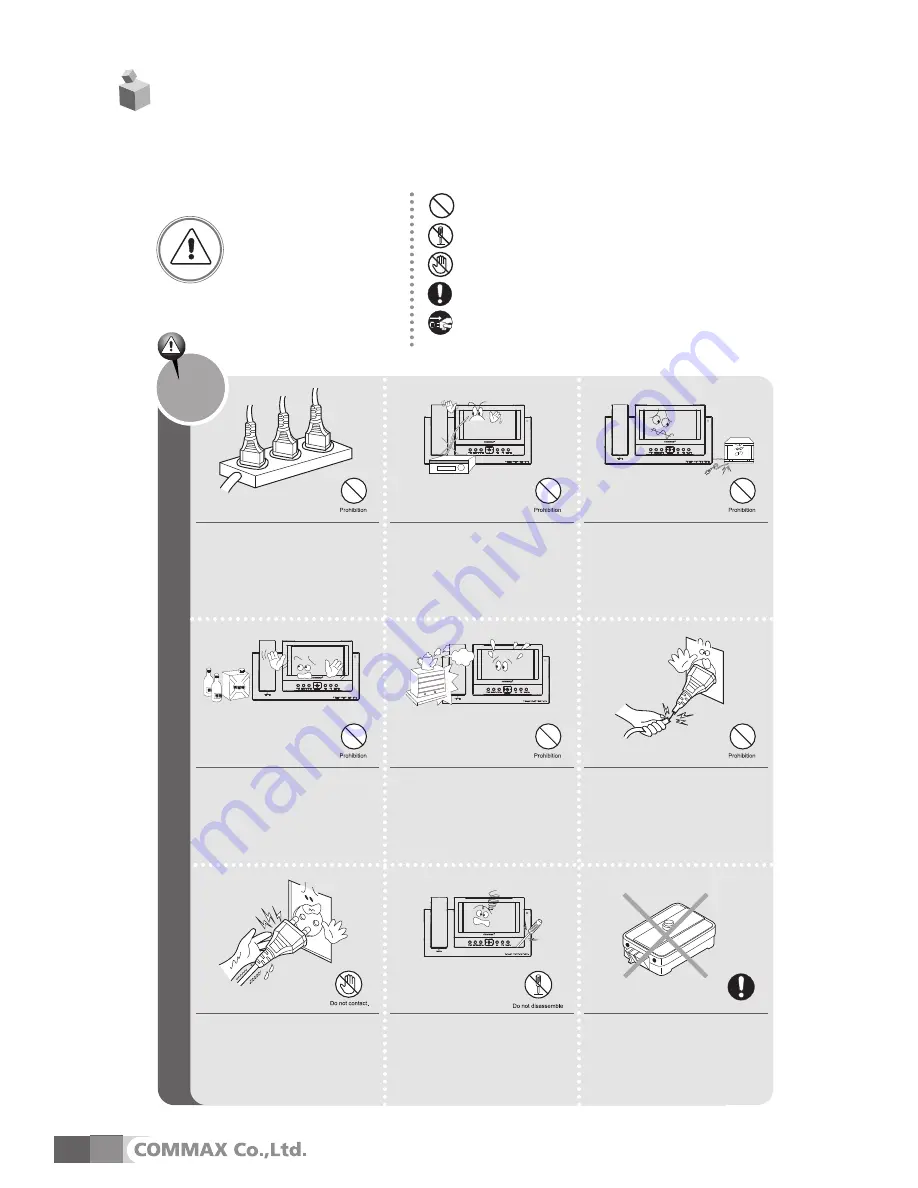
Do not put the plug in the socket
simultaneously.

It may generate abnormal heat 
or cause a fire.

Do not connect to other products
while in use.

It may cause breakdown.

Do not forcibly bend the cord or 
put a heavy object on the
product.

It may cause a fire.

Do not use water, thinner or a
detergent used to wash oil products
when you wash the exterior.

Make sure to wash it by using a dry cloth to
prevent any breakdown or electric shock.

Do not install the product in a
humid place.

It may cause an electric shock or 
a fire.

Do not forcibly pull out the
cord from the socket.

If the cord is damaged, it may
cause a fire or an electric shock.

Do not put the plug in the
socket with a wet hand.

It may cause an electric shock.

Do not disassemble, repair or
modify the product.

It may cause a fire, an electric shock
or an injury due to malfunction of the
product.

Do not use AC circuit breaker.

It may cause an electric shock.

It indicates prohibition.

It indicates prohibition of disassembly.

It indicates prohibition of contact.

It indicates dos and don’ts. 

It indicates that the plug should be pulled out from the socket.  

Warning

Death or serious 
injury is expected.

Warnings and caution

Содержание CAV-70BB

Страница 1: ...n dong Jungwon gu Seongnam si Gyeonggi do Korea Int l Business Dept Tel 82 31 7393 540 550 Fax 82 31 745 2133 Web site www commax com Thank you for purchasing COMMAX products Please carefully read thi...

Страница 2: ...on 3 Package 4 System Layout 5 Wiring Diagram 6 Installation Method 7 Operating Description Visitor Call Monitoring Interphone Function Burglar Function Review Function Product Setting 8 Check Point i...

Страница 3: ...product in a humid place It may cause an electric shock or a fire Do not forcibly pull out the cord from the socket If the cord is damaged it may cause a fire or an electric shock Do not put the plug...

Страница 4: ...id direct rays of the sun or heating devices at a time of installation Install the product in a flat and stable place Otherwise it may not function properly Pull the plug if the product is not used fo...

Страница 5: ...Room ID Interphone receiving rejection and RF ID are set Up direction key Left direction key Down direction key Control the power supply of product Execution button Right direction key Talk in calling...

Страница 6: ...wer supply Menu control by on screen display OSD RF 2 4GHz Wireless handset 2 Main function Interphone call and talk function Image storing 128 cut function Burglar function Door Open Function CCTV in...

Страница 7: ...nector The number of door camera connection 4 units Max CCTV Camera connectable The number of household monitor connection 20 units Max 100m at Cat 5 _6wire 24 29 28 27 30 26 25 3 5 6 9 13 14 15 11 12...

Страница 8: ...UNIT images Notes for connecting Maximum number per line from the slave connection terminal of main unit is 5 Please connect wiring terminal carefully on polarity Please use UTP CAT 5 for cable and 1...

Страница 9: ...able height for main unit is 1450 1500mm from the bottom to the screen Please arrange the handset after installation completed 145cm Installation method of monitor Notes for installing Please keep the...

Страница 10: ...tton to end while talking over the door camera by hands free put down the receiver to end communication while talking over handset When visitors call simultaneously at more than 2 cameras chose a came...

Страница 11: ...D menu restore is available only in case that the magnetic switch connected to the main unit is closed Press the REC IMAGE button and menu out finish It is showed from the last stored screen and all 1...

Страница 12: ...jection set It is set when you don t want to receive the Call from the other Room Switch to Inter Reject call mode with MENU SET button and select Yes Y or No N with RIGHT button and then the MENU is...

Страница 13: ...ith UP DOWN button and press the ENT button again The level is increased or decreased with LEFT RIGHT button and turn back to the previous menu after pressing MENU SET button again 5 5 Automatic recor...

Страница 14: ...rast Brightness Hue Color Reset Exit CONTROL MENU Contrast Brightness Hue Color Reset Exit Please adjust other screen adjustment on the same way To initialize the screen adjustment please press ENTER...

Страница 15: ...2 Please connect correctly to the terminal 3 Please refer to Room id setting related page The product does not produce the sound Call volume Talk volume 1 A sound volume lies in minimum or not 1 Plea...

Страница 16: ...LCD Call sound Door individual door ring electronic chime 3 sounds twice repeatedly Interphone electronic melody sound Power consumption On standby 4 4W On operating 17W Communication distance MAIN UN...

Страница 17: ...14 Memo...

Отзывы: