background image

8

106197

DECORATIVE PATIO FIRE

PROPANE/LP GAS

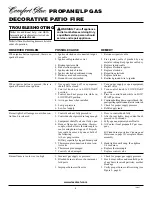
TROUBLESHOOTING

 WARNING: Turn off appliance

and let cool before servicing. Only
a qualified service person should
service and repair appliance.

POSSIBLE CAUSE

REMEDY

OBSERVED PROBLEM

Note:

 For additional help, visit DESA

International’s technical service web site
at 

www.desatech.com

.

Note:

 All troubleshooting items are listed in

order of operation.

www.desatech.com

1. Ignitor electrode not connected to igni-

tor cable

2. Ignitor cable pinched or wet

3. Broken ignitor cable
4. Bad electronic ignitor
5. Ignitor electrode broken
6. Ignitor electrode positioned wrong
7. Batteries are dead or missing
8. Ground wire not attached

1. Gas supply turned off or equipment

shutoff valve closed

2. Control knob not in LOW/START

position

3. Control knob not pressed in while in

LOW/START position

4. Air in gas lines when installed

5. Low gas pressure
6. Low fuel supply

1. Control knob not fully pressed in
2. Control knob not pressed in long enough

3. Equipment shutoff valve not fully open
4. Burner flame not touching thermo-

couple, which allows thermocouple to
cool, causing burner to go out. This prob-
lem could be caused by one or both of
the following:
A) Low gas pressure
B) Dirty or partially clogged burner ports

5. Thermocouple connection loose at con-

trol valve

6. Thermocouple damaged
7. Control valve damaged

1. Incorrect gas supply or pressure
2. Blocked burner orifice or burner mani-

fold ports

3. Improper burner orifice size

When ignitor button is pressed, there is no
spark at burner

When ignitor button is pressed, there is
spark at burner but no ignition

Burner lights but flame goes out when con-
trol knob is released

Burner flame is too low or too high

1. Reconnect ignitor cable

2. Free ignitor cable if pinched by any

metal or tubing. Keep ignitor cable dry

3. Replace ignitor cable
4. Replace electronic ignitor
5. Replace electrode
6. Reposition electrode
7. Replace batteries
8. Reattach ground wire to ignitor

1. Turn on gas supply or open equipment

shutoff valve

2. Turn control knob to LOW/START

position

3. Press in control knob while in LOW/

START position

4. Continue holding down control knob. Re-

peat igniting operation until air is removed

5. Check for proper supply pressure
6. Refill supply tank

1. Press in control knob fully
2. After burner lights, keep control knob

pressed in 30 seconds

3. Fully open equipment shutoff valve
4. A) Contact local propane/LP gas com-

pany

B) Clean burner ports (see Cleaning and
Maintenance
, page 10) or replace burner
assembly

5. Hand tighten until snug, then tighten

1/4 turn more

6. Replace thermocouple
7. Replace control valve

1. Check for proper gas supply pressure
2. Free burner orifice and manifold ports

of any burrs, lava rock particles, or other
blockage

3. Verify proper burner orifice sizing (see

Figure 2, page 4)

Содержание PC3460LP

Страница 1: ...service must be performed by a qualified installer service agency or the gas supplier WARNING Improper installa tion adjustment alteration service or maintenance can cause injury or property dam age R...

Страница 2: ...otherflammablevaporsandliquids 7 Do not place this appliance on grass or dirt Thismaypreventpropersafetyvent ing Only operate this appliance on a level outdoor noncombustible surface 8 Do not operate...

Страница 3: ...Check gas hose before each use If hose shows excessive wear or damage re place hose assembly before operating appliance See Cleaning and Mainte nance on page 10 for how to inspect inlet hose Use only...

Страница 4: ...r ga zebo They could be damaged or set on fire Locate this appliance on a level outdoor noncombustible surface Do not place this appliance on grass or dirt This may prevent proper safety venting Do no...

Страница 5: ...stall equipment shutoff valve in an accessible location The equip ment shutoff valve is for turning on and shutting off the gas to the appliance Apply pipe joint sealant lightly to male threads This w...

Страница 6: ...1 2 PSIG 3 5 kPa 1 The appliance must be isolated from the gas supply piping system by closing its individual manual shutoff valve during any pressure testing of the gas supply piping system at test...

Страница 7: ...ion in column 1 If you do not smell gas go back to step 1 4 Light a match and lay it on top of the lava rock just above the burner WARNING Do not use this applianceifanygascontrolparts have been under...

Страница 8: ...ocouple damaged 7 Control valve damaged 1 Incorrect gas supply or pressure 2 Blocked burner orifice or burner mani fold ports 3 Improper burner orifice size When ignitor button is pressed there is no...

Страница 9: ...leak SeeWarning statement at bottom of page 1 Sooting on the logs is natural OBSERVED PROBLEM Delayed ignition of burner Burner backfiring during combustion Fireplace produces a clicking ticking noise...

Страница 10: ...CEMENT PARTS Note Use only original replacement parts Thiswillprotectyourwarrantycoveragefor parts replaced under warranty PARTS UNDER WARRANTY Contact authorized dealers of this product or Parts Cent...

Страница 11: ...07764 1542 732 870 8809 1 800 755 8809 Parts Department www njplaza com ecep Tarantin Tank Co P O Box 6129 Freehold NJ 07728 6129 908 780 9340 1 800 922 0724 Parts Department www tarantin com Dayton H...

Страница 12: ...12 106197 DECORATIVE PATIO FIRE PROPANE LP GAS ILLUSTRATED PARTS BREAKDOWN PATIO FIRE PC3460LP 3 18 19 1 4 17 19 12 2 13 5 22 26 10 14 7 9 15 8 6 11 23 16 24 25 21 20...

Страница 13: ...Knob 1 10 106137 01 Thermocouple 1 11 106122 01 T C Bracket LP 1 12 106711 01 T C Cover 1 13 106120 01 Front Mounting Plate 1 14 106121 01 Control Bracket 1 15 106130 01 Spark Module 1 16 106715 01 G...

Страница 14: ...to repairing a defective appliance will be the responsibility of the owner TOTHEFULLEXTENTALLOWEDBYTHELAWOFTHEJURISDICTIONTHATGOVERNSTHESALEOFTHEPRODUCT THIS EXPRESS WARRANTY EXCLUDES ANY AND ALL OTHE...

Отзывы: