background image

This page remains blank intentionally.

Содержание 8412F

Страница 1: ...R DXP DXP Plus and FX Series Digital Communications Systems Large Screen Speakerphone Reference Manual MESSAGE 0 WXY 9 TUV 8 PRS 7 GHI 4 JKL 5 MNO 6 DEF 3 1 ABC 2 TAP HOLD TRNS CONF SPEAKER MUTE SHIFT R ...

Страница 2: ...way with problems which may be encountered by incompatible features Notwithstanding anything contained in this publication to the contrary Comdial makes no representation herein as to the compatibility of features This reference manual applies to the following system and telephone models System Models DXP systems with software 13A and later DXP Plus systems with software 13A and later FX Series wi...

Страница 3: ... Calls 2 4 2 5 Making A Call Pick Up 2 5 2 6 Responding To A Subdued Off Hook Voice Announcement 2 6 3 Making Calls 3 1 3 1 Dialing Manually 3 1 3 2 Dialing Automatically 3 2 3 3 Using Dial By Name 3 3 3 4 Redialing A Previously Dialed Number 3 4 3 5 Using Line Groups 3 8 3 6 Waiting For A Line Queuing 3 9 3 7 Making Intercom Calls 3 10 3 8 Camping On At A Busy Station and Waiting For An Automatic...

Страница 4: ...ns Busy Button Inquiry 7 2 7 4 Displaying Button Functions Button Query 7 3 7 5 Diverting Incoming Calls To Another Station 7 3 7 6 Entering Account Codes 7 4 7 7 Entering Authorization Codes 7 5 7 8 Forwarding Calls 7 6 7 9 Listening To A Call Over The Telephone Speaker 7 7 7 10 Making A Call Non Private Privacy Release 7 8 7 11 Monitoring A Conversation Between Two Telephones Service Observing 7...

Страница 5: ...ing LCD Messages 8 3 8 3 Sending Response Messages 8 5 9 Programming Your Telephone 9 1 9 1 Programming For Speed Dialing 9 1 9 2 Storing Speed Dial Numbers 9 3 9 3 Storing DSS Numbers 9 4 9 4 Using The Feature Buttons 9 5 9 5 Storing A Response Message Button 9 7 9 6 Storing Access Codes 9 8 9 7 Setting A Reminder Alert 9 9 10 Using The Attendant Features 10 1 10 1 Using The Special Attendant But...

Страница 6: ...This page remains blank intentionally ...

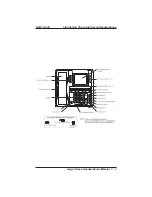
Страница 7: ...adset 1 4 Understanding the Display Abbreviations 1 5 Knowing Your Speakerphone s Functions 1 6 Understanding What The Lights Mean The operation chapters define often used features and provide instructions for their use These chapters are titled as follows 2 Answering Calls 3 Making Calls 4 Placing Calls On Hold 5 Transferring Calls 6 Conferencing Calls The special purpose features of the telephon...

Страница 8: ...gramming instructions are found in the following chapter 9 Programming Your Telephone For your convenience a troubleshooting chart is provided in the following chapter 10 Using The Attendant Features If you operate an attendant station you will use the special features provided in the following chapter 11 Troubleshooting Your Telephone There is a quick reference chart in the following chapter Appe...

Страница 9: ...x mode depending on the current line conditions For example satellite calls or calls with a delay involved may prevent the telephone from operating in full duplex mode To operate in full duplex mode the telephone must perform a speech training test at the beginning of each call To achieve optimum performance from the full duplex speakerphone Comdial recommends that each user in turn speak about 10...

Страница 10: ... beyond 24 milliseconds standard configuration The speakerphone may automatically reduce the volume in each direction when both you and the distant party talk at the same time double talk This volume reduction is necessary to control the echoes at high volume levels It is possible for surrounding conversations and other sounds to trigger double talk even when you are not speaking This condition ma...

Страница 11: ... the distant party s voice Lowering the volume of the loudspeaker makes it easier for the switches to select your voice Since the system takes several seconds to provide the best switching constant sound patterns such as elongating your words and playing externally supplied music may prevent the sound activated switches from operating properly Place the telephone on a hard surface and away from ta...

Страница 12: ... Press the preprogrammed speed dial or DSS button and speak toward the telephone when your party answers To answer a call with your speakerphone 1 Press the INTERCOM or line button with flashing red or orange light 2 Speak toward the telephone to answer the call 3 To end a call with your speakerphone just press SPEAKER 1 6 Large Screen Speakerphone Manual Introducing The Large Screen Speakerphone ...

Страница 13: ...Large Screen Speakerphone Manual 1 7 GCA70 349 Introducing The Large Screen Speakerphone ...

Страница 14: ...isconnect cord into the modular handset headset jack on the bottom of the telephone and route it through the routing channel Make sure the section of cord you plug into the telephone jack has the female receptor jack 4 Plug the male end of the headset cord into the female end of the quick disconnect cord To switch from headset operation to handset operation 1 Unplug the handset cord from the modul...

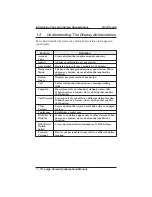
Страница 15: ...hone has 13 interactive buttons for selecting or programming features When your speakerphone is idle the first line in your display shows the date and time while the sixth line displays the word OPTIONS If your system is using the voice mail option this is also indicated in the sixth line by the word VMAIL If your voice mail has four messages for you for example the VMAIL display is replaced by 4 ...

Страница 16: ...amp On Has system call you when busy station becomes idle When chosen as a feature stores a button that enables the function Call Forward Forwards all of your calls to a different station location When chosen as a feature stores a button that enables the function Clear Features Stores a button that clears a currently active or engaged feature Conference Establishes a conference DND Do Not Disturb ...

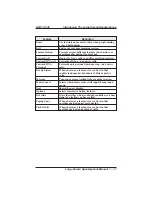
Страница 17: ...feature stores a button that enables loud speaker broadcast of distant party s voice Message Turns on message waiting light at another station Music Source Selects which music source will supply background music Next Shows the next display Options Selects interactive button features Override Overrides either a do not disturb condition or a busy signal at a station you have called Paging Zone When ...

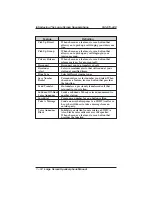
Страница 18: ...er Redial Permanently saves last number you dialed When chosen as a feature stores a button that provides the function Send Transfer Re transfers a previously transferred call that returned to your station Subdued Off Hook Voice Announce Sends a subdued off hook voice announcement to another station Speeddial Programs a number for one button calling Take A Message Send a non verbal response to a S...

Страница 19: ...on hold Stores pauses in number sequences during programming Scans or scrolls through calls placed on hold when hold light is flashing in order to access with the TAP button a call other than the last one placed on hold information about each held call appears in your display as you scroll through them Scrolls through LCD response messages Interactive Buttons Provide quick and easy access to syste...

Страница 20: ...and or automatically dialing speed dial numbers That is you can store two speed dial numbers at every programmable button location one in the regular tier and one in the second tier You activate the shift function by pressing this button and turning the shift light on before storing or automatically dialing a speed dial number from the second tier Speaker Sounds distant party s voice Sounds ringin...

Страница 21: ...ight set for you by station associated with that DSS button Next to a line button Steady green this is your line either on hook in a handsfree mode or off hook when the line is active Steady red another station is using this line Flashing red a call is coming in on this line Flashing orange this line will be answered when you lift the handset Winking green with repetitive off periods your line is ...

Страница 22: ...ing transferred to you Next to the HOLD button Fast flashing red message awaits pick up Winking green with repetitive off periods a line is on hold at your station Next to the SPEAKER button On steady with the telephone on hook and busy speakerphone mode is active On steady with telephone on hook and idle background music is turned on Flashing feature viewing and programming is in progress Next to...

Страница 23: ...d pivot the telephone supporting arms upward with your other hand while feeling for the notches under the telephone Notice there are three sets of notches under the telephone corresponding to the three positions available 3 When the telephone is at the desired height find the closest pair of notches and place the supporting arms in the notches Press down slightly on the telephone until you feel th...

Страница 24: ...This page remains blank intentionally ...

Страница 25: ...lash for any other ringing line When you hear outside ringing and observe a flashing light answer the call as follows 1 Lift handset or press line button and speak toward telephone if light is orange OR press button of ringing line if flashing light is red and speak toward the telephone lift handset if privacy is desired When a call rings at your station the ringing line number or name appears in ...

Страница 26: ...voice announce calls if you wish See the discussion titled Blocking Voice Announce Calls for details When you hear intercom ringing followed by a caller s voice 1 Speak toward the telephone to answer or lift handset if privacy is desired When you hear intercom ringing two short ring bursts 1 Press INTERCOM and speak toward telephone lift handset if privacy is desired When an intercom call rings at...

Страница 27: ...e the BLF light shows activity status at the monitored telephone To monitor another telephone 1 Observe the BLF light indications next to the personal intercom appearance DSS button Off idle Flashing ringing On busy or on hold NOTE If you do not have the station monitoring feature the BLF light shows just the following information Off idle On busy To call an idle monitored station or to answer one...

Страница 28: ...r may choose different night answer dialing codes than those default values detailed in this procedure When in doubt ask your system attendant what codes are active at your site If your telephone rings 1 Press line button with flashing light 2 Lift handset to talk When you hear loud ringing anywhere in the system 1 Lift handset 2 Press INTERCOM 3 Dial 65 through 68 to select ringing zone 1 4 that ...

Страница 29: ... INTERCOM 2 Dial 4 3 Dial extension number of ringing telephone 4 Speak toward telephone to answer call Lift handset if privacy is desired If you have programmed a PICK UP button on your telephone see Storing The Feature Buttons in the chapter titled Programming Your Telephone in this guide you may make a call pick up either within your group or at a specific station inside or outside your group u...

Страница 30: ...d the REPLY button and speak into handset Distant party cannot hear response To return to distant party after your reply is complete release the REPLY button Non verbally Response Messaging If the announcing station has an LCD speakerphone press MESSAGE then select one of the messages appearing in your LCD by pressing the corresponding interactive button The message you select appears in the displ...

Страница 31: ...t a line for use when you lift the handset To dial an outside number manually 1 Press line button to select line remember selecting a line is not necessary if a prime line or idle line preference feature is assigned to your telephone and if you lift the handset or press SPEAKER to begin the call 2 Listen for dial tone 3 Dial number 4 Lift handset if privacy is desired Large Screen Speakerphone Man...

Страница 32: ...s on your station 1 Press preprogrammed speed dial button line selection is usually a part of the stored speed dial number OR press preprogrammed SHIFT button then press preprogrammed button to choose number stored as a second choice at that button With your station idle you can automatically dial a personal or system speed dial number stored at a dial pad location To speed dial a personal speed d...

Страница 33: ...elected or shows a No Name Match message if the system cannot find a match NOTE All the names starting with the letters you selected will appear but they will not be in alphabetical order 4 Press NEXT to display the subsequent names in the index until you reach the name you need 5 If the display says No Name Match press PREV to return to the list of letters 6 Press the button next to the name you ...

Страница 34: ...em installer has preprogrammed If a distant party tells you an important telephone number and you want to immediately save it for later redial you can use the SAVED NUMBER REDIAL button to permanently save the first 16 digits of that number You will overwrite a temporary system saved number with subsequent dialing activity however a permanently saved number remains available until you overwrite it...

Страница 35: ...ion or the system has dialed the number a preprogrammed number of times determined by your system installer 3 The LCD displays the words AUTO REDIAL and CLEAR 4 When the distant party answers the call press the AUTO REDIAL button while on the call to cancel automatic redialing OR if your installer has enabled answer supervision on your line the system automatically cancels automatic redialing 5 If...

Страница 36: ...c redial queue The display shows the last number dialed 2 To remove the number from the redial queue press REMOVE OR to exit from the redial queue press EXIT To cancel the automatic redial feature 1 Perform any user activity at the station go on hook press the speaker button etc OR press 72 to delete all numbers from the redial queue OR press the AUTO REDIAL button while the number you wish to rem...

Страница 37: ...ou ve just dialed 1 While the number is still ringing press the MORE button then press SAVE 2 Select an unused programmable button location To dial the saved number 1 Press button where you saved the number Large Screen Speakerphone Manual 3 7 GCA70 349 Making Calls ...

Страница 38: ... an individual line for use If your system has line groups access them as follows 1 Press INTERCOM 2 Dial desired line group access code 9 line group 1 80 through 89 line groups 2 through 11 60 through 64 line groups 12 through 16 OR press preprogrammed line group button 3 Listen for outside dial tone 4 Dial desired number 5 Lift handset to talk These are the default system codes Your installer ma...

Страница 39: ...TERCOM 2 Dial the line group access code 3 Hear busy tone 4 Dial S 6 If you have line appearance for a particular line and wish to queue for it 1 Note the busy status light LED 2 Press INTERCOM 3 Dial 6 4 Press line button 5 When line group is free your telephone sounds several short tone bursts When you hear this lift handset hear dial tone and place call To cancel line queuing or line group queu...

Страница 40: ...ions assume a tone first setting Any user can change a call to voice announce signaling for that call simply by pressing the INTERCOM button again after dialing the extension number or by pressing the DSS button again To manually cause the other telephone to ring tone calling 1 Press INTERCOM 2 Dial extension number called telephone will ring To tone call automatically 1 Press DSS button called te...

Страница 41: ...phone will ring with five short tone bursts When you hear five short tone bursts 1 Press INTERCOM The other telephone will start ringing 2 If you do not press INTERCOM after the ring back tones within the time limit set by the installer the call back is canceled at that time however you can cancel automatic call back at any time before your telephone sounds the tone bursts To cancel the call back ...

Страница 42: ...e to calls you make in the voice announce mode 3 10 Camping On At A Busy Station And Waiting For An Answer Call Waiting If the telephone you have called is busy you can send a call waiting tone to the telephone and wait on the line for an answer you must be using the handset for this feature to work To activate call waiting when you hear a busy signal 1 Dial 6 called party hears tone 2 Wait on lin...

Страница 43: ...em installer has enabled the executive override feature at your telephone If the feature is not enabled through programming an error tone will sound and screen options will remain displayed To override an in progress call at another telephone 1 Make intercom call and hear a busy signal 2 Dial 03 all parties will hear several tone bursts 3 Join in progress call To override a Do Not Disturb conditio...

Страница 44: ...ecide not to interrupt the called party hang up OR to interrupt press SOHVA and hear several quick tone bursts 4 Make announcement busy tone means that the called telephone is in speakerphone mode and you cannot make announcement that your SOHVA has been denied through system programming or that the called party has blocked your SOHVA 5 Wait on line for reply either verbal or LCD reply NOTE You ca...

Страница 45: ...ound at your telephone and speed up the flash rate of the line button light If the call is on exclusive hold it will revert to manual hold recall after a time out period When you answer a call on a group intercom and place it on hold the system keeps the call on hold on the group intercom This means that you or any other user can pick up this call at any station that has access to the group interc...

Страница 46: ...ther you have line appearance for the line on which the call is holding To place a call on exclusive hold 1 Press HOLD twice To retrieve exclusive hold 1 Press line button of held call with flashing light OR press TAP if station does not have line appearance To place a call on directed station hold 1 Answer call 2 Press INTERCOM 3 Dial S90 4 Dial extension number of station to receive held call 5 ...

Страница 47: ...system provides a way for you to access that call To display a list of held calls and retrieve a specific one 1 Wait at least 5 seconds after placing the most recent call on hold and then press the HOLD button again Your telephone will display a list of up to eight held calls identified by their line numbers or line names that are on hold The calls are displayed in the order they were placed on ho...

Страница 48: ...hold after the hold recall period you will hear four short tone bursts at 12 second intervals Calls that revert to manual hold can be picked up from any telephone with line appearance for the recalling line or you can use the group or directed pick up buttons GPKUP or DPKUP If a held line is recalling 1 Answer retrieve recall 2 Press HOLD to place the call on hold at your station and restart HOLD ...

Страница 49: ...K button at your telephone see section 9 5 Using The Feature Buttons and use it to simplify your call parking efforts To park a call in orbit 1 While on the call press INTERCOM 2 Press S OR press TRANSFER CONFERENCE if intercom call 3 Dial code for park orbit 910 999 for orbit 1 90 4 Remember the code for later use or make it known to those who need to know it in order to retrieve the call To park...

Страница 50: ...n connect to your station To place a park recall on hold at your station 1 Press HOLD If the call remains on hold for a period of time it will ring back to your telephone as a hold recall To re park a park recall and restart the park timer 1 Answer retrieve call this step is only necessary if you wish to talk to the person before re parking the call 2 Press PARK the call will then be placed back i...

Страница 51: ...lephone Again you have several options for servicing the returning call To screen and transfer a call to another telephone in the system 1 Answer call or make call 2 Press TRANSFER CONFERENCE call is automatically placed on hold 3 Dial extension number of telephone to receive transfer or press DSS button for that extension 4 When intercom party answers announce call 5 Press SPEAKER to disconnect i...

Страница 52: ...3 Press MESSAGE to leave a message waiting indication at the called station 4 Press CALLBACK to camp on at the called station If the intercom party does not answer their telephone when ringing take one of the following steps 1 Press RECONNECT to reconnect the call to your station 2 Press MESSAGE to leave a message waiting indication at the station 3 Press CALLBACK to camp on at the called station ...

Страница 53: ... the returning call To transfer an unscreened call to another system telephone 1 Answer call 2 Press TRANSFER CONFERENCE call is automatically placed on hold 3 Dial extension number of telephone to receive transfer or press DSS button for that extension 4 Press SPEAKER to disconnect if in speakerphone mode or hang up The transfer will ring at the called telephone NOTE Unscreened transfers ring at ...

Страница 54: ...ll over the telephone s speaker but the person receiving the outside line transfer will need to lift the handset to answer the call the telephone will not ring after the announcement is made Please note that you cannot make a hot transfer to a telephone if its user has enabled the Voice Announce Block feature This telephone will automatically ring with the transfer requiring the intercom party to ...

Страница 55: ...henever you answer a call and then dial the intercom number for the transfer location To do a quick screened transfer 1 Answer call 2 Dial intercom number for transfer location 3 When party at transfer location answers announce call 4 Hang up press RELEASE or press SPEAKER button To do a quick unscreened transfer 1 Answer call 2 Dial intercom number for transfer location 3 Hang up press RELEASE or...

Страница 56: ...This page remains blank intentionally ...

Страница 57: ... parties in various combinations in a conference call If you are involved in a conference call with two outside lines you can drop out of this established conference call and leave the outside lines in the conference with each other This is known as an unsupervised conference call To set up a conference call that includes any combination of outside lines and intercom parties 1 Make first call 2 Pr...

Страница 58: ...nd in use until one or both outside parties disconnect when only one party drops out of an unsupervised conference the other party remains on hold until he hangs up or the line is answered To rejoin an unsupervised conference between two outside lines 1 Press TAP NOTE Conference volume levels depend upon the quality of the external lines To drop a party out of a conference call 1 Press DROP PARTY ...

Страница 59: ...ss of the button makes the display darker until you go past level eight and return to level one 4 Press EXIT to end 7 2 Blocking Voice Announce Calls You can prevent voice announcements from sounding over your telephone speaker if you wish This feature also blocks subdued off hook voice announcements To block voice announced calls 1 Press OPTIONS then press PROGRAMMING 2 Set voice announce block t...

Страница 60: ...m presents the station or line information on your display for 10 seconds after you request it If your station does not have this feature the system presents busy information on the display without identifying the line or the station To identify the station that occupies a busy line 1 Press button for busy line 2 Read your display for intercom number of station that is busy on line To identify the...

Страница 61: ...ill hold for few seconds before the telephone returns to idle 7 5 Diverting Incoming Calls To Another Station Call diverting permits you to send an incoming call to another station that you have previously designated You can divert an incoming call to the designated station whether you are busy or idle To identify the station to receive diverted calls 1 Press INTERCOM 2 Dial S55 3 Dial extension n...

Страница 62: ... programming section of this user s guide for details To enter account code on an incoming call 1 Press ACCOUNT CODE OR Press preprogrammed ACCOUNT CODE button OR Press INTERCOM then dial 04 call is automatically placed on hold but will return from hold after you ve dialed the account code 2 Dial account code To enter account code on an outgoing call 1 Press line button LCD will prompt for Account...

Страница 63: ... they remain in effect until any idle time exceeds the authorization code time out period If your telephone includes an installer programmed LOCK button you can press it and then dial your authorization code to deny other users access to lines and features at your LCD speakerphone To activate walking class of service 1 Select system telephone to use 2 Press INTERCOM 3 Dial 08 4 Dial your authoriza...

Страница 64: ... this feature is valuable if you are frequently away from your desk for short periods of time and find it inconvenient to permanently forward your calls every time you leave The system installer sets the number of rings that sound at your telephone before the system forwards the calls To forward your calls 1 Press OPTIONS then press PROGRAMMING 2 Press NEXT until the CALL FORWARD option appears 3 ...

Страница 65: ...istening feature also works if you are using your headset only the headset microphone will be active To activate group listening while on a call 1 Press the MORE button then press the GROUP LISTEN button NOTE To activate the group listening feature press SPEAKER for two seconds To cancel group listening 1 Press the GROUP LISTEN button again NOTE You should cancel Group Listening before hanging up ...

Страница 66: ...lowing other telephones with line appearance for the line being used to join the call Privacy returns to the line when the call is completed Refer to the chapter on programming for instructions on how to program the PRIVACY RELEASE button To release privacy from your telephone while on a call 1 Press preprogrammed PRIVACY RELEASE button The light associated with the PRIVACY RELEASE button will rem...

Страница 67: ...eakerphone mode or off hook To monitor another station at any time 1 Press INTERCOM 2 Dial 0 3 3 Dial extension or press DSS of station you wish to observe 4 Press SPEAKER to end monitoring If you have an installer programmed SERVICE OBSERVE button on your telephone and wish to monitor a station 1 Press SERVICE OBSERVE button 2 Dial extension or press DSS of station you wish to observe 3 Press SPE...

Страница 68: ...des This arrangement sounds your voice announcement through the telephone speakers All call sounds the announcement through all telephones while zone paging sounds the announcement only through those telephones located in a specific area Check with your system administrator to determine the type of paging and access method you should use If your day to day operation requires that you send many pag...

Страница 69: ...ply known as a meet me page OR hang up handset At times other telephone users may page you with instructions to meet them on line This is known as a meet me page You can go to the nearest telephone dial a code and be in contact with the paging party To reply to a meet me page 1 Lift handset of nearest telephone 2 Press INTERCOM 3 Dial 78 4 Meet paging party on line Large Screen Speakerphone Manual...

Страница 70: ...self with quick access to this feature if you wish See the programming section of this user s guide for details To enable or disable the Do Not Disturb proceed as follows 1 Press OPTIONS then press PROGRAMMING 2 Press the DO NOT DISTURB to the right of the LCD to toggle the Do Not Disturb feature on or off 3 Press EXIT To set a do not disturb condition at your telephone when a call rings at your s...

Страница 71: ...level for any volume control setting When loudness is at desired level press the SAVE button The level will remain at this loudness referred to as the default setting until you change the setting NOTE The Impact SCS 8412S and SCS 8412F support the optional ICVOL handset The ICVOL is an amplified handset with its own volume control making it useful in noisy environments For ordering information con...

Страница 72: ...rrent handset setting the default setting press SAVE There are eight headset loudness levels that you can set for the current call as follows 1 While on a call and using the headset press the VOLUME UP or VOLUME DOWN button once for each change in loudness you desire 2 To make the current headset setting the default setting press SAVE There are eight group listening loudness levels Set the level f...

Страница 73: ...ng Tones You can choose one of eight different ring tones for your telephone Often when several telephones are located close together each user chooses a different personal ring tone To select one of the ring tones proceed as follows 1 Press OPTIONS then press PROGRAMMING 2 Press NEXT until the RING TONE option appears 3 Press the RING TONE button to the right of the LCD to scroll through the ring...

Страница 74: ...To convert to tone dialing at any time during dialing or while on an active call 1 Press 7 18 Using Background Music If the telephone system supplies background music you can turn it on at your LCD speakerphone while it is on hook and idle The system automatically turns background music off during calls and voice announcements To turn the music on or off 1 Press OPTIONS then press PROGRAMMING 2 Pr...

Страница 75: ...by your system installer a designated station where you can talk to the system attendant a digital voice announce that will prompt you to take additional action a proprietary voice mail station where you will be prompted to leave a message The system allows you three tries at dialing your authorization code before it routes your call as detailed above Some systems provide voice prompts to DISA cal...

Страница 76: ...call to use system features 1 Dial number for DISA line listen for voice prompt if available 2 Dial authorization code listen for voice prompt if available otherwise hear stutter style dial tone remember the system gives you only three tries to dial your code correctly 3 Dial feature code and listen for acknowledgment tone NOTE If you are selecting a line group through DISA for outside calling you...

Страница 77: ... Message wait off 3 Message waiting set S3 Personal speed dial S01 System speed dial S01S Tracker access S8 Tracker page orbit retrieval 8 Trunk group access 9 80 89 60 64 Zone paging 70 77 You must have an assigned personal intercom number to use this feature Your system must provide the Tracker option to activate this feature Large Screen Speakerphone Manual 7 19 GCA70 349 Using The Other Teleph...

Страница 78: ...tercom number you can receive messages that someone else sends you The system automatically installs the Tracker pager for your use however you can disable it when you do not wish to receive paged messages and when you leave at the end of your day Of course if you do disable your Tracker pager at the end of your day be sure to enable it at the beginning of your next day Your LCD speakerphone inclu...

Страница 79: ...to display the subsequent names in the index until you reach the name you need 4 Hear confirmation beep Tracker page accepted or hear busy tone Tracker page not accepted To use Tracker to transfer a call to a park orbit for retrieval and transmit the call s park orbit code and caller ID information if available 1 Answer call and press TRANSFER 2 Dial extension number 3 If the called station does n...

Страница 80: ...yed parked call If you receive a parked call message on your Tracker pager 1 Go to any system station 2 Press INTERCOM 3 Dial Tracker pager displayed orbit code 800 899 4 Retrieve call To enable or disable a Tracker pager at your station 1 Press INTERCOM 1 Dial 06 to disable OR dial 07 to enable 2 Press SPEAKER to end 7 22 Large Screen Speakerphone Manual Using The Other Telephone Features GCA70 3...

Страница 81: ...S access code 9 2 Wait until you hear a dial tone then dial the intercom number for the party you wish to reach at the remote site You will hear a fast busy signal if you dialed an invalid number To transfer a call over an E M tie line 1 Answer the incoming call 2 Press CONFERENCE 3 Dial the E M access code assigned by the installer OR if your system was configured by the installer to use Automati...

Страница 82: ...the line to line connection timer expires To set up a conference call on an E M tie line 1 Make first call 2 Press CONFERENCE call is placed on hold automatically 3 Select next line and make next call 4 Press CONFERENCE to establish conference 5 Press TRANSFER CONFERENCE button to add more parties for up to a 7 party conference including yourself To continue conversation on remaining line after ot...

Страница 83: ...rence circuits Since CFOS involves outbound calls those calls are subject to all line access toll restriction and automatic route selection restrictions normally imposed on your calls The CFOS feature is useful if you need to forward your after hours calls to an alternate site such as your home or cellular telephone To activate CFOS with your LCD speakerphone 1 Press OPTIONS PROGRAMMING NEXT CALL ...

Страница 84: ...ding CFOS which protect against unauthorized or fraudulent access to or use of a system or which protect against unauthorized fraudulent or unaccounted for access to or use of long distance lines However no system is entirely invulnerable or immune from unauthorized or fraudulent access or use or unaccounted for access or use and therefore Comdial disclaims any and all liability and makes no warra...

Страница 85: ...on or prime line access Further an out of service line is available for all inbound calls unless it is a DID line You cannot mark a line during a conference call or if you are calling in as a DISA caller The system manager can use the line disable feature at the programmer s station to restore service on the out of service line To mark a line 1 Press the MARK button on your telephone OR press INTE...

Страница 86: ...e the programming in the new location To maintain the extension number and programming features from the old location 1 Connect the telephone line cord to the new jack 2 Press YES to retain the extension number and programming from the previous location To assume the extension number and programming features of the new location 1 Connect the telephone line cord to the new jack 2 Press NO 7 28 Larg...

Страница 87: ...the appropriate digital station board and memory board If your system does not have the optional enhanced memory board the IMIST module will function like the one on the DXP system described above On an FX Series system the speakerphone and IMIST module can function simultaneously and the IMIST module has its own extension number NOTE The IMIST module does not provide voltage to light a message wa...

Страница 88: ...ions on programming this button To scroll through ring no answer numbers stored on your system 1 If your CID light is flashing the system has unreturned ring no answer numbers stored in memory 2 To view the list of unreturned ring no answer number press the preprogrammed CID button on your telephone Your LCD will display the calling number date and time the call came in The most recent call appear...

Страница 89: ...button 2 Press the CALL LOG button The LCD displays the last 10 phone numbers you dialed or the numbers that called you if you have caller ID Incoming calls are designated with an I to the left of the number and outgoing calls are designated with an O 3 To scroll through the lists of numbers press the NEXT or PREV buttons 4 To display the time of a call press the corresponding button to the right ...

Страница 90: ...This page remains blank intentionally ...

Страница 91: ...the station user takes his or telephone off hook If a telephone that receives a message has a DSS button that is programmed to call the station that left the message the light next to that DSS button on the message receiving station will flash To turn on the message waiting light and a broken dial tone at another station that is idle or busy 1 Press INTERCOM 2 Dial S 3 3 Dial extension number of s...

Страница 92: ...ss INTERCOM once if off hook twice if on hook NOTE Only the person who sent the message and the person receiving the message can turn the indicator off To receive a message at an alerted station 1 Observe flashing message waiting light and the LCD message indicating who called for you 2 Press CALL to dial the messaging station automatically OR press CLEAR to clear the message from your station 8 2...

Страница 93: ...ng the corresponding interactive button If you need to scroll through the list of available messages press the NEXT button If you use the default messages Back at and Call add to them as follows For Back at message dial the code for time numbers and colon from dialing codes table on the next page for example dial 00 01 29 04 05 for the time 01 45 For Call message dial code for telephone number of ...

Страница 94: ...Code Table Character Dialing Code Character Dialing Code 1 01 8 08 2 02 9 09 3 03 0 00 4 04 space 12 5 05 15 6 06 29 7 07 8 4 Large Screen Speakerphone Manual Sending And Receiving Non Verbal Messages GCA70 349 ...

Страница 95: ...me message every time in response to a situation which saves you the trouble of scrolling to the message you want to send This section tells you how to use the RESPONSE MESSAGE button s to send messages to other LCD speakerphones Refer to section 10 1 for instructions on programming the RESPONSE MESSAGE button s To send an LCD message when you call and receive busy signal or no answer 1 While stil...

Страница 96: ...message I Will Call Back for example to the calling telephone OR while still on the call press the scrolling RESPONSE MESSAGE button to scroll through the system supplied messages 3 Press when your display shows the message you wish to send the message will then be displayed at the calling telephone and the SOHVA call will be terminated 8 6 Large Screen Speakerphone Manual Sending And Receiving No...

Страница 97: ...utton locations Before you begin programming write down the intercom or outside line you will use and the number digits that you are storing Then as you program the speed dial numbers write the first and second level numbers on your telephone s ID strips You can also fill out the charts on the next page if you wish for a personal record of your stored numbers NOTE The Federal Communications Commis...

Страница 98: ...peed Dial Numbers Programmable Buttons 1 7 2 8 3 9 4 10 5 11 6 12 Personal Speed Dial Numbers Keypad Buttons 1 6 2 7 3 8 4 9 5 10 9 2 Large Screen Speakerphone Manual Programming Your Telephone GCA70 349 ...

Страница 99: ...on 7 Dial number up to 16 digits long include S and if needed You may need a pause between numbers to compensate for differences in response time between your system and the host system ask your attendant about this To store a pause press the PAUSE p button To store a flash switchook press the FLASH f button If you need to erase the typed digits appearing in your display to correct them use the in...

Страница 100: ...ss PROGRAMMING 2 Press NEXT until the DSS option appears 3 Press DSS 4 Press programmable button to choose DSS location 5 Dial extension number 6 Press next location button and store next DSS number 7 Repeat the previous step until all DSS numbers are stored OR press EXIT Write Your DSS Numbers On This Chart 9 4 Large Screen Speakerphone Manual Programming Your Telephone GCA70 349 ...

Страница 101: ...rrently active or engaged feature Do Not Disturb Button DND prevents other telephones from ringing your telephone Group Listen Button GPLSN allows others to hear a conversation over the telephone speaker while you use the handset or headset the distant party can hear only the conversation transmitted through the handset or headset microphone Music Button MUSIC allows you to enable or disable backg...

Страница 102: ...ng the corresponding button to the left of the LCD 6 Select the button you want to assign as a feature button 7 Select the feature you want to assign to by pressing the corresponding button to the left of the LCD Press NEXT to scroll through the list of available features 8 Repeat steps 1 6 to assign additional feature buttons 9 Press EXIT when you are done To clear a feature button assignment 1 R...

Страница 103: ...N option appears 3 Press the FEATURE BUTTON option 4 Select the programmable button you wish to use as a reponse message button 5 Press NEXT until the RESPONSE MESSAGE option appears 6 Select the RESPONSE MESSAGE option 7 Select from the list of displayed messages Press the NEXT button to scroll through the list of messages If you use the Back at or Call options add to them as follows For Back at ...

Страница 104: ...out having to store their feature dialing codes To store an access code 1 Press OPTIONS then PROGRAMMING 2 Press NEXT until you see the FEATURE BUTTON option 3 Press FEATURE BUTTON 4 Select the programmable button at which you wish to store the feature remember if there is anything else programmed at this button the new programming will overwrite it For help in selecting a button press SHOW EMPTY ...

Страница 105: ... until the REMINDER ALERT option appears 3 Press the REMINDER ALERT button 4 Select the reminder alert you want to set Reminder Alert 1 or Reminder Alert 2 by pressing the corresponding button to the left of the LCD 5 Dial reminder time using the numbers on the dial pad remember to add a zero 0 before single digit times 01 for one o clock 02 for 2 o clock etc 7 Set AM or PM by pressing the button ...

Страница 106: ...This page remains blank intentionally ...

Страница 107: ...hat normally ring at the attendant s telephone also ring at an overflow attendant s station Queue Button When multiple calls are ringing or are on hold at an attendant s station the system places them in a queue The attendant can use this button to determine how many calls are queued awaiting service Serial Call Button When a caller wishes to speak to more than one person the attendant uses this b...

Страница 108: ...aller programmed BOTH button If you wish to cancel the conference condition and return one of the lines to hold 1 Press HOLD 2 Press the line button for the held call you wish to re engage The other line remains on hold at your speakerphone To direct incoming calls to an overflow attendant during peak calling periods 1 Press the installer programmed OVERFLOW button If an overflow attendant is prog...

Страница 109: ...nsfer 1 Press the installer programmed SERIAL button 2 Dial intercom number or press associated DSS button 3 Repeat to add up to two more extensions to the serial 4 Press SPEAKER to end Serial transfer begins To determine the status of individual lines idle busy or on hold 1 Press the installer programmed TEST BUSY button the LCD will display the prompt Enter Line 2 Dial the line number to be test...

Страница 110: ...n errors that exceed their installer programmed thresholds The installer may arrange for the system to sound an external audible alarm or turn on an external visual alarm if certain alarm conditions occur with the T1 service it is the installer s choice whether the external alarm is audible or visual If a T1 alarm occurs you must take action to turn off the alarm device View the status logs by scr...

Страница 111: ...nd date of the current entry 4 Press the REV interactive button to display the previous entry 5 Press the FWD interactive button to display the next more recent entry To display the number of entries in the log 1 Press the button at any time To exit the log viewing mode 1 Either press the SPEAKER button press the hookswitch or wait for the 15 second time out To turn off the external T1 alarm 1 Pre...

Страница 112: ...ct station selection DSS with busy lamp field BLF using the instructions provided previously in this guide When the installer assigns a DSS BLF console to a station port the system recognizes it as such and automatically clears blanks the console buttons so that you can store numbers at the buttons as you need them 10 6 Large Screen Speakerphone Manual Using The Attendant Features GCA70 349 Level ...

Страница 113: ...nsole allow you to select which button level is currently active To change button levels press one of the buttons at the bottom of the console The leftmost button activates level 1 the next button activates level 2 etc A light beside the appropriate button lights to indicate which level is currently active Large Screen Speakerphone Manual 10 7 GCA70 349 Using The Attendant Features ...

Страница 114: ...This page remains blank intentionally ...

Страница 115: ...ot provide background music To cancel press INTERCOM then dial 1 Error Tone three steady tones May occur when incorrect buttons are pressed during speed dial programming For example if a button has a line assigned to it or was not enabled for speed dial programming by the installer You cannot receive a voice announce call Voice announce block has been activated To cancel press INTERCOM then dial 2...

Страница 116: ...This page remains blank intentionally ...

Страница 117: ...ization Codes Entering 7 5 Automatic Redial Feature 3 5 3 6 Automatic Set Relocation 7 28 B Blocking Voice Announce Calls 7 1 Busy Button Inquiry 7 2 Busy Line And Station Status Displaying 7 2 Button Functions Displaying 7 3 Button Levels Accessing On DSS BLF Consoles 10 7 Button Query 7 3 C Call Listening Over The Telephone Speaker Group Listening 7 7 Call Log 7 31 Call Making A Non Private 7 8 ...

Страница 118: ...n Automatic Callback 3 12 Conferencing Calls 6 1 Conferencing Telephones Together 6 1 Contrast Adjusting The Display 7 1 D Dial By Name Feature 3 3 Dialing Automatically 3 2 Dialing Manually 3 1 Direct Inward System Access Using 7 17 Display Abbreviations Understanding The 1 10 1 12 Display Contrast Adjusting The 7 1 Displaying Status Of Busy Lines And Stations 7 2 Displaying Button Functions Butt...

Страница 119: ...uidelines 1 5 Handing Hold Recalls 4 4 Handling Park Recalls 4 6 Headset Installing 1 8 Headset Using Your 1 8 Hold Button 1 13 Hold Placing Calls On 4 1 Hold Recalls Handling 4 4 Holding Calls 4 1 Hot Transfer 5 4 I IMIST Module 7 29 Interactive Buttons 1 13 Intercom Button 1 13 Intercom Calls Answering 2 2 Intercom Calls Making 3 10 Introducing The LCD Speakerphone 1 1 K Knowing Your Speakerphon...

Страница 120: ...2 5 Making A Hot Transfer 5 4 Making Calls 3 1 Making Intercom Calls 3 10 Message Waiting Light 1 14 Message Waiting Light Lighting The 8 1 Messages Sending And Receiving Non Verbal Messages 8 1 Messages Sending LCD 8 3 Messages Sending Response 8 5 Microphone Opening 1 14 Monitoring A Conversation Between Two Telephones 7 9 Music Using Background 7 16 Mute Button 1 14 Muting Your Telephone 7 10 N...

Страница 121: ...ng Mode 7 16 Q Queuing 3 9 Quick Reference Guide Quick Reference 1 Quick Transfer Using 5 5 R Redial Feature Automatic 3 5 3 6 Redial Queue 3 5 3 6 Redialing A Previously Dialed Number 3 4 Redialing A Saved Number 3 7 Redialing Last Dialed Number 3 4 Relocation Automatic Set 7 28 Reminder Alert Setting A 9 9 Responding To A Subdued Off Hook Voice Announcement 2 6 Response Message Button Storing A ...

Страница 122: ...ing Programming For 9 1 Speakerphone s Functions Knowing Your 1 13 1 15 Status Log Viewing The System 10 4 Storing Access Codes 9 6 Storing DSS Numbers 9 4 Storing Speed Dial Numbers 9 3 Storing The Feature Buttons 9 5 9 6 Storing A Response Message Button 9 7 Switching The Dialing Mode Between Pulse And Tone 7 16 Subdued Off Hook Voice Announcement Making A 3 14 Subdued Off Hook Voice Announcemen...

Страница 123: ...Background Music 7 17 7 19 Using Direct Inward System Access 7 19 Using E and M Tie Lines 7 23 Using Line Groups 3 8 Using Quick Transfer 5 5 Using The Attendant Features 10 1 Using The Feature Buttons 9 5 Using The IMIST Module 7 29 Using The Other Telephone Features 7 1 Using The Tracker Paging System 7 20 7 22 Using This Guide 1 1 Using Your Speakerphone 1 3 V Viewing The System Status Log 10 4...

Страница 124: ...This page remains blank intentionally ...

Страница 125: ...uttons with the feature s mnemonics Feature Enable Code Disable Code Button Mnemonic Account Code INTERCOM S 04 account code ACCT All Call INTERCOM 70 PAGE 1 Attendant Calling INTERCOM 0 Authorization Code INTERCOM 08 authorization code AUTH Automatic Callback and Call Waiting INTERCOM S 6 INTERCOM 6 CAMP Automatic Redialing ARD Background Music INTERCOM S 11 or 12 INTERCOM 1 MUSIC 1 MUSIC 2 Call ...

Страница 126: ...M S 4 extension number DPKUP Call Pickup Group INTERCOM 4 GPKUP Call Forward Outside System INTERCOM S 56 INTERCOM 5 Clear Major Alarm Ring INTERCOM 09 DISA Access Installer Assigned Do Not Disturb INTERCOM 01 DND Do Not Disturb Override extension number S 03 EXOVR DSS Programming INTERCOM SS 3 Executive Override extension number S03 EXOVR Hold Manual HOLD HOLD Hold Exclusive HOLD HOLD HOLD Hold D...

Страница 127: ...m Any Station All Zones INTERCOM 69 TAFSS Meet Me Answer Page INTERCOM 78 MMEPG Message Waiting INTERCOM S 3 extension number INTERCOM S 3 extension number Message Wait Retrieval 00 Operator Access INTERCOM 0 Paging All Call INTERCOM 70 PAGE 1 Paging Zones 2 8 INTERCOM 71 77 PAGE 2 8 Paging Meet Me INTERCOM 78 MMEPG Park Orbit Retrieve INTERCOM 91 99 PARK 1 9 Park Orbit Send INTERCOM 91 99 PARK 1 ...

Страница 128: ...M S 05 extension number Response Message INTERCOM SS 6 button 01 30 RSPnn nn 1 30 S Service Observing INTERCOM 03 extension number S OBS Speed Dial Station 1 0 Speed Dial System S 100 S 599 Speed Dial Programming INTERCOM SS 1 Station Lock INTERCOM 04 code LOCK Volume Save INTERCOM SS 7 VOLSV Voice Announc e Block INTERCOM S 2 INTERCOM 2 VABLK 4 Quick Reference Quick Reference GCA70 349 ...

Страница 129: ...s The following table details several unique dialing codes that are only applicable to single line proprietary and industry standard telephones Feature Enable Code Pick Up Last Line S 08 Broker s Call S 07 Speed Dial Access Code S 01 Saved Number Redial S 06 Dial Saved Number S 09 TAP Dialing Code Quick Reference 5 GCA70 349 Quick Reference ...

Страница 130: ...NOTES ...

Страница 131: ...ors the Company disclaims liability for any difficulties arising from the interpretation of the information contained herein The information contained herein does not purport to cover all details or variations in equipment or to provide for every possible contingency to be met in connection with installation operation or maintenance Should further information be desired or should particular proble...

Страница 132: ...Charlottesville Virginia 22901 2829 R World Wide Web http www comdial com Printed in U S A GCA70 349 02 2 98 ...

Отзывы: