background image

6

66

66

.

4.  Service.

4.  Service.

4.  Service.

4.  Service.

4.  Service.

Inst

Inst

Inst

Inst

Installation and st

allation and st

allation and st

allation and st

allation and start

art

art

art

art

Empire Hot

Empire Hot

Empire Hot

Empire Hot

Empire Hot

1.

1.

1.

1.

1.

Locate the brewer on a flat

Connect the electrical plug to a separate

level and waterproof surface.

grounded wall socket

Grounded wall socket

Grounded wall socket

Grounded wall socket

Grounded wall socket

Grounded wall socket

230V 10A

230V 10A

230V 10A

230V 10A

230V 10A

OBSERVE!

OBSERVE!

OBSERVE!

OBSERVE!

OBSERVE!
Make sure there is a space behind

Make sure there is a space behind

Make sure there is a space behind

Make sure there is a space behind

Make sure there is a space behind
the machine for free flow of air

the machine for free flow of air

the machine for free flow of air

the machine for free flow of air

the machine for free flow of air.....
( minimum 10cm ).

( minimum 10cm ).

( minimum 10cm ).

( minimum 10cm ).

( minimum 10cm ).

2.

2.

2.

2.

2.

Connect  attached water tube to cold water with an  R 1/2”.
Make sure that the water hose not are kinked anywhere when machine is
pushed into place.

Please flush the water tube before connecting to machine, this to avoid any
particles to destroy the inlet valve.

3.

3.

3.

3.

3.

Open the water inlet.

4.

4.

4.

4.

4.

Turn on the ON-OFF switch inside the door.

Water is been filled into the tank automatically
with 2,0 litres of water. The heating will not
start before the water level reaches the
level sensor.

Set temperature is approx.  97ºC.

Set temperature is approx.  97ºC.

Set temperature is approx.  97ºC.

Set temperature is approx.  97ºC.

Set temperature is approx.  97ºC.

5.

5.

5.

5.

5.

Close door

Close door

Close door

Close door

Close door.....

ON / OFF

ON / OFF

ON / OFF

ON / OFF

ON / OFF
switch

switch

switch

switch

switch

Содержание Empire Hot

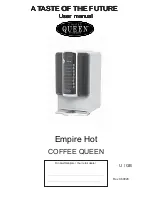
Страница 1: ...ser manual User manual User manual A A A A A T T T T TASTE OF ASTE OF ASTE OF ASTE OF ASTE OF THE FUTURE THE FUTURE THE FUTURE THE FUTURE THE FUTURE Rev 060928 U GB Empire Hot COFFEE QUEEN Din återförsäljare Your retail dealer ...

Страница 2: ...ity Water 6 Starting up machine 6 Fylla behållare med ingredienser 7 5 DRIFT Making coffee in a cup chocolate 8 6 CLEANING CLEANING CLEANING CLEANING CLEANING Weekly cleaning Dismantle mixing system 9 Washing parts 9 Reassemble mixing system 10 7 CLEANING programs CLEANING programs CLEANING programs CLEANING programs CLEANING programs Automatic cleaning of mixing bowl only 11 Automatic cleaning of...

Страница 3: ...ough this manual before you take the machine into operation for the first time for the first time for the first time for the first time for the first time The manual contents important instructions for a safe and proper usage of the machine Always keep this manual within reach for the user Coffee Queen Empire hot Coffee Queen Empire hot Coffee Queen Empire hot Coffee Queen Empire hot Coffee Queen ...

Страница 4: ...nght of drinks Strenght of drinks Strenght of drinks Strenght of drinks or or or or or Choices of Choices of Choices of Choices of Choices of drinks drinks drinks drinks drinks Drip tray Drip tray Drip tray Drip tray Drip tray Drip tray insert Drip tray insert Drip tray insert Drip tray insert Drip tray insert Key switch Key switch Key switch Key switch Key switch cup and jug cup and jug cup and j...

Страница 5: ...Chute Chute Ingredients Ingredients Ingredients Ingredients Ingredients canister canister canister canister canister ON OFF ON OFF ON OFF ON OFF ON OFF switch switch switch switch switch Steam trap Steam trap Steam trap Steam trap Steam trap Mixing bowl Mixing bowl Mixing bowl Mixing bowl Mixing bowl Outlet pipe Outlet pipe Outlet pipe Outlet pipe Outlet pipe Empire cold 4 canisters Canister Width...
Страница 6: ... for free flow of air the machine for free flow of air the machine for free flow of air the machine for free flow of air minimum 10cm minimum 10cm minimum 10cm minimum 10cm minimum 10cm 2 2 2 2 2 Connect attached water tube to cold water with an R 1 2 Make sure that the water hose not are kinked anywhere when machine is pushed into place Please flush the water tube before connecting to machine thi...

Страница 7: ...urn up chute 2 2 2 2 2 Lift up canister and pull out Lift up canister and pull out Lift up canister and pull out Lift up canister and pull out Lift up canister and pull out 3 3 3 3 3 Lift off lid and fill canister with Lift off lid and fill canister with Lift off lid and fill canister with Lift off lid and fill canister with Lift off lid and fill canister with ingredients ingredients ingredients i...

Страница 8: ...pushing or for 5 or 10 alternative Weaker drink Weaker drink Weaker drink Weaker drink Weaker drink Decrease Decrease Decrease Decrease Decrease by pushing or for 5 or 10 by pushing or for 5 or 10 by pushing or for 5 or 10 by pushing or for 5 or 10 by pushing or for 5 or 10 the indication lamp will go up or down depending of choice 3 3 3 3 3 Choose drink by pushing on the button to the right of ea...

Страница 9: ...ht out from the machine E E E E E A A A A A B B B B B C C C C C Cleaning Cleaning Cleaning Cleaning Cleaning W W W W Wash these p ash these p ash these p ash these p ash these part art art art arts s s s s 6 6 6 6 6 A A A A A Mixer bowl B B B B B Steam trap C C C C C Whipper D D D D D Assembly plate Make sure this parts are dry Make sure this parts are dry Make sure this parts are dry Make sure th...

Страница 10: ...ssemble whipper pull until you hear a clicking noise H H H H H 10 10 10 10 10 Assemble mixer bowl and steam trap J J J J J see picture 1 1 1 1 11 1 1 1 1 Easily push the mixer bowl towards according to K K K K K and lock with lock knob L L L L L Connect outlet hose M M M M M NOTE NOTE NOTE NOTE NOTE make sure that all water hose are connected at right place H H H H H J J J J J J J J J J J J J J J ...

Страница 11: ...drip tray Place a jug in the drip tray Place a jug in the drip tray Place a jug in the drip tray 2 2 2 2 2 Turn the key slowly ninety degrees and back again 3 3 3 3 3 Push button for drink 1 in 6 seconds Push button for drink 1 in 6 seconds Push button for drink 1 in 6 seconds Push button for drink 1 in 6 seconds Push button for drink 1 in 6 seconds After 6 seconds the mixer bowl starts to be clea...

Страница 12: ... drip tray Place a jug in the drip tray 2 2 2 2 2 Turn the key slowly ninety degrees and back again 3 3 3 3 3 Push button for drink 2 in 6 seconds Push button for drink 2 in 6 seconds Push button for drink 2 in 6 seconds Push button for drink 2 in 6 seconds Push button for drink 2 in 6 seconds To cleaning mixing bowl 1 cleaning mixing bowl 1 cleaning mixing bowl 1 cleaning mixing bowl 1 cleaning m...

Страница 13: ...p tray Place a jug in the drip tray Place a jug in the drip tray 2 2 2 2 2 Turn the key slowly ninety degrees and back again 3 3 3 3 3 Push button for drink 1 and 2 at the same Push button for drink 1 and 2 at the same Push button for drink 1 and 2 at the same Push button for drink 1 and 2 at the same Push button for drink 1 and 2 at the same time in 6 seconds Keep buttons down time in 6 seconds K...

Страница 14: ...sh button in 6 seconds Push button in 6 seconds Push button in 6 seconds Push button in 6 seconds After 4 seconds a signal will go faster The display shows The display shows The display shows The display shows The display shows Total xxx cups 2 2 2 2 2 Push button for drink 2 The display shows The display shows The display shows The display shows The display shows Choise 1 free xxx cups 3 3 3 3 3 ...

Страница 15: ...closed The display shows Door open 2 2 2 2 2 When machine is not in use The inlet valves are blocked 10 Failure messages 10 Failure messages 10 Failure messages 10 Failure messages 10 Failure messages T T T T Transport and no use in long time ransport and no use in long time ransport and no use in long time ransport and no use in long time ransport and no use in long time 1 Turn off the switch pul...

Страница 16: ...12 DIMENSION SKETCH 12 DIMENSION SKETCH 12 DIMENSION SKETCH 12 DIMENSION SKETCH 12 DIMENSION SKETCH Empire Hot Empire Hot Empire Hot Empire Hot Empire Hot 16 16 16 16 16 ...

Страница 17: ...13 Circuit diagram 13 Circuit diagram 13 Circuit diagram 13 Circuit diagram 13 Circuit diagram 17 17 17 17 17 ...

Страница 18: ... contact Please contact Please contact Please contact Please contact Din återförsäljare Your retail dealer COFFEE QUEEN AB Box 960 671 29 ARVIKA COFFEE QUEEN AB Box 960 671 29 ARVIKA COFFEE QUEEN AB Box 960 671 29 ARVIKA COFFEE QUEEN AB Box 960 671 29 ARVIKA COFFEE QUEEN AB Box 960 671 29 ARVIKA besöksadress Korpralsv 1B Tel vxl 46 0 570 47700 Fax 46 0 570 47719 E mail info coffeequeen se www coff...

Отзывы: