PAGE 7
CODEX USER GUIDE -
CODEX XL-SERIES
27.07.17
• Primary colour correction - play back, adjust and apply LUTs and CDL looks in Vault Review.
• Synchronise audio, either with timecode or manually.
• Add Quality Control (QC) notes and create PDF QC reports.
• Transcode to common deliverable formats such as ProRes, DNxHR/DNxHD, DCP and H264 with LUTs, CDL, burn-ins
and masks.
• VFS (Virtual File System) for fast, flexible and powerful deliverables creation.
• Framings to allow customisable extraction of ‘region of interest’ from source image into deliverables.
• Archive to disk or LTFS tape with md5 verification.
9. Loading and unloading media
Following the correct procedures for loading and unloading media is very important. Failure to do so may result in damage
to the media and compromise data integrity.
Media will be unloaded automatically when the XL-Series is shut down.
WARNING: Do not unload media when it is reading or writing.
9.1. Transfer Drive
Loading –
with the handle on the Transfer Drive lifted, gently insert it fully into the port on the front of the XL-Series. Lower
the handle to lock the Transfer Drive in place and the loading process will begin. During this time the LED next to the
Transfer Drive will flash blue. When the Transfer Drive has loaded the LED will turn green.
Unloading –
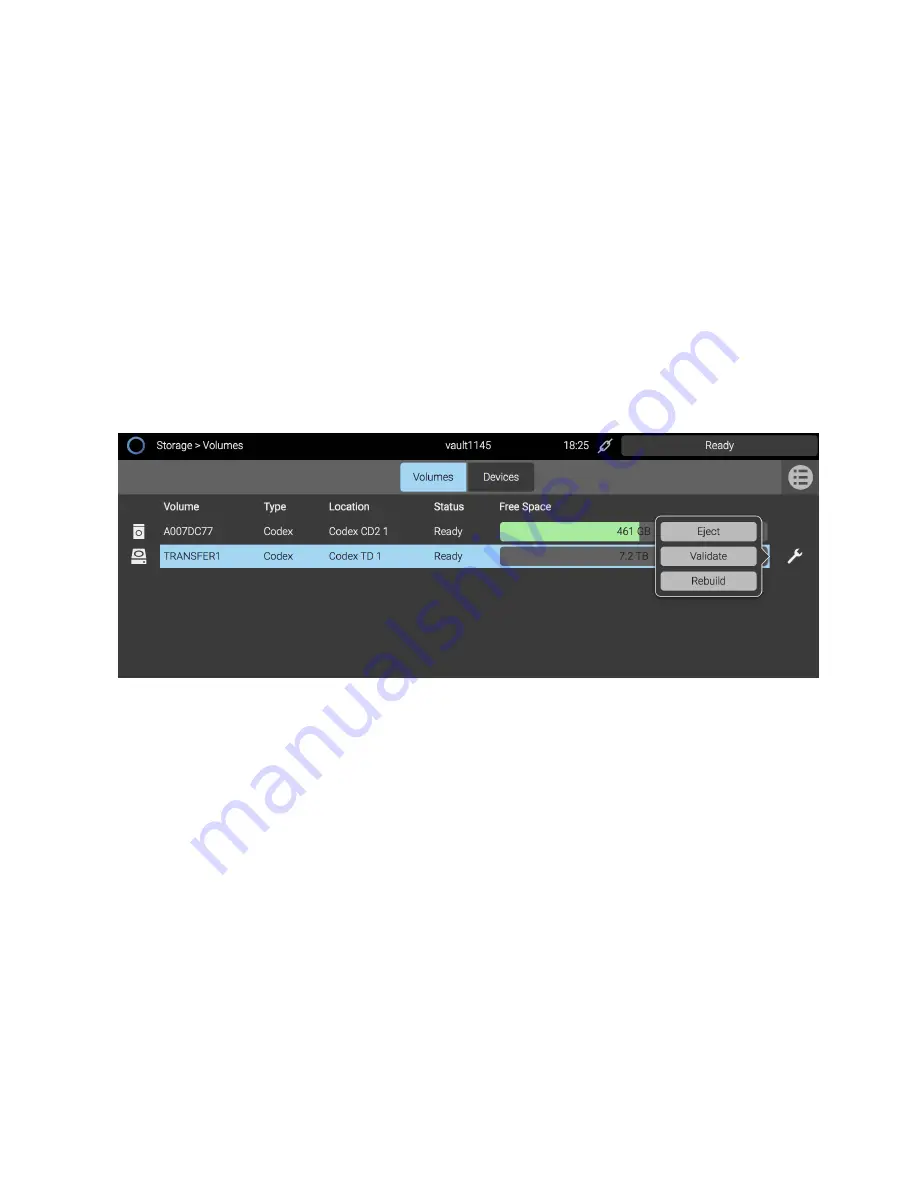
go to the Storage screen of the software, select the Transfer Drive (“Codex TD 1”). Click the Wrench symbol,
and then click Eject. While unloading the LED next to the Transfer Drive will flash blue, and become solid blue when
unloading is complete. Push the locking latch to the left, then raise the handle on the Transfer Drive and pull gently to
remove it from the XL-Series.
An alternate unloading method is to push the locking latch to the left, and raise the handle slightly. This will trigger the
unload sequence. Wait until the LED stops flashing and becomes solid blue, then raise the handle fully and pull gently to
remove the Transfer Drive.
9.2. Capture Drive
Loading –
gently insert the Capture Drive fully into the port on the front of the XL-Series. The loading process will begin,
and during this time the LED on the Capture Drive will flash blue. When the Capture Drive has loaded the LED will turn off.
Reading/writing -
when the Capture Drive is reading or writing, the LED will be green.
Unloading –
go to the Storage screen of the software, select the Capture Drive (“Codex CD2 1”). Click the Wrench symbol,
and then click Eject. While unloading the LED on the Capture Drive will flash blue, and become solid blue when unloading
is complete. Pull the Capture Drive gently to remove it from the XL-Series.


