background image

Wireless Camera with Solar Panel

10

 1300 663 907

After Sales Support

[email protected]

www.cocoonproducts.com.au

Model number:

 HE200073-S

10/2021

Inserting batteries

To operate the Wireless Camera, 2 x rechargeable 18650 Li-Ion batteries need to be inserted. 

It is also recommended you charge the batteries prior to use.

NOTE:

 For first time charging, use a constant USB power source (not included) and not the included 

solar panel

1. 

Move switch on the top of camera to open position to unlock the casing

2. 

Open case to see battery compartment

3. 

Ensure power switch is set to Off

4. 

Insert batteries methodically, taking care with polarity

5. 

Switch power On, close case and set top switch to lock position

6. 

The Wireless Camera will power up and say “The Camera is now ready to begin pairing” 

and the left LED will flash blue / purple

Charging the batteries

1. 

Make sure the included batteries are secure in the camera in the correct polarity positions

2. 

Plug the Micro USB end of the USB cable into the bottom of the smart wireless camera

NOTE:

 For first time charging, use a constant USB power source (not included) and not the included 

solar panel

3. 

Plug the other end of the USB cable into a DC 5V USB power supply (Not included)

Setting up the Wireless Camera in the 

Cocoon Connect app

1. 

Open the Cocoon Connect app on your phone 

which is connected to your Wi-Fi network and 

log into your account

2. 

Select the   Home tab on the bottom left hand 

side

3. 

Select the + icon on the top right-hand side or 

select Add Device to add a product

4. 

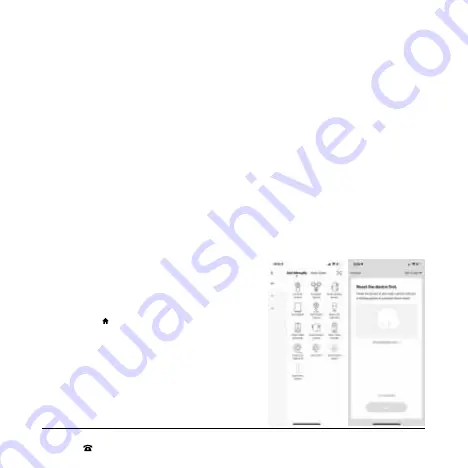
Select Add Manually, select AU in the menu 

on the left hand side, then select the Wireless 

Camera icon on the right

5. 

Confirm the blue/purple LED on the Wireless 

Camera is flashing by selecting Next Step. If not, 

reset the camera as per “FAQs” on page 17

Setup

Содержание HE200073

Страница 1: ...Smart Wireless Camera With Solar Panel User Guide Model HE200073 S Version 1 0 ...

Страница 2: ......

Страница 3: ...ts com au We have additional support videos and guides Call After Sales Support 1300 663 907 Or email help cocoonproducts com au we re always happy to help If you experience any issues with this product or its performance is not what you had expected please contact our friendly customer service team It is likely that we can resolve problems for you via phone or email We can be reached on Phone 130...

Страница 4: ...medies in respect of the product that the consumer has under the Competition and Consumer Act 2010 and similar state and territory laws Our goods come with guarantees that cannot be excluded under the Australian Consumer Law You are entitled to a replacement or refund for a major failure and for compensation for any other reasonably foreseeable loss or damage You are also entitled to have the good...

Страница 5: ... that can generate heat At the end of its working life observe local regulations when disposing of this product Dispose of batteries in an environmentally friendly matter The manufacturer is not responsible for loss or stolen goods Do not mix old and new batteries This unit comes supplied with Lithium Ion Batteries Do not mix Alkaline standard Car Zinc or rechargeable Nickel Cadmium batteries with...

Страница 6: ...Cocoon Connect application for the first time 8 Create a Home 9 Setup 10 Inserting batteries 10 Charging the batteries 10 Setting up the Wireless Camera in the Cocoon Connect app 10 Operation 12 Main controls 12 Settings menu 13 Additional Functionality 14 Adding other Cocoon Connect accounts to your Home 14 MicroSD card usage 14 Solar Panel Installation 15 Mounting the solar panel 15 Connect the ...

Страница 7: ...arranty certificate Not shown Technical Specifications 1080P Resolution Water resistant IP65 Wide angle lens Micro SD Slot up to 64GB card not included Rechargeable batteries via USB WI FI 2 4Ghz Infrared night vision 2 way audio with noise suppression DC Power Input 5V d c 1A Battery rating 3 7V d c 2600mAh X 2 NOTE Your phone does not have to be connected to your local Wi Fi to use this device h...

Страница 8: ...n for the first time 1 Download the Cocoon Connect application by scanning the QR code provided or downloading it from the iOS App Store or Google Play Store 2 Launch the application and select Register to register a Cocoon Connect account 3 Select Agree to Terms and Conditions and then you will be required to enter an email address and press Obtain verification code A verification code will then ...

Страница 9: ...control of Connected Home devices 1 Select Create home 2 Enter a name for the Home for example use your surname address or workplace etc 3 Set the location for the Home If location is turned on the Cocoon Connect application can use your smartphone s GPS function to pinpoint your location NOTE You do not have to enter a location or use this feature 4 Select or un select rooms which will have Cocoo...

Страница 10: ...and the left LED will flash blue purple Charging the batteries 1 Make sure the included batteries are secure in the camera in the correct polarity positions 2 Plug the Micro USB end of the USB cable into the bottom of the smart wireless camera NOTE For first time charging use a constant USB power source not included and not the included solar panel 3 Plug the other end of the USB cable into a DC 5...

Страница 11: ...yed on the phone screen b Place the phone approximately 15 20cm in front of the Wireless Camera LED blinking rapidly with the QR code facing the camera c The Wireless Camera will read the unique QR code and an audible sound will be heard In addition the LED will turn blue and begin flashing d Once you hear the sound select Heard the Beep on the application e If you do not hear a beep select Heard ...

Страница 12: ...tage 4 Speaker Select to hear audio from the camera 5 HD SD High Definition or Standard Definition selection 6 Full Screen Icon Plays the video in full screen 7 Battery Shows the cameras current battery percentage 8 Screenshot Takes a screenshot of the current video stream onto your smartphone 9 Speak Hold this button to allow two way communication Unmutes camera 10 Record Activates the recording ...

Страница 13: ...ctions on adding the Smart Wireless Camera to an Amazon Echo device Sold separately e Power Management Settings f Basic Function Settings Flip Screen Rotates the video stream 180 g Motion Detection Adjust motion sensitivity between Off Low Medium or High h Value Added Service VAS Purchase Link to cloud storage for video stream of Smart Wireless Camera i Storage Settings Storage Capacity Shows tota...

Страница 14: ...ccess 3 Select Add Member the home member must set up an account prior to adding them 4 Fill out the details for the new Home member 5 Select if you want to give that account administrator rights allowing them to make changes to the settings of devices in that home including removing the whole home This will also allow them to create automations of these devices 6 Select completed and Cocoon Conne...

Страница 15: ...Mounting the solar panel 1 Attach the mounting bracket to a solid surface with the supplied screws Make sure to allow enough charging cable to reach your camera from the mounting location of the solar panel NOTE If mounting to a wooden surface screw the mounting bracket directly to the surface If mounting to a masonry surface bricks concrete or stucco drill three holes using a 8mm 1 8 drill bit an...

Страница 16: ...re no prompt from the camera If the device is not providing a prompt when the QR code is help up to the camera lens try the below 1 Ensure that the lens is not blocked If the camera has a protective film remove it before you scan the QR code 2 Place the app QR code in front of the camera at a distance of 15cm to 20cm Adjust the angle and distance until you hear a prompt 3 Reset your camera and try...

Страница 17: ...on process does not work What if my Router is not 2 4GHz Wi Fi routers operate in two bands 2 4GHz and 5GHz Some routers operate on both bands simultaneously The Cocoon Connect Wireless Camera can only operate on the 2 4GHz frequency Why are the speaker and microphone not working Check the app settings to make sure they are not disabled How do I turn On Off Push Notifications Push notifications fo...

Страница 18: ...ct on the environment and human health if disposed of inappropriately Observe any local regulations regarding the disposal of electrical consumer goods and dispose of it appropriately for recycling Contact your local authorities for advice on recycling facilities in your area Observe and local regulations regarding the disposal of waste products Contact your local authorities for advise on recycli...

Страница 19: ...re that rather than repairing goods we may replace them with refurbished goods of the same type or use refurbished parts in the repair process Please be assured though refurbished parts or replacements are only used where they meet ALDI s stringent quality specifications If at any time you feel your repair is being handled unsatisfactorily you may escalate your complaint Please telephone us on 130...

Страница 20: ......

Страница 21: ...After Sales Support Ph 1300 663 907 help cocoonproducts com au ...

Отзывы: