background image

17

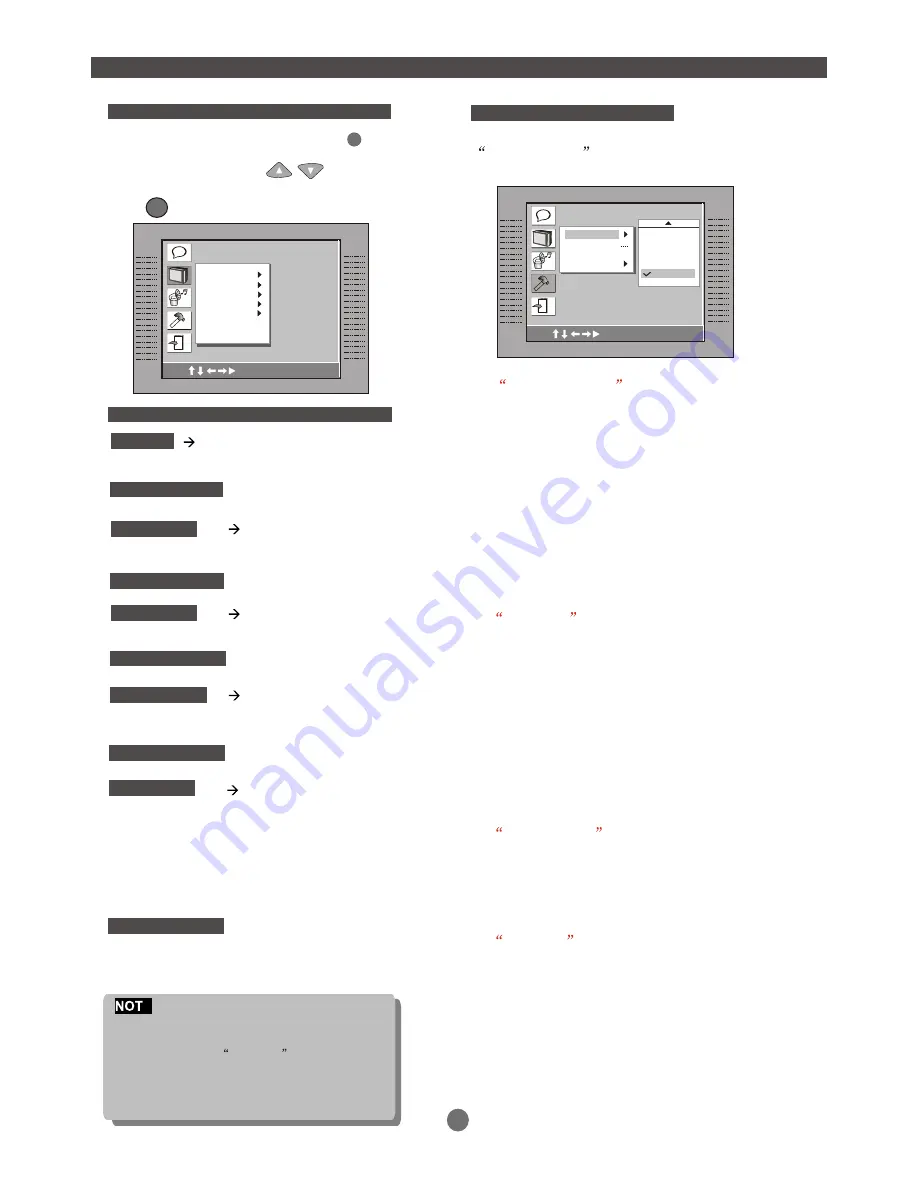
CUSTOM  SETUP

SETUP MENU (Press SETUP button)

After entering the main menu, choose and confirm

CUSTOM setup

and then the following window

will appear on the TV screen.


A)   Parental Control

There are  8 levels of Parental Control,as follows:
1.G; 2.;3.PG;4.PG13;5.;6.R;7.NC17;8.;
Level one opens discs to people of all ages. Level
eight is suitable only for adults.
If you want to change the Parental Control setting,
enter the level number and then the four digit pass code.
The default code is 8888.(If you are using the player for the 
first time, there is the code that is needed.)
When the input code has been confirmed, the level setting
menu will appear.Move the cursor to the appropriate level
and  press ENTER to confirm. Press Set Up to exit the Menu.

B) Password

Move the cursor to the PASSWORD prompt and press ENTER.
Input the password 8888 if this is your first use.
After confirmation, you will be required to input a new 4 digit 
pass code.After entering your new  pass code, press ENTER 
to confirm.

WARNING: 

Please keep a copy of the new pass code 

in a safe place, Otherwise you will not be able to change 
the Parental Control.Please remember your PASSWORD,
as the DEFAULT setting will revert everything BUT the 
PASSWORD to the factory defaults.

C) ANGLE 

MARK

You can choose to have the 

ANGLE MARK function ON or OFF . In the ON mode,
an ICON will display on the screen when a disc has 
multiple angle shots available for viewing. Press ANGLE
on the remote to enjoy these scenes.

D) DEFAULT

This function allows you to change the

 player back to the factory default settings. All settings will 
be changed back to the original settings. If you have 
changed the default PASSWORD of 8888,this will not revert.


E

1. Certain DVD disc are formatted in wide screen (16:9) or letter
 box (4:3)only. Adjusting the setting of the disc player will not alter
 the screen size for these

Format-only

discs.

2. The PSCAN button on the remote should only be used if you 
have a Component Video Connection.
3. If your TV does not have a Y, Cb, Cr Component function, please
 do not change Video Out setting .
 

C

A

B

Custom  Setup

Use                         to select

Parental Ctrl

Password

Angle Mark

Default

4: PG13

5

6: R

7: NC17

8

SCREEN MENU

Adjust TV  screen viewable format

In STOP mode, press SETUP button

highlight SCREEN SETUP.

Press UP/DOWN button                   to highlight 

the desired item in the SCREEN menu.

Press       to confirm the selection.

SETUP

ENTER

TV TYPE

              4:3 LB  (Letter Box)

              4:3 PS  (Pan Scan)

              16:9      (Wide Screen)

NTSC
PAL
AUTO 

NORMAL
BRIGHT
SOFT 

VIDEO OUT

 CVBS+S-Video
 CVBS+ YUV
  Y U V P-Scan

-4
-3
-2
-1

0
1
2
3
4

Default  setting                   

CVBS+S-Video

TV SYSTEM

BRIGHTNESS 

CONTRAST 

Default  setting              

     NTSC

Default  setting                   

4:3 PS

Default  setting                    

NORMAL

Default  setting                          

0

C

A

B

Screen Setup

Screen Setup

Use                         to select

TV Type

TV System

Video Output

Brightness

Contrast

Содержание DVD-218

Страница 1: ......

Страница 2: ...l shock or fire If in doubt contact qualified service personnel Accessories Do not place this video product on an unstable cart stand tripod bracket or table The video product may fall causing serious...

Страница 3: ...ut MP3 About the player Front panel Rear panel Remote control SYSTEM CONNECTION System connection figure Connecting to a TV set Connecting to stereo amplifier Connecting to digital amplifier GETTING S...

Страница 4: ...ect sunlight Heat or exhaust from a heating device Extreme humidity Clean the disc surface with a soft dry cleaning cloth Wipe the disc surface gently radically from center toward the outer edge Do no...

Страница 5: ...er than CD Quality Studio Quality Tips for making a good MP3 CD Use good quality CD RW disc CD R Gold Ultima is recommended Up to 650 MB 74 minute CD of MP3 files can be recorded Select a high quality...

Страница 6: ...907 093 licensed for limited viewing uses only This device is verified to comply with part 15 of the FCC rules for use with cable television service PRODUCT COMPLIES WITH DHHS RULE 21 CFR SUBCHAPTER...

Страница 7: ...the light or reposition the unit to avoid direct lighting 3 4 INTRODUCTION MUTE DISPLAY OP CL Power Mute On screen display Open Close ENTER Number Keys SUBTITLE Subtitle ANGLE Angle AUDIO Audio langua...

Страница 8: ...NOT REMOVE THE COVER NO USER SERVICEABLE PARTS INSIDE REFER SERVICING TO QUALIFIED SERVICE PERSONNEL COBY CAUTION DVD PLAYER MODEL NO DVD 218 110 240V 50 60Hz 20W CLASS 1 LASER PRODUCT AUDIO VIDEO APP...

Страница 9: ...1 2 3 Connect ONE of the above options ONLY to avoid picture interference NOTE...

Страница 10: ...SL SR NOTE 7...

Страница 11: ...al when it is exposed to direct sunlight or a strong artificial light fluorescent or strobe light In this case change the direction of the light or reposition the unit to avoid direct lighting If a DV...

Страница 12: ...playing depending on the damaged level of the disc Production qualities of DVD discs vary some discs might deviate from the industrial standard Some incorrectly formatted discs may playback on the pla...

Страница 13: ...appear automatically if it is activated by pressing the DISPLAY button Press the DISPLAY button again and a new status bar will appear Press DISPLAY button a third time and the OSD bar will dis appear...

Страница 14: ...SD MP3 mode OSD Current track Track 3 15 00 02 30 Program Thumbnail Press key to button 107 108 109 110 111 112 7 8 9 10 11 12 ROOT MP3 01 Mp3 02 MP3 03 Directory structure Current track Disc Track Pl...

Страница 15: ...pletely Stop the disc Press the PLAY button and the disc will resume playing from the beginning of the disc Skip Forward Backward Press button skip advance DVD chapter or CD track Press button skip ba...

Страница 16: ...ic section of a disc Press the A B button at the starting point of the desired section A display on screen Press the A B button again at the end of the desired section A B display on screen The play w...

Страница 17: ...a facility for the owner to adjust the detail setting of the player For the detail of Setup menu see SET UP MENU of this instruction manual SETUP PROGRAM To program play a disc in a desired sequence I...

Страница 18: ...mode before accdssing the Set Up Menu LANGUAGE MENU Default setting ENGLISH In STOP mode press SETUP button highlight Language Press UP DOWN button Press ENTER button the screen displays sub menu Pre...

Страница 19: ...to turn OFF the digital out to minimize circuit interference SETUP MENU Press SETUP button ENGLISH CHINESE JAPANESE FRENCH GERMAN ITALIAN SPANISH PORTUGUESE INDIAN THAI RUSSIAN KOREAN OTHERS ENGLISH C...

Страница 20: ...RK function ON or OFF In the ON mode an ICON will display on the screen when a disc has multiple angle shots available for viewing Press ANGLE on the remote to enjoy these scenes D DEFAULT This functi...

Страница 21: ...on the player and the restore function should reset the player Problem message display on screen Moisture may be condensed inside the player Remove the disc and leave the unit power on for one or two...

Страница 22: ...noisy Remote control does not function When PC program files or other data files are mixed with MP3 files in the same disc the player may play the non MP3 files with noise or no sound Check the disc i...

Страница 23: ...3 20 SPECIFICATIONS 20W Max Audio DAC 18bit 48KHz...

Страница 24: ...COBY s...

Отзывы: