

Power connection
We recommend using the EXPLORER 6000 Series Power Supply available from Cobham SATCOM
(sales item number 403160P). This power supply connects directly to the terminal and is fitted with a
Schuko EU plug for connection to standard AC outlet. A Schuko to US adapter is included.
If you want to use a different power supply, an open-ended power cable is included with the system.
Connect the
Red wire to positive (
V+) and the
Black wire to negative
(V-) in your power supply.
See the User & Installation manual for details.
98-168362-B
www.cobham.com/satcom
Any responsibility or liability for loss or damage in connection with the use of this product and the accompanying documentation is disclaimed by Thrane & Thrane A/S. The information in this manual is provided for information
purposes only, is subject to change without notice and may contain errors or inaccuracies. Manuals issued by Thrane & Thrane A/S are periodically revised and updated. Anyone relying on this information should acquire the
most current version e.g. from www.cobham.com/satcom, Cobham SYNC Partner Portal, or from the distributor. Thrane & Thrane A/S is not responsible for the content or accuracy of any translations or reproductions, in whole or
in part, of this manual from any other source. In the event of any discrepancies, the English version
shall be the governing text.
Thrane & Thrane A/S is trading as Cobham SATCOM.
COBHAM PUBLIC
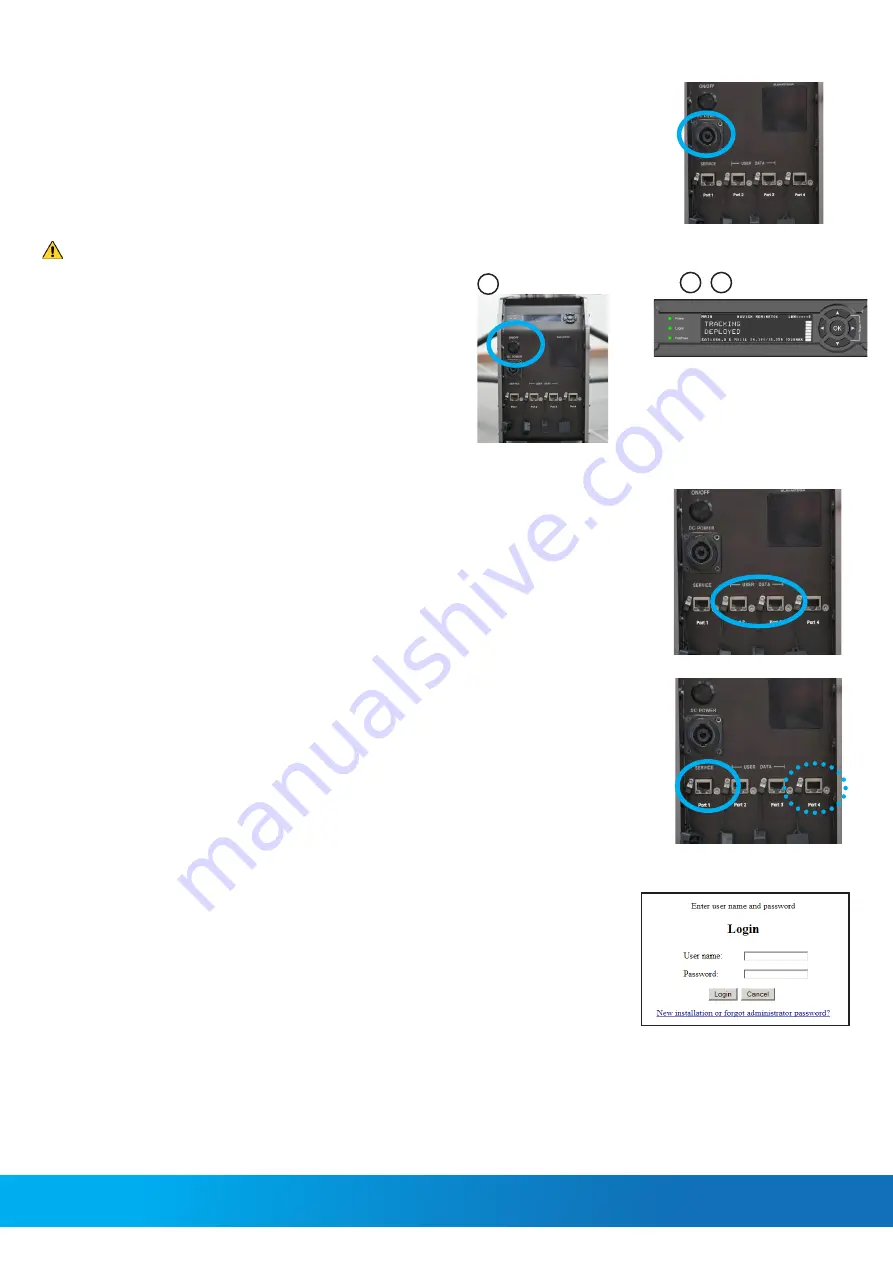
Internet
1. Use shielded LAN cables to connect a PC to
Port 2
or
Port 3
for Internet,
see documentation from the service provider.
2. Start a browser on the connected PC.
User & Installation manual
You can download the User & Installation manual at
https://sync.cobham.com
or directly from the terminal.
To download the manual from the terminal, do as follows:
1. Connect a PC to Port 1, Service. Use a shielded LAN cable.
NOTE:
If you are using a PC on a corporate network, connect to Port 4 instead.
Port 1 is configured as DHCP server.
2. Open your browser and access the web interface at
http://192.168.0.1
(default for Port 1).
3.
Log in as guest or as administrator. For first time login see the next section.
After login, the
DASHBOARD
is displayed.
4. Click
HELPDESK
and then
Support.
5. Click the link
Download manual
.
Administrator login - first time
To log in as an administrator do as follows:
1. Connect a PC to Port 1, Service (use a shielded LAN cable).
2. On the keypad, push and hold the left arrow key for 5 seconds.
3. Wait for the short display of
Local administration
followed by the event
0807F-0
WARNING Local administration enabled.
This gives you temporary administrator access for 1 hour or until next restart.
4. Open your browser and access the web interface at
http://192.168.0.1
(default).
5. Enter the user name
admin
(no password is required) and click
Login
.
The
DASHBOARD
is displayed.
6. Enter an admin password at
ADMINISTRATION > User login
, section
Change Login
.
1
2
3
Power on
WARNING
: Radiation! Do not place your head or other body
parts in front of the reflector when the system is operational.
1. Press the
On/Off
button. The system typically auto-acquires the
network within five minutes.
2. When the connection is established, the display shows
TRACKING
.
3.
Wait until the field
MDM
: in the upper status line shows
NETOK
.
NOTE:
Do not cover the GNSS (GPS, Glonass, etc.) window nor
the WLAN window located in the positioner and the front of the
Base Unit respectively.


