background image

Airfusion Abyss Installation Instructions 


17 | 

P a g e        


This fan is suitable for indoor, alfresco and 
coastal areas. This product is IP66 rated 
and can be exposed to powerful water jets 
from any direction. This rating should be 
maintained during installation. 

-

  If you think batteries might have been swallowed or placed inside any part of the body, seek immediate 

medical attention. If you suspect your child has swallowed or inserted a button battery, immediately call 
the 24-hour Poisons Information Centre on 

13 11 26

 for fast, expert advice. 

-

  Battery Leaks: Battery contains chemicals and should be treated as any chemical would. Take precautions 

when  handling  leaked  battery  chemicals.  Battery  chemicals  should  not  be  placed  near  the  eyes  or 
ingested. Contact Poisons Information Centre on 

13 11 26

 for fast, expert advice. 


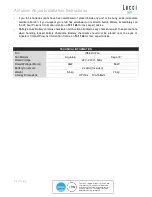
TECHNICAL INFORMATION 

Fan   

IP66 DC Fan 

Fan Models 

Aqua 66 

Aqua 70’’ 

Rated Voltage 

220 - 240V~ 50Hz 

Rated Wattage (Motor) 

26W 

55W 

Battery for remote   

2 x AAA (Included) 

Weight 

5.5kg 

7.0kg 

Canopy Dimensions 

H:77mm      Dia:158mm 


Содержание ABYSS Series

Страница 1: ...V1 1 AU 07 2021 LUCCI ABYSS SERIES DC CEILING FAN INSTALLATION OPERATION MAINTENANCE WARRANTY INFORMATION CAUTION READ INSTRUCTIONS CAREFULLY FOR SAFE INSTALLATION AND FAN OPERATION ...

Страница 2: ...ly 3 speeds and this DC fan comes complete with a 6 speed remote which gives a greater choice of comfort levels SAFETY PRECAUTIONS 1 In Europe This appliance can be used by children aged from 8 years and above and persons with reduced physical sensory or mental capabilities or lack of experience and knowledge if they have been given supervision or instruction concerning the use of the appliance in...

Страница 3: ... in landfills or dumps hazardous substances can leak into the groundwater and get into the food chain damaging your health and well being 6 The structure to which the fan is to be mounted must be capable of supporting four time of the weight of the fan 7 The fan should be mounted so that the blades are at least 2 3 m above the floor in Europe or 2 1 m above the floor in Australia 8 This fan is sui...

Страница 4: ... parts and hardware Lay out all the components on a smooth surface and make sure no components are missing before assembling If parts are missing return the complete product to the place of purchase for inspection or replacement Check whether the ceiling fan has been damaged during transport Do not operate install any product which appears damaged in any way Return the complete product to the plac...

Страница 5: ...the blades are spaced 300mm from the tip of the blade to the nearest objects or walls Install the hanging bracket to the ceiling joist or structure that is capable of carrying a load of at least four times of the weight of fan with two long screws provided Ensure at least 30mm of the screw is threaded into the support Fig 2 NOTE The bracket screws provided are for use with wooden structures only F...

Страница 6: ...ould be maintained during installation INSTALLATION OF THE MOUNTING BRACKET Fig 4 1 Insert the supply cable through the cable entry of the ceiling canopy top cover Fig 4 1 2 Install the hanger bracket onto the ceiling Fig 4 1 NOTE Check and ensure the mounting direction of the hanger bracket is correct and ensure the sealed pad is in place Fig 4 2 3 Connect the supply cable to the terminal block F...

Страница 7: ...ction This rating should be maintained during installation INSTALLATION OF BLADE Fig 5 1 Turn the fan host ring cover anti clockwise to the open position and lift up Fig 5 1 2 Install the fan blades onto the motor assembly by the three fan blade screws provided Fig 5 2 3 Install the fan host ring cover back to the motor assembly Lock it by turning clockwise Fig 5 3 Fig 5 1 Fig 4 2 Sealed pad ...

Страница 8: ...ructions 7 P a g e This fan is suitable for indoor alfresco and coastal areas This product is IP66 rated and can be exposed to powerful water jets from any direction This rating should be maintained during installation Fig 5 2 Fig 5 3 ...

Страница 9: ...to prevent the fan from rotating when in operation Fig 6 1 2 Install the drive component onto the hanger by pushing through the mounting bracket Fig 6 2 3 Connect the wiring Fig 6 3 Refer to the wiring diagram in Fig 7 for more information Connect the supply cable from the terminal block to the input of the drive component Connect the output of the drive component to the cable of the fan assembly ...

Страница 10: ... RECEIVER TO PAIR TOGETHER Ensure the motor earth wire is connected to the single earthing terminal block 1 in the diagram below Fig 7 From mains supply to mounting bracket terminal block 1 Connect the live supply wire to the L terminal of the terminal block on the mounting bracket 2 Connect the neutral supply wire to N terminal of the terminal block on the mounting bracket 3 Connect earth wire to...

Страница 11: ...uring installation FINISHING THE INSTALLATION INSTALLATION OF THE CANOPY Fig 8 1 Ensure the earth wiring is secure and correct by performing an earthing continuity test from the fan s accessible metal body back to the earth terminal at the terminal block on the mounting bracket 2 Push the canopy up to the ceiling canopy top cover fixed by two screws and the clicks 3 Lock the bottom cover of the ca...

Страница 12: ...off wall switch Install the batteries into the remote Please make sure the polarity of the battery is correct Turn ON the power to the receiver Press and hold the Forward Reverse button on the remote for 10 seconds within 30 seconds of switching the power ON to the receiver of the ceiling fan There will be a notification beep sound from the receiver to indicate that the pairing process is successf...

Страница 13: ...on switch so that only the ceiling fan that needs to be paired with the transmitter will be ON Press and hold the Forward Reverse button of transmitter 1 for 10 seconds within 30 seconds of switching the power ON to the receiver of ceiling fan 1 There will be a notification beep sound from the receiver to indicate that the pairing process is successful Turn ON and change the speed of the ceiling f...

Страница 14: ...receiver must be repaired Below are the operating symptoms and method to repair the pairing of the DC ceiling fan remote and receiver Issues Loss of control Fan is only running at high speed after installation Loss of control No reverse function after installation Loss of control Remote cannot communicate with the receiver Solution Switch off the main power of ceiling fan Switch on the main power ...

Страница 15: ... in Australia and more than 2 3m in Europe REPLACEMENT OF AN EXTENSION ROD 1 Uninstall the ball joint canopy canopy bottom cover the down rod joint cover from the fan assembly Figure 10 1 2 Replace the original down rod with the extended one Connect the extended cable provided with the extension rod to the wiring of the fan assembly Fig 10 2 3 Install the down rod joint cover canopy bottom cover c...

Страница 16: ...r indoor alfresco and coastal areas This product is IP66 rated and can be exposed to powerful water jets from any direction This rating should be maintained during installation Fig 10 2 Fig 10 3 Extension cable provided with extension rod Note Extension Rod Supplied Separately ...

Страница 17: ...eaning of your ceiling fan is the only maintenance required Use a soft brush or lint free cloth to avoid scratching the paint finish Please turn off electricity power when you do so Do not soak or immerse your ceiling fan in the water or other liquids It could damage the motor or the blades and create the possibility of an electrical shock Ensure that the fan does not come in contact with any orga...

Страница 18: ...wed or inserted a button battery immediately call the 24 hour Poisons Information Centre on 13 11 26 for fast expert advice Battery Leaks Battery contains chemicals and should be treated as any chemical would Take precautions when handling leaked battery chemicals Battery chemicals should not be placed near the eyes or ingested Contact Poisons Information Centre on 13 11 26 for fast expert advice ...

Страница 19: ...not been subjected to misuse neglect or been involved in an accident 2 The repairs are not required as a result of normal wear and tear 3 The product was installed by a licensed electrical contractor 4 A copy of the original receipt of purchase is presented 5 12 month warranty applies when used in any non domestic applications 6 This warranty does not cover stains scratch and scuff marks or dents ...

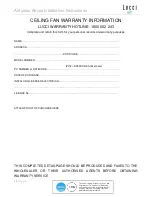
Страница 20: ... CEILING FAN WARRANTY INFORMATION LUCCI WARRANTY HOTLINE 1800 602 243 Complete and retain this form for your personal records and warranty purposes NAME ADDRESS POSTCODE MODEL NUMBER PO DATECODE Sticker here PO NUMBER or DATECODE DATE OF PURCHASE INSTALLING LICENSED ELECTRICIAN LICENCE No ATTACH PROOF OF PURCHASE HERE THIS COMPLETED DETAIL PAGE SHOULD BE PRODUCED AND FAXED TO THE WHOLESALER OR THE...

Отзывы: