background image

0


MAINTENANCE


6


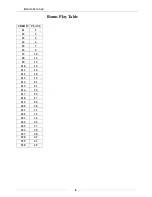
Bonus Play Table 

CREDIT


PLAYS


$1


1


$2


3


$3


4


$4


6


$5


7


$6


9


$7


10


$8


12


$9


13


$10


15


$11


16


$12


18


$13


19


$14


21


$15


22


$16


24


$17


25


$18


27


$19


28


$20


30


$21


31


$22


33


$23


34


$24


36


$25


37


$26


39


$27


40


$28


42


$29


43


$30


45


Содержание TOY SOLDIER

Страница 1: ...N28BU2B1 OPERATING MANUAL 46 40 and 30 Models Coastal Amusements Inc 1950 Swarthmore Ave Lakewood New Jersey 08701 U S A Fax Number 1 732 905 6815 sales coastalamusements com Phone Number 1 732 905 6662 Email Service coastalamusements com www coastalamusements com ...

Страница 2: ... 2 DEMO 2 Coin In 2 Shocking Machine 2 DIP SW Setting 3 1 DIP SW1 3 2 DIP SW1 4 Ability to change the Inner Values 4 MAINTENANCE 5 TEST 5 Bonus Play Table 6 ERROR CODE 8 TROUBLE SHOOTING 9 WIRING DIAGRAM 11 MAIN BOARD W150104 11 DISPLAY W991907 15 ...

Страница 3: ...on before claw reaches in filed the claws will catch item in the air 5 After movement of catching claws closes the claws rise up till it touches Stop Up SW Then the claws move to exit area and releases Game Rules DEMO Play Demo music for 2 minutes every 3 minutes Coin In 1 Coins v s plays By Dip SW setting 2 If COIN pulse speed was lower than 10msec the machine does not recognize the signal 3 If c...

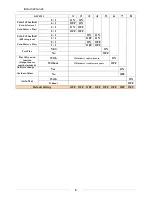
Страница 4: ...n 1 Coin 2 Linked Together Yes ON No OFF Adjustment of Credit Value Inner Value ON DIP SW OFF Bonus Plays see bonus table 4 pluses 1 when Dip SW1 4 if off YES ON NO OFF Claw moving to playfield when game begins YES ON NO OFF Reserved FIXED OFF At the moment the program sends strong strength on the basis of the setup winning percentage the system will keep sending strongest strength to the claw unt...

Страница 5: ...tor of Coin Pulse vs Play 4 1 ON ON 3 1 OFF ON 2 1 ON OFF 1 1 OFF OFF Free Play YES ON No OFF Play till you win function Output Sensor must be included With Will deduct 1 credit when win ON Without Will deduct 1 credit for each game OFF Ability to change the Inner Values Yes ON No OFF Auto Test With ON Without OFF Default Setting OFF OFF OFF OFF OFF OFF OFF OFF ...

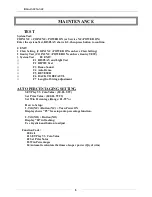
Страница 6: ... Test F 3 Demo Sound F 4 Auto Demo F 5 REVESED F 6 BACK TO DEFAUTL F 7 Length of String adjustment AUTO PERCENTAGING SETTING SET Play VS Coin Value 0 01 9 99 Set Prize Value 00 01 99 99 Set Win Percentage Range 01 99 How to Setup 1 Tilt NC Button NC Turn Power ON Display shows P5 for setup auto percentage function 2 Tilt NO Button NO Display 00 in flashing Use Joystick and button to adjust Functio...

Страница 7: ...INTENANCE 6 Bonus Play Table CREDIT PLAYS 1 1 2 3 3 4 4 6 5 7 6 9 7 10 8 12 9 13 10 15 11 16 12 18 13 19 14 21 15 22 16 24 17 25 18 27 19 28 20 30 21 31 22 33 23 34 24 36 25 37 26 39 27 40 28 42 29 43 30 45 ...

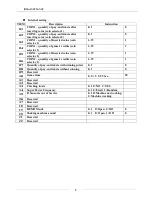
Страница 8: ...Inserted coins coin selector 2 1 99 1 06 COIN2 quantity of game s credits coin selector 2 1 99 1 07 Quantity of pay out tickets with winning prizes 0 9 0 08 Quantity of pay out tickets without winning 0 9 0 09 Reserved 10 Game time 0 5 5 5 99 Sec 50 11 Reserved 12 Reserved 13 Catching in Air 0 1 0 NO 1 YES 14 Super Power Frequency 0 1 0 Fixed 1 Random 15 If Sensor is out of Service 0 1 0 Machine n...

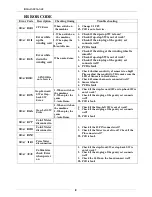
Страница 9: ...in Dark status 2 Check J5 sensor harness is connected well 3 Sensor is fault 4 PCB is fault Er 05 Stop Forward SW or Stop back SW Error 1 When switch on the machine 2 When play the game 3 Auto Demo 1 Check if the stop forward SW or stop back SW is out of work 2 Check if the air plug of the gantry set connects well 3 PCB is fault Er 06 Stop Left SW Error 1 When switch on the machine 2 When play the...

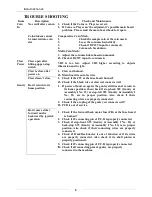
Страница 10: ...ire at claw coil connects well Gantry Don t return to its home position 1 If power off and on again the gantry still does not return to its home position then check if stop back SW Gantry Assembly I No 23 or stop left SW Gantry Assembly I No 21 are in proper position Also check if their connecting wires are properly connected 2 Check if the air plug of the gantry set connects well 3 PCB is out of ...

Страница 11: ... Down motor wires are properly connected 2 Check if Up Down motor is out of function Also check if its shaft pinion is in proper position 3 Check if J9 connecting pin of P C B is properly connected 4 Main board break down Don t lower down or only down a bit and close up in the air then it returns to its home position 1 Check if winding cord is stuck 2 Check if stop down SW is functioning properly ...

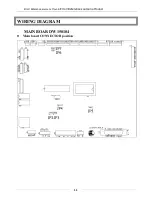
Страница 12: ...Error Reference source not found Error Reference source not found 11 WIRING DIAGRAM MAIN BOARD W150104 Main board CONNECTOR position ...

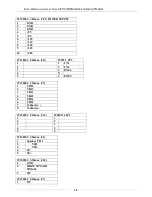
Страница 13: ... 9 24V 10 48V W150104 2 54mm J11 W9833 JP3 1 1 IN2 2 2 IN4 3 3 EN04 4 X 5 4 EN05 W150104 2 54mm J5 1 VR23 2 VR13 3 VR11 4 VR12 5 VR21 6 VR22 7 Voltmeter 8 Voltmeter W150104 2 54mm J14 W040316 JP1 1 1 2 2 3 3 4 4 5 5 W150104 2 54mm J6 1 Speaker VR 1 2 VR2 3 VR3 4 SP 5 SP W150104 2 54mm J10 1 GND 2 PRIZE SENSOR SINGAL 3 12V W150104 2 54mm J7 1 12V ...

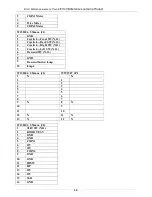
Страница 14: ...oystick Back SW N O 4 Joystick Right SW N O 5 Joystick Left SW N O 6 Descend SW N O 7 8 GND 9 Descend button lamp 10 lamp 2 W150104 2 54mm J2 W991907 JP1 1 X X 2 1 3 2 4 3 5 4 6 5 7 6 8 7 9 X 8 X 10 9 11 10 12 X 11 X 13 X 12 X W150104 2 54mm J8 1 TILT SW N O 2 DOOR TEST 3 GND 4 GND 5 COIN1 6 12V 7 12V 8 COIN2 9 GND 10 GND 11 HPSW 12 HP 13 12V 14 12V 15 SSR 16 GND ...

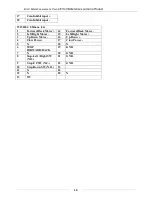
Страница 15: ...nput W150104 2 54mm J4 1 Forward Back Motor 14 Forward Back Motor 2 Left Right Motor 15 Left Right Motor 3 Up Down Motor 16 Up Down 4 Claw Power 17 Claw Power 5 X 18 X 6 STOP FORWARD BACK 19 GND 7 X 20 GND 8 Stop Left Right SW N O 21 GND 9 Stop UP SW N C 22 GND 10 Stop Down SW N O 23 11 X 24 12 X 25 X 13 12V ...

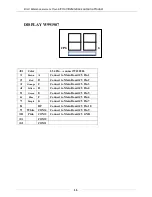
Страница 16: ...t to Main Board J5 Pin 2 3 Orange C Connect to Main Board J5 Pin 3 4 Yellow D Connect to Main Board J5 Pin 4 5 Green E Connect to Main Board J5 Pin 5 6 Blue F Connect to Main Board J5 Pin 6 7 Purple G Connect to Main Board J5 Pin 7 8 DP Connect to Main Board J5 Pin 10 9 White COM4 Connect to Main Board J5 Pin 9 10 Pink COM3 Connect to Main Board J5 GND 11 COM2 12 COM1 JP1 1 ...

Отзывы: