X
X
N
N
E
E
T
T
N
N
e
e
t
t
w
w
o
o
r
r
k
k
V
V
a
a
n
n
d
d
a
a
l
l
D
D
o
o
m
m
e
e
C
C
a
a
m
m
e
e
r
r
a
a
I
I
n
n
s
s
t
t
a
a
l
l
l
l
a
a
t
t
i
i
o
o
n
n
M
M
a
a
n
n
u
u
a
a
l
l
11 /
20
3
3
.
.
1
1
.
.
2
2
.
.
C
C
a
a
b
b
l
l
e
e
C
C
o
o
n
n
n
n
e
e
c
c
t
t
i
i
o
o
n
n
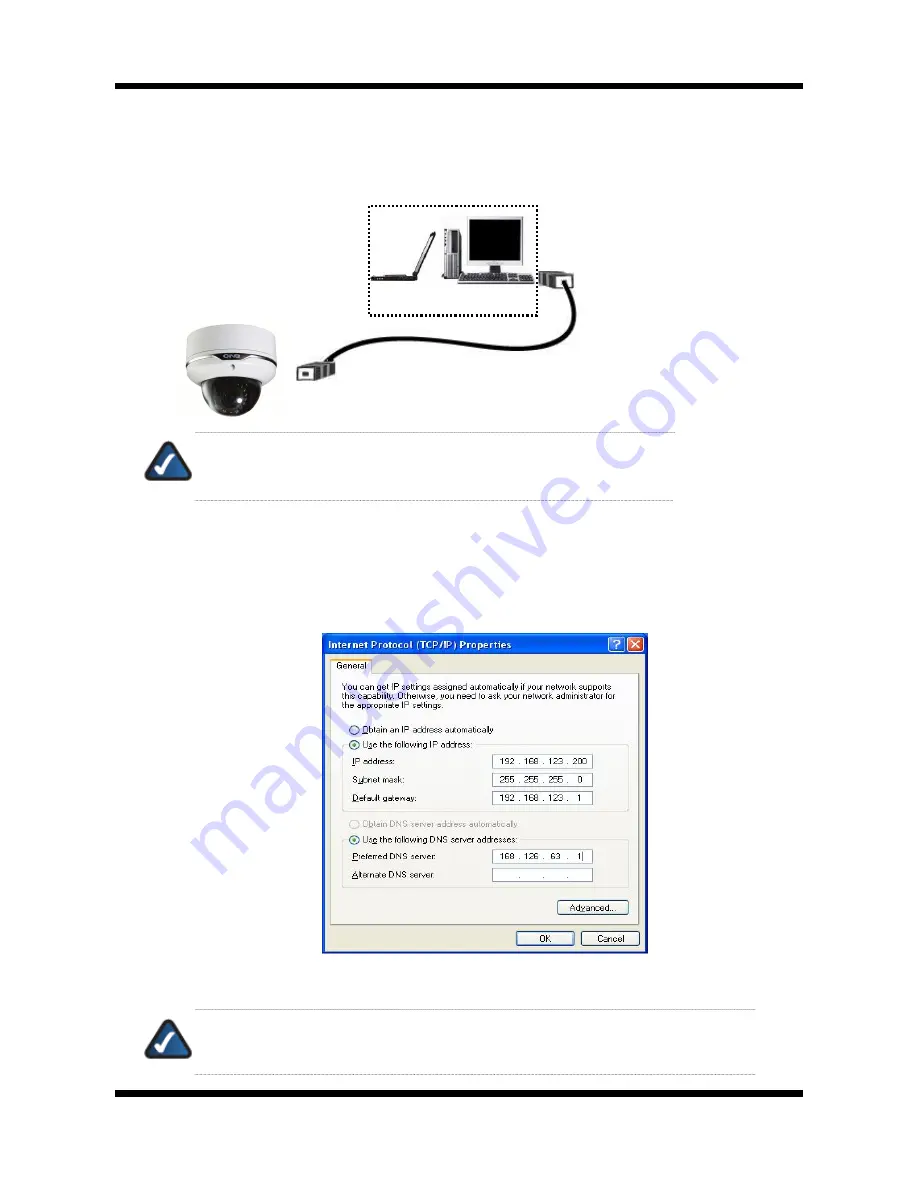
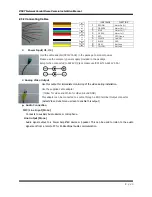
Connect XNET to PC directly
User can monitor and configure XNET camera by connecting it to your PC directly.
1.
Connect XNET camera to your PC directly using a LAN cable like below.
NOTE:
XNET camera’s IP address will be automatically set to the default
value, 192.168.123.100, after connecting XNET camera to your PC
directly.
(This process approximately takes 20~30 seconds)
2.
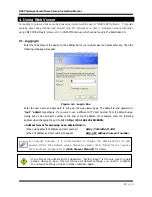
Please follow the direction to modify PC’s network configuration.
Windows Start Control Panel Network Connections Right-clicks on the Local Area Connection
icon Double click on the Internet Protocol (TCP/IP) icon.
Please set PC’s network configuration like below.
NOTE:
IP address for PC can be set from 192.168.123.2 to 192.168.123.254. Since
XNET camera’s IP address is already set to 192.168.123.100, you cannot allocate this
IP address to PC.
COMPUTER
Crossover Network
Cable


