TROUBLESHOOTING AND ELECTRICAL SYSTEM
Test Procedures
2001 Pioneer 900 Gasoline Vehicle Maintenance and Service Manual Page 11-31
11
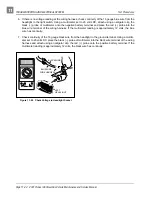
3. With the multimeter set to the diode test function (
ç
), connect the black (–) probe of the multimeter
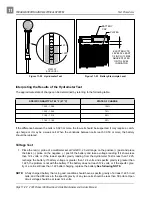
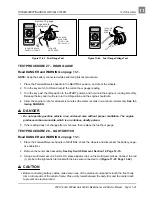
to the (+) terminal of the diode and the red (+) probe on the other terminal of the diode (Figure 11-35,
Page 11-30). The reading should be approximately 960 mV.
4. Reverse the multimeter probes and note the reading. The multimeter should indicate an overload (no
continuity) (Figure 11-36, Page 11-30). A diode is designed to conduct current in one direction only. If
a diode conducts current (shows continuity) in both directions, the diode has failed and must be
replaced. If a diode does not conduct current (does not show continuity) in either direction, the diode
has failed and must be replaced. See Diode Removal, Section 12, Page 12-14.
5. Reconnect the diode. See Diode Installation, Section 12, Page 12-15. See also following WARNING.
∆ WARNING
• Incorrect wiring could result in severe injury or death.
• Diode and solenoid connections must have correct polarity.
• Keep all persons clear of engine belts when making final connections.
TEST PROCEDURE 11 – STARTER/GENERATOR (GENERATOR FUNCTION)
Read DANGER and WARNING on page 11-1.
NOTE: Perform Test Procedure 10 before proceeding with this test procedure.
Keep the battery connected while performing this test procedure.
1. Place the Forward/Reverse handle in the NEUTRAL position, and chock the wheels.
2. Ensure that the wires are connected correctly and are tight. If they are not, rewire or tighten as necessary.
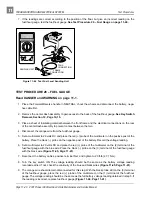
3. Disconnect the yellow wire from the DF terminal on the starter/generator. Cover the connector on the
yellow wire to make sure the yellow wire will not short to ground. Then, using a jumper wire, ground the
DF terminal to the A2 terminal (Figure 11-34, Page 11-29).
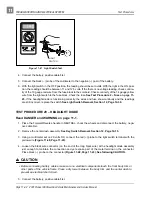
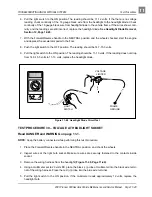
4. Using a multimeter set to 20 volts DC, place the red (+) probe on the positive (+) post of the battery,
and place the black (–) probe on the negative (–) post. Start the engine and run it at full governed
speed. The reading should show the voltage rising on the meter. If the voltage rises, see Test Proce-
dure 12 – Voltage Regulator on page 11-31. If the voltage does not rise, and the diode was found to be
functioning properly in Test Procedure 10, a tear-down inspection of the starter/generator will be neces-
sary. See Starter/Generator Removal, Section 12, Page 12-2.
5. Reconnect the yellow wire to the DF terminal on the starter/generator.
TEST PROCEDURE 12 – VOLTAGE REGULATOR
Read DANGER and WARNING on page 11-1.
NOTE: Perform Test Procedures 10 and 11 before proceeding with this test procedure.
Keep the battery connected while performing this test procedure.
1. Place the Forward/Reverse handle in the NEUTRAL position, and chock the wheels.
Содержание Pioneer 900
Страница 1: ......
Страница 2: ......
Страница 22: ...3...
Страница 88: ...7...
Страница 92: ...8...
Страница 100: ...9...
Страница 108: ...10...
Страница 188: ...12...
Страница 268: ...14...
Страница 272: ...15...
Страница 316: ...16...
Страница 332: ...17...
Страница 341: ......
Страница 342: ......
Страница 343: ......

