background image

Battery Charger

2006 Gold Standard Electric Vehicle Owner’s Manual

Page 29

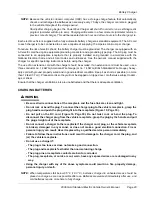
NOTE: 

Because the vehicle onboard computer (OBC) has a storage charge feature that automatically
checks and recharges the batteries as necessary every 15 days, the charger can remain plugged
to the vehicle throughout the storage period.

Shortly after charging begins, the PowerDrive Charger will shut off in order to run a self-diagnostic
program (ammeter will drop to zero). Charging will resume in a few moments (ammeter returns to
previous rate of charge). This will be repeated at one hour and at two hours into the charge cycle.

Each electric vehicle is supplied with a fully automatic battery charger as standard equipment. The AC cord
to each charger is to be connected to a source capable of supplying 15 amperes minimum per charger.

To reduce the risk of electric shock, the battery charger must be grounded. The charger is equipped with an
AC electric cord having an equipment-grounding conductor and a grounding type plug. The AC plug must be
connected to an appropriate receptacle that is properly installed and grounded in accordance with the
National Electrical Code and all local codes and ordinances. See the owner’s manual supplied with the
charger for specific operating instructions before using the charger.

The use of an extension cord with the charger should be avoided. If an extension cord must be used, use a
three-conductor no. 12 AWG (American Wire Gauge) or no. 14 SWG (British Standard Wire Gauge), heavy-
duty cord with ground, properly wired and in good electrical condition. Keep it as short as possible (no more
than 12 feet (3.7 m)). Place all cords so they will not be stepped on, tripped over, or otherwise subject to dam-
age or stress.

Ensure that the charger ventilation slots are unobstructed and that there is adequate ventilation. 

CHARGING BATTERIES

ý 

WARNING

• Be sure all wire connections at the receptacle and the fuse link are clean and tight.
• Do not rock or bend the plug. To connect the charger plug to the vehicle receptacle, grasp the

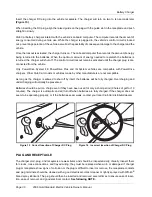
plug handle and push the plug straight into the receptacle (Figure 15, Page 30).

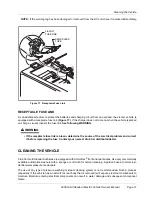
• Do not pull on the DC cord (Figure 16, Page 30). Do not twist, rock or bend the plug. To

disconnect the charger plug from the vehicle receptacle, grasp the plug by the handle and pull
the plug straight out of the receptacle.

• Do not connect a charger to the receptacle if the charger cord, plug, or the vehicle receptacle

is broken, damaged in any manner, or does not make a good electrical connection. Fire or
personal injury can result. Have it replaced by a qualified service person immediately.

• Failure to follow these instructions could result in damage to the charger cord, the plug, and

(or) the vehicle receptacle.

• Do not use a charger if:

- The plug is too loose or does not make a good connection.
- The plug and receptacle feel hotter than normal during charge.
- The plug pins or receptacle contacts are bent or corroded.
- The plug, receptacle, or cords are cut, worn, have any exposed wires or are damaged in any

way.

• Using the charger with any of the above symptoms could result in a fire, property damage,

personal injury, or death.

NOTE: 

When temperatures fall below 65 °F (18.3 °C), batteries charged in unheated areas should be
placed on charge as soon as possible after use. Batteries are warmest immediately after use, and
cold batteries require more time to fully charge.

Содержание 2006 DS Golf

Страница 1: ...Club Car Club Car Club Car 2006 Owner s Manual Gold Standard Electric Vehicles F F A A A C C T T O R R Y E M NU U R E D C E R T I I F ED GOL D STA A N D D R CLUB CAR...

Страница 2: ......

Страница 3: ...Owner s Manual An business 2006 Gold Standard Vehicles Electric DS Golf Handyman DS Golf 4 Passenger Lynx Box Bed Lynx 4 Passenger...

Страница 4: ......

Страница 5: ...eration of golf cars defines a golf car as a vehicle used to convey a person or persons and equip ment to play the game of golf in an area designated as a golf course Throughout this manual the words...

Страница 6: ...that you ask them to read this manual before they operate the vehicle Club Car products are backed by a customer support system designed to offer you fast courteous service In the event that your Club...

Страница 7: ...ns 16 Loading and Unloading Box Bed Vehicles 18 Towing with the Vehicle DS Golf and Handyman Vehicles 19 Towing the Vehicle 19 Transporting on a Trailer 20 Storage 21 Maintenance 22 Periodic Service S...

Страница 8: ...L NUMBER BRAKE PEDAL PARK BRAKE PEDAL MOTOR BRAKING DECAL POWERDRIVE PLUS AND IQ SYSTEM VEHICLES ACCELERATOR PEDAL OPERATING INSTRUCTIONS DECAL UNDERAGE WARNING DECAL DRIVER PASSENGER WARNING DECAL KE...

Страница 9: ...LUS AND IQ SYSTEM VEHICLES ON TOW SWITCH BRACKET UNDER SEAT FOUR PASSENGER VEHICLE ONLY OR FORWARD REVERSE SWITCH POWERDRIVE PLUS AND IQ SYSTEM VEHICLES ON SPEED CONTROLLER COVER POWERDRIVE PLUS AND I...

Страница 10: ...Page 6 2006 Gold Standard Electric Vehicle Owner s Manual...

Страница 11: ...onal injury or death Contact your Club Car distributor dealer DANGER A DANGER indicates an immediate hazard that will result in severe personal injury or death WARNING A WARNING indicates an immediate...

Страница 12: ...ical repair The appropriate instructions must be used when performing maintenance service or accessory installation PowerDrive Plus and IQ System vehicles Place Tow Run switch in the TOW position befo...

Страница 13: ...r to read and understand this manual and to pay special attention to the features specific to his her vehicle s MODEL IDENTIFICATION The serial number of the vehicle is printed on a bar code decal mou...

Страница 14: ...icle set the park brake place the Forward Reverse handle or switch in the NEUTRAL position turn the key switch to the OFF position and remove the key when leaving the vehicle Figure 3 Serial Number De...

Страница 15: ...s the Forward Reverse handle on all other models on the seat support panel below and to the right of the driver s right knee The F FORWARD and R REVERSE positions are clearly marked Push down the FORW...

Страница 16: ...ke pedal It has the word PARK molded into it and the words PARK BRAKE marked on top of it Figure 8 To set the park brake press the brake pedal firmly and tilt the park brake portion of the pedal forwa...

Страница 17: ...next charge cycle When the charger is unplugged the warning light will illuminate and remain illuminated for 10 seconds if the charge is less than 90 complete but the vehicle has enough power for app...

Страница 18: ...lace the Tow Run switch in the TOW position to turn off power to the vehi cle electrical system thus preventing vehicle electrical components from discharging the batteries PRE OPERATION AND DAILY SAF...

Страница 19: ...he brake pedal cannot be pressed to the floor under any circumstance Park brake When latched the park brake should lock the wheels and hold the vehicle stationary on an incline of 20 or less It should...

Страница 20: ...except for the 4 passenger vehicle which can carry four people The vehicle is not specially equipped for handicapped persons Be sure all persons can properly operate the vehicle prior to allowing them...

Страница 21: ...e sure load is secure 4 Make sure everyone is seated and holding onto seat hand holds or handrails 5 Make sure wheels are turned in desired direction and that nothing is in your path 6 Turn key to the...

Страница 22: ...e Zero Speed Detect on page 15 LOADING AND UNLOADING BOX BED VEHICLES WARNING Firmly engage the park brake before loading the vehicle Do not allow riders in the cargo bed Do not exceed the rated capac...

Страница 23: ...er being towed Avoid sudden starts sudden stops and tight turns when towing Avoid stopping on a hill when towing If you must stop on a hill avoid sudden starts or rolling backwards and stopping sudden...

Страница 24: ...passenger vehicle is equipped with a front tow bar attaching point A light duty tow bar is available for break down towing and sin gle vehicle towing Observe all of the previous WARNING statements whe...

Страница 25: ...gallon 3 8 L of water Rinse solution off bat teries Do not allow this solution to enter the batteries Be sure terminals are tight Let the terminals dry and then coat them with Battery Terminal Protec...

Страница 26: ...ributor dealer to perform all repairs and semiannual and annual periodic ser vice WARNING If any problems are found during scheduled inspection or service do not operate the vehicle until repairs are...

Страница 27: ...d underside of vehicle Semiannual service by trained technician only every 50 hours of operation or 100 rounds of golf Brake system Check brake shoes replace if necessary See Section 6 Wheel Brake Ass...

Страница 28: ...Moly Lube CCI P N 1012151 Brake linkage and pivots Dry Moly Lube CCI P N 1012151 Accelerator pivot rod supports Dry Moly Lube CCI P N 1012151 Spring loaded ball joint MCOR vehicles are not equipped wi...

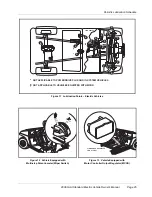
Страница 29: ...le Equipped with Multi step Potentiometer Wiper Switch Figure 13 Vehicle Equipped with Motor Controller Output Regulator MCOR 9 NOT APPLICABLE TO POWERDRIVE PLUS AND IQ SYSTEM VEHICLES NOT APPLICABLE...

Страница 30: ...of magnesia or vegetable oil Call a physician immediately Eyes Flush with water for 15 minutes Call a physician immediately WARNING Wear safety glasses or approved eye protection when servicing the v...

Страница 31: ...vel For best battery life add only distilled water See following NOTE NOTE A battery watering gun or bottle is available at many auto parts dealers 3 The hold down straps should be tight enough so tha...

Страница 32: ...e and be as short as possible The use of improper extension cord could result in fire or an electrical shock Do not operate the charger if it has received a sharp blow was dropped or otherwise damaged...

Страница 33: ...t as possible no more than 12 feet 3 7 m Place all cords so they will not be stepped on tripped over or otherwise subject to dam age or stress Ensure that the charger ventilation slots are unobstructe...

Страница 34: ...werDrive chargers Other Club Car models or vehicles made by other manufacturers are not compatible As long as the charger is allowed to shut off by itself the batteries will be fully charged Overcharg...

Страница 35: ...al problem and correct it before replacing the fuse Contact your nearest Club Car distributor dealer CLEANING THE VEHICLE Club Car Gold Standard vehicles are equipped with ArmorFlex front and rear bod...

Страница 36: ...lable from Club Car and our dealers distributors You can obtain the name and phone number of your closest Club Car contact by visiting our web site at www clubcar com and clicking the Dealer Locator l...

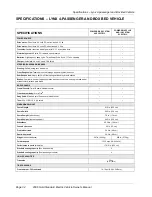
Страница 37: ...ydraulic shocks Brakes Dual rear wheel self adjusting brakes with cast iron drums and single brake pedal with automatic release park brake BODY CHASSIS Frame Chassis Twin I Beam welded aluminum Front...

Страница 38: ...uty multi leaf springs with dual hydraulic shocks Brakes Dual rear wheel self adjusting brakes with cast iron drums and single brake pedal with automatic release park brake BODY CHASSIS Frame Chassis...

Страница 39: ...accessories installation of parts or accessories that are not original equipment overloading accident alteration abuse or neglect Transportation expenses for warranty services are also excluded from t...

Страница 40: ...ry or death CLUB CAR LIMITED THREE YEAR WARRANTY FOR GOLD STANDARD VEHICLE POWERDRIVE T 875 8 VOLT BATTERIES ONBOARD COMPUTER CLUB CAR INC CLUB CAR hereby warrants to the original purchaser that the n...

Страница 41: ...ED BY CLUB CAR AND EXCLUDED FROM THIS WARRANTY THE PURCHASER AND CLUB CAR EXPRESSLY AGREE THAT THE REPLACEMENT OR REPAIR OF THE DEFECTIVE VEHICLE OR COMPONENT THEREOF IS THE SOLE REMEDY OF THE PURCHAS...

Страница 42: ...rity of Illustrations 4 Periodic Service and Periodic Lubrication Schedules Poor Fair Average Good Excellent Comments Suggestions In order to help us better serve you please rate this publication in t...

Страница 43: ......
Страница 44: ...Car Inc P O Box 204658 Augusta GA 30917 4658 USA Web www clubcar com Phone 1 706 863 3000 1 800 ClubCar Intl l 1 706 863 3000 Fax 1 706 863 5808 Publication Part Number RM1011206 Edition Code 0705B07...

Отзывы:

Похожие инструкции для 2006 DS Golf