


2
- Do not remove a ZigBee device from the ZigBee network router or coordinator without removing the battery from a
ZigBee device.
J
J
o
o
i
i
n
n
i
i
n
n
g
g
t
t
h
h
e
e
Z
Z
i
i
g
g
B
B
e
e
e
e
N
N
e
e
t
t
w
w
o
o
r
r
k
k
As a ZigBee device, the Panic Button needs to join a ZigBee network to connect to the power device. Please follow
the steps bellow to join the Panic Button into the ZigBee network.
1. Press and hold the ZigBee Button for 10 seconds for the Panic Button to search and join an existing ZigBee
network. At the 10
th
second, the LED indicator will flash once. Please make sure to enable the permit-join feature
on the router or coordinator of your ZigBee network
2. If the Panic Button successfully joins a ZigBee network, the LED Indicator will flash twice to confirm.
3. After joining the ZigBee network, the Panic Button will be registered in the network automatically. Please check
the ZigBee network coordinator, system control panel or CIE (Control and Indicating Equipment) to confirm if
joining and registration is successful.
4. If network joining and registration is unsuccessful, please check your ZigBee network coordinator, control panel or
CIE setting to ensure the permit-join function is available, and then use the Factory Reset function below to join
the ZigBee network.
R
R
e
e
m
m
o
o
v
v
i
i
n
n
g
g
D
D
e
e
v
v
i
i
c
c
e
e
f
f
r
r
o
o
m
m
Z
Z
i
i
g
g
B
B
e
e
e
e
N
N
e
e
t
t
w
w
o
o
r
r
k
k
(
(
F
F
a
a
c
c
t
t
o
o
r
r
y
y
R
R
e
e
s
s
e
e
t
t
)
)
To remove the Panic Button from current ZigBee network, the Panic Button must be put to Factory Reset to
complete device removal. Factory Reset function will clear the device of its stored setting information and prompt
the Panic Button to search for new Zi
gBee network.
Before removing device, make sure the Panic Button is within current ZigBee network signal range
1. Press and hold the ZigBee function button for 10 seconds, then release the button to reset Panic Button.
2. Upon reset, the Panic Button will clear current ZigBee network setting and transmit signal to ZigBee coordinator
to remove itself from current ZigBee network. It will then actively search for available ZigBee network again and
join the network automatically.
O
O
T
T
A
A
F
F
i
i
r
r
m
m
w
w
a
a
r
r
e
e
U
U
p
p
g
g
r
r
a
a
d
d
e
e
The Panic Button supports OTA firmware upgrade feature via ZigBee network, which can be initiated from the
ZigBee network coordinator. Follow steps below to perform OTA firmware upgrade.
1. Press and hold the Active Button for 6 seconds. Release the button when the LED flashes once.
2. You have to access your ZigBee Coordinator to perform the firmware upgrade on the air.
3. On the configuration webpage, select the device that you wish to upgrade and select the new ZigBee firmware file
provided. Please refer to ZigBee Coordinator User Manual for detail.
4. Press
OK
to start upgrading process, and the LED will keep flashing. During the OTA process, please do not
perform any other actions, or power down the panel.
5. The length of an upgrade will take approximately 20 to 30 minutes. Please note that the duration may vary based
on file size or distance between your accessory and coordinator.
6. Wait for firmware to complete update. When the progress reaches 100%, the Device will reset automatically. You
can also refresh the webpage again to ensure if the device firmware is successfully updated with the newest
version displayed.
Operation
Press the Active Button to transmit signal to ZigBee network coordinator / gateway and activate alarm.
If the Panic Button is disconnected from the ZigBee network (e.g. being too far away from the ZigBee
network), the Panic Button needs to rejoin the ZigBee network by pressing the button.
Installation
M
M
o
o
u
u
n
n
t
t
i
i
n
n
g
g
t
t
h
h
e
e
P
P
a
a
n
n
i
i
c
c
B
B
u
u
t
t
t
t
o
o
n
n
The Panic Button can be mounted using two methods: Self-adhesive or Screw mounting.
Self-adhesive mounting
1. Clean the surface with a suitable degreaser.
2. Remove the protective covering from one side of double-sided adhesive pad
and firmly apply to the back of the device.
3. Remove the other covering and firmly place/press the device in the desired
location.
Do not use the Self-adhesive mounting method on poorly painted and/or rough
surfaces.
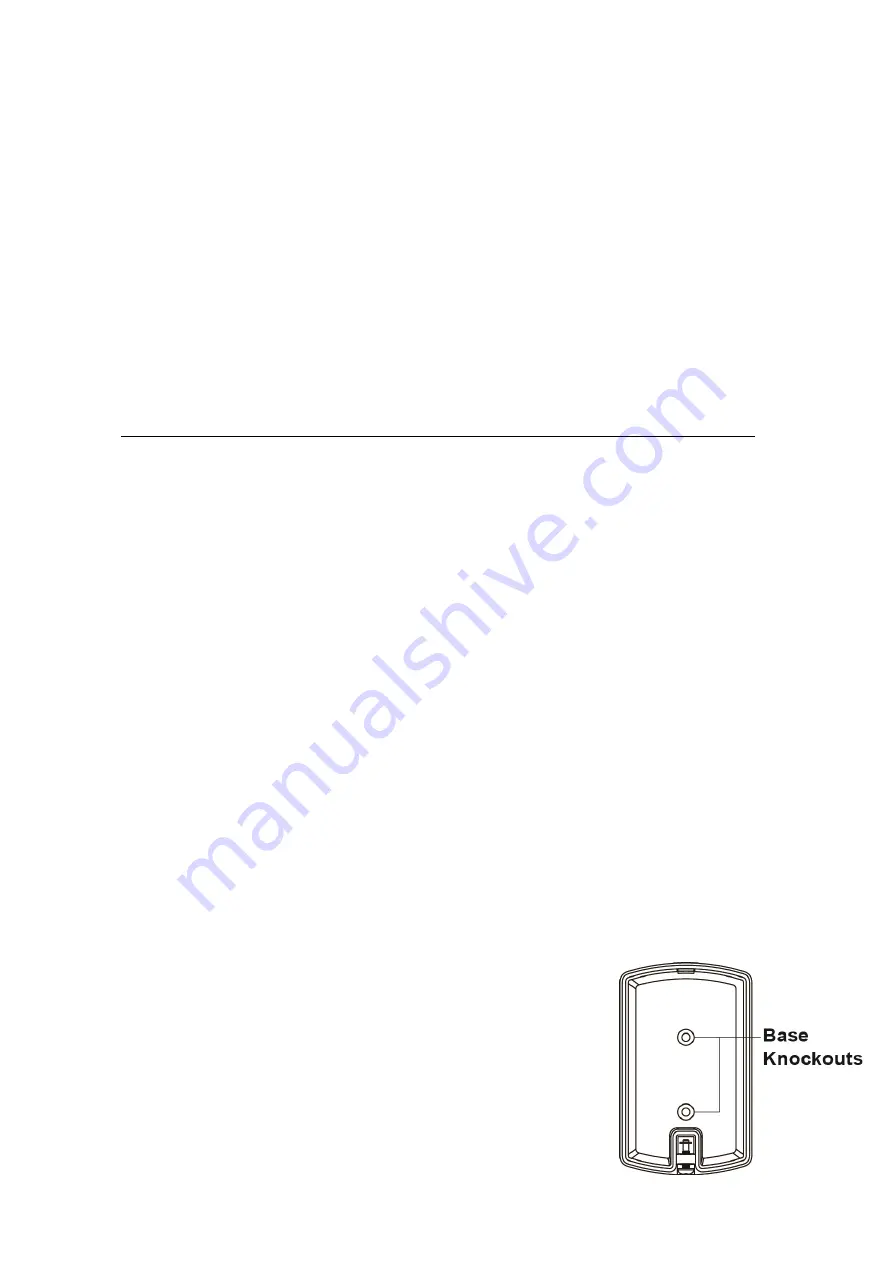
Screw Mounting
The Button base has two screw knockouts, where the plastic is thinner for
mounting purposes. To mount the Panic Button:
1. Loosen the screw using a Philips screwdriver and separate the top cover from
the base.
2. Break through the knockouts on the base.


