8. Reinstall the grille and screw it in (figure A).
4. OPERATING INSTRUCTIONS
It is recommended that you installed your appliance in a place where the ambient temperature is
between 16-32°C (N class marked on the rating plate). If the ambient temperature is above or below
recommended temperatures, the performance of the unit may be affected and it may not be possible
to obtain temperature between 5-10°C/10-18°C.
•
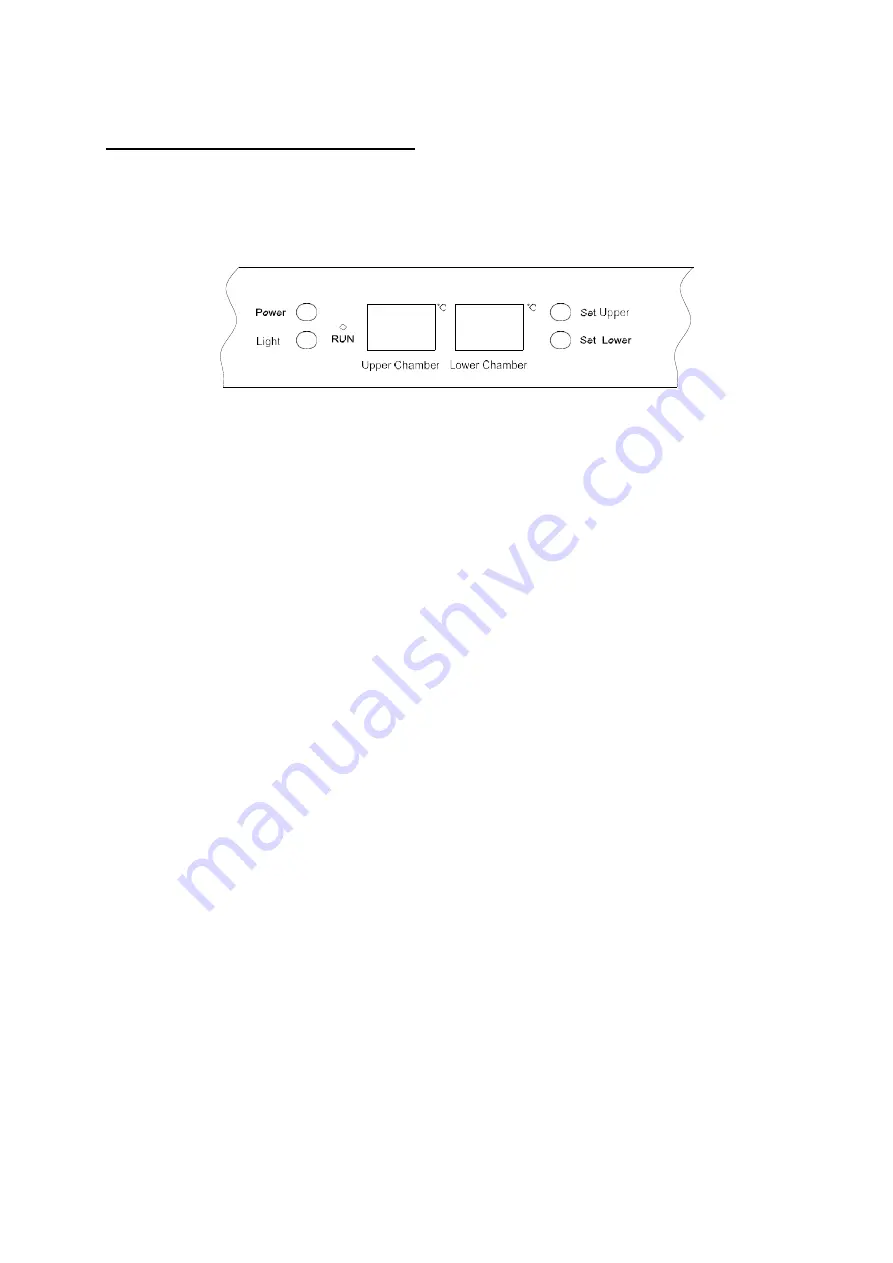
“RUN”
Power indicator
•
“Power”
On/Off switch (press and hold for 3s)
•
“Light”
Lighting control button
•
“Upper Chamber”
Upper chamber electronic display
•
“Lower Chamber”
Lower chamber electronic display
•
“Set Upper” button
Upper chamber temperature setting button
•
“Set Lower” button
Lower chamber temperature setting button
Press
“Set Upper”
to adjust the upper chamber temperature. The relevant chamber display will start
to flash and each press on the button will alter the temperature by 1°C. Once the lowest set
temperature of 5°C is reached, the display automatically changes to the highest set temperature of
10°C. Once selected, the display will flash for approximately 5s before showing the current internal
temperature of the cellar. The set temperature can be viewed at any time by pressing and holding the
temperature select buttons.
Press
“Set Lower”
to set the upper chamber temperature.. The relevant chamber display will start to
flash and each press on the button will alter the temperature by 1°C. Once the lowest set temperature
of 10°C is reached, the display automatically changes to the highest set temperature of 18°C. Once
selected, the display will flash for approximately 5s before showing the current internal temperature of
the cellar. The set temperature can be viewed at any time by pressing and holding the temperature
select buttons.
In the event of a power cut, all previously selected temperature settings will be deleted and each
chamber will re-initialize to the factory-preset temperature of 6°C for the upper chamber and 12°C for
the lower chamber.


