background image

13

    b.  Pull the water tank out from the cooler and put the unloaded water 
     

pump in a small dish to avoid water dropping on the ground.

    c.  Clean the water tank with a soft brush or cloth.
     

Note: Do not use gasoline, thinners, solvents, ammonias or other 


chemicals for cleaning and maintenance.

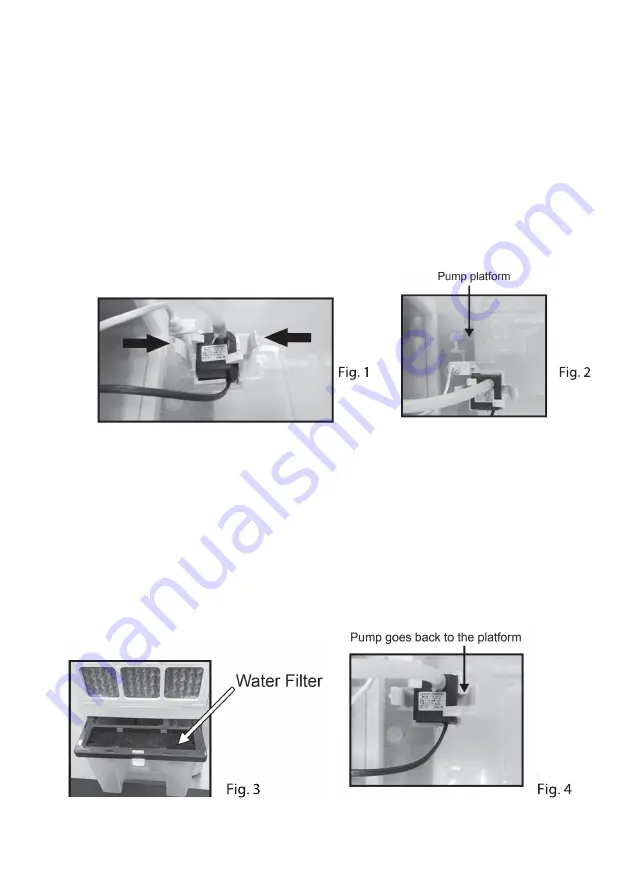
4.  Clean the water filter under running water and soft brush if needed.(fig.4)
5.  Drain all water in the water tank after cleaning.
6.  Put the water pump inside the water tank. Install the water pump to
     the pump platform.

7.  Hold the water tank lock tab and push the water tank back to the cooler 
    until the lock tab clicks into the cooler properly.

CLEANING & MAINTENANCE

Cleaning Water Tank and Top water Inlet

1.   Before undergoing maintenance, please disconnect the power cord 
    plug out the power source.
2.  Add water into the water tank via top water inlet.
3.  When all the water in the top water inlet drain into the water tank, 
    remove the water tank as per the procedures below:
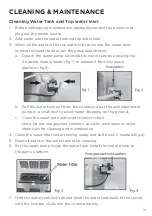
    a.  Detach the water pump sit inside the water tank by pressing the 
     

2 bracket hook inwards (fig. 1) to release it from the pump 


platform (fig.2).

Содержание CAC-75W

Страница 1: ......

Страница 2: ......

Страница 3: ...l 8 Product Overview 9 How to Use 10 Cleaning and Maintenance 13 Cleaning water tank and top water inlet 13 Changing the honeycomb filter pads 14 Troubleshooting Last page Specifications Last page Customer Helpline Last Page CONTENTS ...

Страница 4: ...c shock Do not expose the product to water The electrical insulation could be damaged and cause electrocution Do not touch the unit when barefoot or parts of your body are wet or damp This appliance is not intended for use by persons including children with reduced physical sensory or mental capabilities or lack of experience and knowledge unless they have been given supervision or instruction con...

Страница 5: ...maintain the product do not use any chemical or cleaning agent or wet cloth please only ensure to utilize a dry cloth to wipe it down from marks or dust and only after unplugging the product from the power socket Do not direct airflow directly onto plants or animals as long exposure can affect them Please ensure to contact our call center for any repair or service required for the products not doi...

Страница 6: ...upervise children to ensure they do not play with the appliance Close supervision is necessary when any appliance is used by or near children Cleaning and user maintenance shall not be made by children without supervision DO NOT INSTALL USE THE APPLIANCE IN THE FOLLOWING AREAS outdoors or where water is likely to splash near a bath shower laundry basin or swimming pool in an area where oil is like...

Страница 7: ...ppliance to high heat sparks and open flames Do not pierce or burn the appliance Maintenance must only be carried out by properly qualified authorised personnel If the appliance requires maintenance or service contact our after sales support centre info ayonz com ...

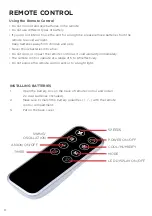
Страница 8: ...a fire Do not drop or impact the remote control as it void warranty immediately The remote control operate at a range of 5 to 6M effectively Do not expose the remote control sensor to a bright light INSTALLING BATTERIES 1 Open the battery box on the back of remote control and install 2 x AAA batteries included 2 Make sure to match the battery polarities with the remote control compartment 3 Put on...

Страница 9: ...9 PRODUCT OVERVIEW ...

Страница 10: ...e three airflow styles Standard Wind The fan will blow at maximum speed Natural Wind The fan speed will fluctuate to imitate natural wind Sleep Wind The fan speed will decrease by 1 level per half hour and then continue to run at low speed LIGHT Press to turn OFF the LED Display TIMER Press the TIMER button to activate timer the time can be set from 1 to 12 hours LED screen will display the corres...

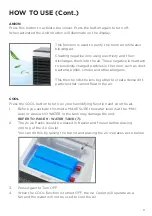
Страница 11: ...onds the ions together to create dense dirt particles that cannot float in the air COOL Press the COOL button to turn on your humidifying function and cool the air 3 Press Again to Turn OFF 4 When the COOL function is turned OFF the Air Cooler will operate as a fan and the water will not be used to cool the air 1 Before you activate this mode MAKE SURE the water level is at the MIN level or above ...

Страница 12: ...the water tank to deactivate the alarm in cool mode First switch OFF the unit and unplug from the power outlet Fill the water tank with water above the minimum water level mark Plug in and switch ON again To deactivate the alarm and continue using the unit as a fan without evaporative cooling switch the unit OFF and then ON again The Low Water Alarm will not act ivate in Fan only mode The Low Wate...

Страница 13: ...water tank Install the water pump to the pump platform 7 Hold the water tank lock tab and push the water tank back to the cooler until the lock tab clicks into the cooler properly CLEANING MAINTENANCE Cleaning Water Tank and Top water Inlet 1 Before undergoing maintenance please disconnect the power cord plug out the power source 2 Add water into the water tank via top water inlet 3 When all the w...

Страница 14: ... and restrict air flow If mineral deposits remain on the Honeycomb pads the filter should be removed and washed under fresh water For a deeper clean a mild detergent should be used with a soft brush Once cleaned the filter should be rinsed in clean water before leaving to dry We recommend cleaning the honeycomb filter at least every two months depending on your needs For best resul ts allow the ho...

Страница 15: ...15 ...

Страница 16: ...ow for solutions to common problems If none of the solutions offered help you solve your problem please contact our support centre for advice on click technologist com Do not attempt to repair the appliance yourself SPECIFICATIONS Rating 220 240V 50 60Hz Power POWER 75W Weights NET 6 4 kg GROSS 7 7 kg Dimensions 260 W 300 D 700 H mm ...

Отзывы: