Right View 1 - 23
Quick Start Guide
1
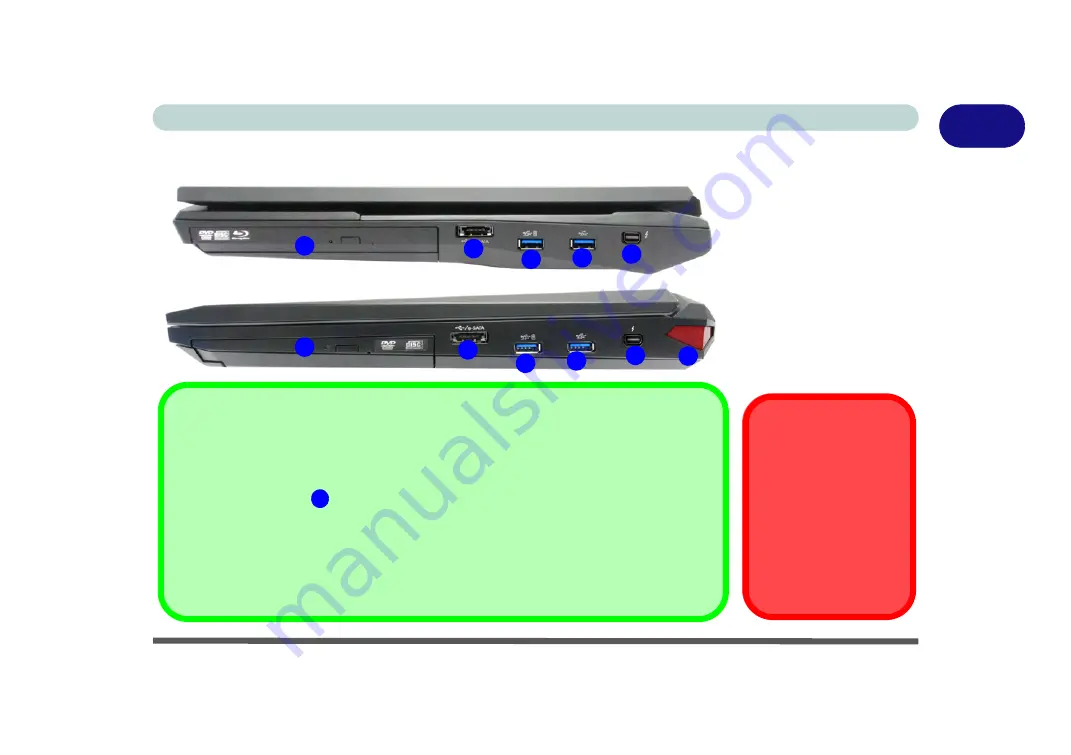
Right View
Figure 1 - 13
Right View
1. Optical Device
Drive Bay
2. Combined eSATA/
USB 2.0 Port
3. Powered USB 3.0
Port
4. USB 3.0 Port
5. Thunderbolt Port
6. Rear LED (
Model
B
Only)
Ejecting Thunderbolt
Devices
In order to prevent sys-
tem problems make sure
you
do not simply pull
the cable out from the
Thunderbolt port
. The
hardware must be eject-
ed safely (see
USB 3.0 Ports & USB Port Power
Note that the connections to the USB ports only fit one way, do not force them. USB 3.0
ports are denoted by their blue color; USB 2.0 ports are colored black.
The powered USB 3.0
port can supply power (
for charging devices only, not for op-
erating devices
) when the system is off but still powered by the AC/DC adapter plugged
into a working outlet, or powered by the battery with a capacity level above 20% (this may
not work with certain devices - see page
). Toggle power to this port by using
Fn +
power button
(
press for around 1 to 2 seconds
to toggle).
for a more detailed description of the ports & jacks etc.
3
1
2
3
4
5
1
2
3
4
5
Models A & C
Model B
6
Содержание P375SM
Страница 1: ...V13 1 00 ...
Страница 2: ......
Страница 18: ...XVI Preface ...
Страница 32: ...XXX Preface ...
Страница 78: ...Quick Start Guide 1 46 1 ...
Страница 108: ...Storage Devices Mouse Audio 2 30 2 ...
Страница 138: ...Drivers Utilities 4 10 4 ...
Страница 176: ...Upgrading The Computer 6 20 6 ...
Страница 260: ...Modules 7 84 7 ...
Страница 278: ...Interface Ports Jacks A 6 A ...
Страница 310: ...NVIDIA Video Driver Controls C 28 C ...
Страница 316: ...Specifications D 6 D ...


