5
Toothed rod 1 pc
Electric motor 1 pc
Battery compartment 1 pc
Car body 2 pcs
Large tyre 4 pcs
Wheel rim
4 pcs
String (150 cm long) 1 pc
Steering wheel 1 pc
Spool 1 pc
Pulley
4 pcs
Hook
1 pcs
Crank
2 pcs
Elastic band 3 pcs
Small tyre (for pulley) 4 pcs
ACTIVITIES
Before you start building, observe carefully how the parts of the kit are made!
If you get stuck, ask an adult for help.
Warning! In the assembly steps, different icons indicate when the model needs to be
rotated, when to tighten the pieces, when to use a beam with pins or one with pegs.
WARNING!
• Take care when detaching the parts from the plastic frame. Use your hands to gently rotate
each element. Never just pull them off.
• You will find that the rods fit into the various different parts, such as the collars and
cogwheels etc., with varying degrees of resistance and tightness. Try adjusting the position of
the rod in the hole to achieve a better fit, if necessary.
Rotate the
model.
The pieces need
to be tightened
Beam
with pins
Beam with
pegs
•
Key
180°
Содержание Science & Play TechnoLogic Mechanics Laboratory 75025
Страница 12: ...12 2 4 3 X1 X1 X2 X4 X4 X8 X4 X2 X2 X1 Assembled motor...
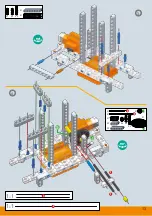
Страница 13: ...13 5 90 6 90 1 1 3 1 1 5 3 5 41 10 X1 X1 X1 X2 X3 X4 X3 X2 X1 X3 X2 X1 X1 X1 X1 3 5 41 10...
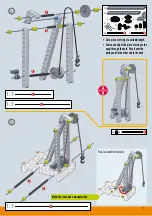
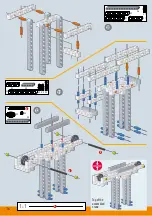
Страница 16: ...16 10 11 12 3 3 1 1 3 X4 X7 X2 X1 X1 X2 X4 X8 X8 X2 X3 X2 X2 X2 X4 3 Top of the assembled crane...
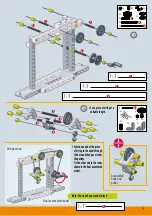
Страница 19: ...19 1 1 1 2 3 3 3 X6 X1 X2 3 X2 X1 X4 X2 X4 X4 Assembled base 46 In the gym with a barbell...
Страница 20: ...20 3 4 5 1 1 2 2 3 3 1 1 6 6 1 1 3 X6 X2 X1 2 3 X10 X1 X1 6 X1 X1 X1 Final assembled model...
Страница 28: ...28 3 4 1 1 4 4 18 X6 X1 X2 X1 X2 X2 X2 X1 X1 4 18 Front...
Страница 29: ...29 5 6 1 1 3 3 3 X1 X1 X1 X1 X3 X1 X1 X2 X2 3 X1 X1 X1 X1 X1 X1 X2 Front components...
Страница 31: ...31 9 1 1 4 4 41 X4 X1 X1 X1 X4 X2 X1 4 41 Assembled helicopter rotor and blades...

