ELECTRICAL INFORMATION
This appliance has been designed for dry vacuum cleaning only and must
not be used to pick up any liquids.
Kerstar declines any liability should this or any of the following measures not be observed.
Cable & Plug
This Vacuum Cleaner is an earthed appliance and has 10 metres of 3 core fl ex with a moulded on
impact resistant 13amp 3 pin plug (to BS 1363A). The fuse fi tted (ASTA Approved) is rated at
13amps. Only 13amps fuses must be used
(Not applicable to 110V models – these are fi tted with a
yellow 16 amp 3-pin plug suitable for 110V)
.
Should the moulded on plug be damaged please follow this procedure:
Switch off supply at socket, remove damaged plug from socket, cut plug off from fl ex.
Make sure the damaged plug is disposed of immediately so as there is no chance of the damaged
plug being used.
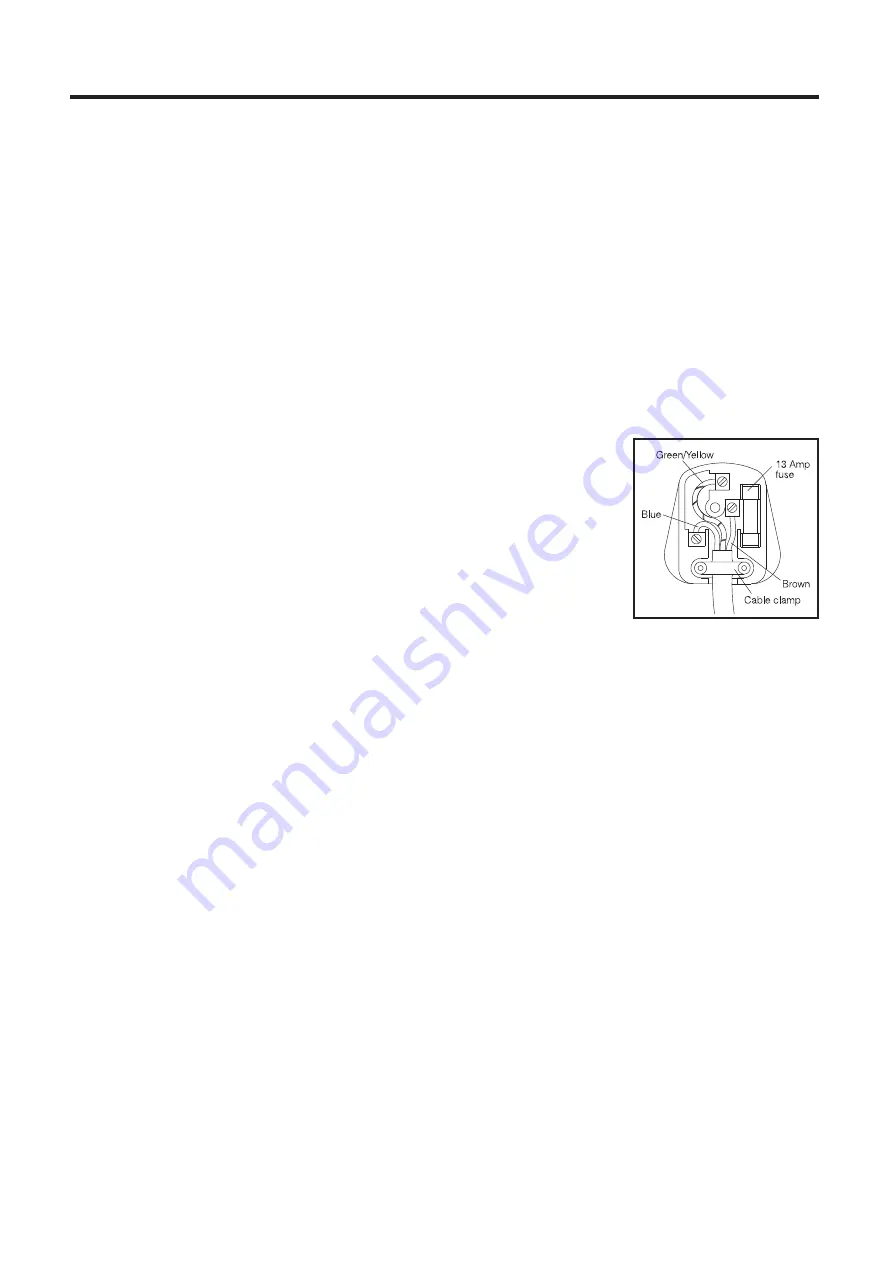
Fitting a Replacement Plug
Use only a 13amp (BEAB approved) plug. To fi t proceed as follows:
1) Ensure that the lengths of wire to be fi tted inside the plug have
been cut to the correct length and the end correctly prepared. When
preparing the cable ends take care not to damage the out sheath, or
the insulation surrounding the inner conductors.
2) Connect the blue (NEUTRAL) wire to the terminal in the plug which
is marked with the letter “N” or coloured black.
3) Connect the brown (LIVE) wire to the terminal in the plug which is marked with the letter “L”
or coloured red.
4) Connect the green/yellow (EARTH) wire to the terminal in the plug which is marked with the
letter “E” or coloured green.
5) Tighten all screws. Ensure that all conductor strands have entered into the terminal posts and
that the mains lead is securely held in place by the cable clamp.
6) Ensure that the plug is fi tted with a 13amp ASTA approved BS 1362 fuse. Replace the top cover
of the plug and secure.
Extension Cable
If using an extension cable at any time, always ensure that the insulation sheath is in good condition
and is not damaged in any way. Make sure that the socket is fi tted to the extension cable correctly,
if in doubt have it checked by a qualifi ed electrician. Always use the extension cable in accordance
with the manufacturers instructions.


