
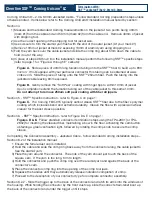

Corning UniCam® – 2.0 & 3.0mm Jacketed Cable - *Follow standard Corning preparation steps unless
otherwise noted. Items below refer to the Corning UniCam® installation manual noted by section:
Section 4
1) Measure and mark standard Corning measurements on the jacket at two points being 40mm
(mark #1) from the cable end and 53 mm (mark #2) from the cable end. Remove 40mm of jacket
with stripping tool.
2) Use the correct opening in the stripping tool for jacket size.
3) Use scissors to trim the aramid yarn flush with the end of the outer jacket. (At your mark #1)
4) Remove 13mm of jacket at mark #2 exposing 13mm of aramid yarn using stripping tool.
5) Fold the yarn back over the cable jacket and slide the crimp ring about 5mm down the cable to
hold it out of the way.
6) In place of steps #6 thru # 8 in the installation manual perform the following SSF
TM
specific steps
(refer to page 1 for “Figure A through E” callouts):
Figure A. Slide a piece of 40mm long furcation tubing onto the SSF
TM
fiber to build up to 900
micron. If not supplied with your particular connector this tubing can be obtained at www.
clrtec.com. Slide the piece of tubing onto the SSF
TM
250um fiber. Push the tubing into the
jacketed cable leaving 6mm exposed.
Figure B. Gently remove the “Soft Peel” coating with finger tips to within 10mm of jacket.
Upon completion extend the furcation tubing out of the cable jacket to this same 10mm.
Do not attempt to remove 250um soft peel coating with fiber strippers.
Section 5 - SSF
TM
Specific Instruction - refer to Figure C on page 1:
Figure C. The Corning FBC-015 typically cannot cleave SSF
TM
fiber due to the fiber’s polymer
coating which increases bend and extreme durability. Cleave the fiber with a precision wheel
cleaver for the best cleave possible.
Section 6 - SSF
TM
Specific Instruction - refer to Figure D & E on page 1:
Figures D & E. Follow standard connector termination steps using the TPA-2801 [or TPA-
2802] for inserting the cleaved fiber, maintaining a bow in the fiber, activating the cam button,
obtaining a green verification light, followed by rotating the crimp knob to secure the crimp
sleeve.
Completing the Connector Assembly – Jacketed Cable - follow standard Corning installation steps –
Section 6.2 of the installation manual:
1 Ensure the ferrule dust cap is installed
2) Hold the cable and slide the crimp ring back away from the connector along the cable jacket to
free the aramid yarn.
3) Flare the yarn around the connector. The ends of the yarn should just touch the back of the
square cam. If the yarn is too long, trim to length.
4) Hold the connector and push the crimp ring over the aramid yarn and against the back of the
connector’s cam.
5) Place the connector crimp ring into the opening of the crimp tool jaws.
6) Squeeze the handles until they automatically release indication completion of crimp.
7) Proceed to the description of your connector type for complete connector assembly.
Section 6.2.2 - Slide the trigger up to the back of the connector and latch its arms into the windows of
the housing. While holding the connector by the front dust cap, slide the correct strain-relief boot up
the back of the connector and under the trigger until it stops.
Cleerline SSF
TM
Corning Unicam
®
LC
Termination With:
SSF
TM
Jacketed Fiber 2.0mm/3.0mm


