


102
Select SN (object1/2/3/4) and direction, and then input customized rule name.
Object1/2/3/4: System supports four zones. Each SN stands for one zone.
Direction (
/
): For icon
, system can generate an alarm once the object left in the
one for the specified time.. For icon
, system can generate an alarm once the object is out of
the zone for the specified time.
Period: It refers to the object in/out the zone time.
Now you can draw a rule. Left click mouse to draw a line, until you draw a rectangle, you can right click
mouse.
Click Ok to complete the rule setup.
Tips
Click
to delete the corresponding rule.
You can refer to the chapter 4.13.2.1 to set parameters.
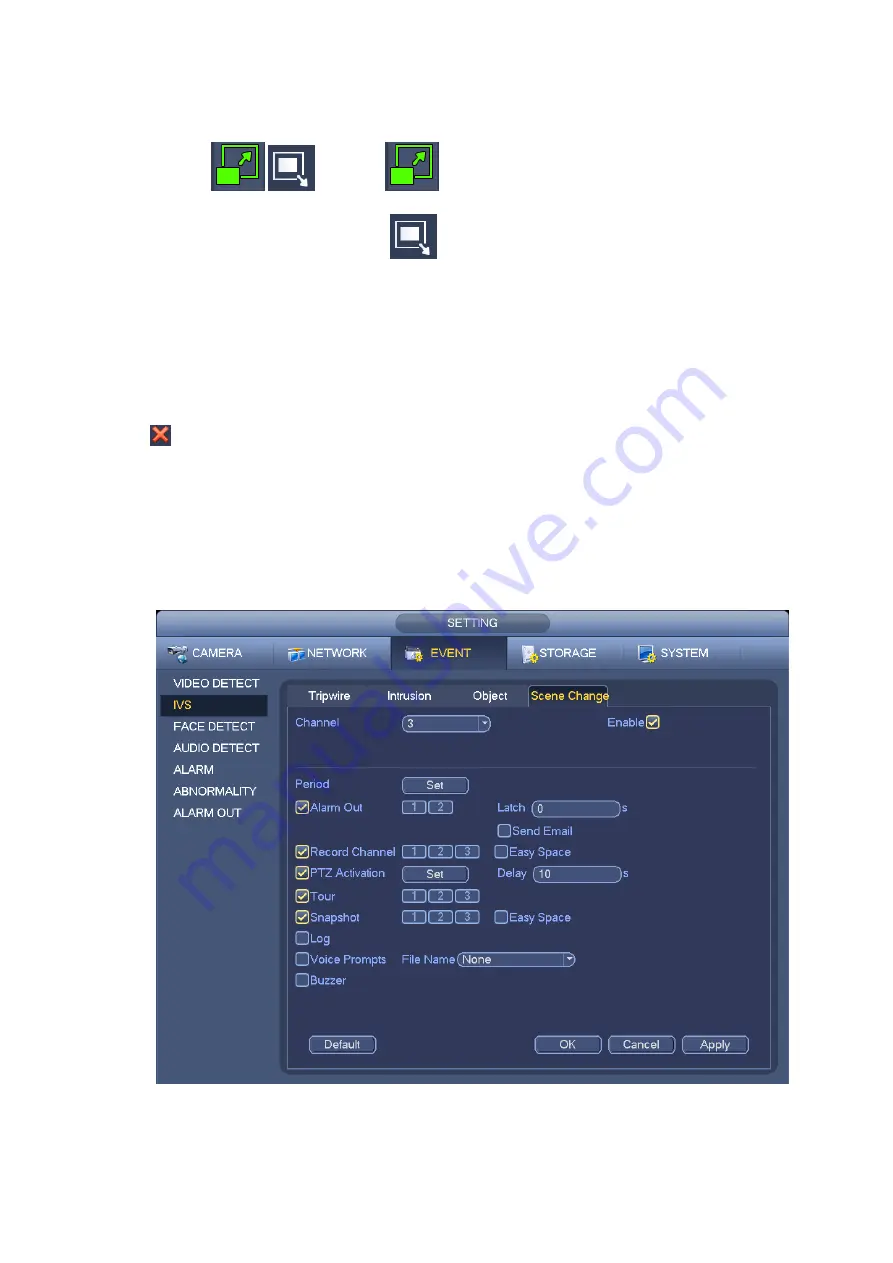
4.13.2.4 Scene Change
(
Optional
)
Please make sure you are connecting to the smart network camera, otherwise you can not use
IVS function!
When the detected scene changes, system can generate an alarm.
From main menu->Setting->Event->IVS->Scene change, the interface is shown as in Figure 4-108.
Figure 4-108
You can refer to the chapter 4.13.2.1 to set parameters.
Содержание PhoenixPlus-08
Страница 1: ...Network Video Recorder User s Manual V 2 4 2 ...
Страница 45: ...34 Figure 4 19 Click smart add button you can see device enables DHCP function See Figure 4 20 Figure 4 20 ...
Страница 102: ...91 Figure 4 91 Figure 4 92 ...
Страница 103: ...92 Figure 4 93 Figure 4 94 ...
Страница 118: ...107 Figure 4 112 Figure 4 113 ...
Страница 119: ...108 Figure 4 114 Figure 4 115 ...
Страница 120: ...109 Figure 4 116 Figure 4 117 ...
Страница 122: ...111 Figure 4 119 Figure 4 120 ...
Страница 149: ...138 Figure 4 150 In Figure 4 150 click one HDD item the S M A R T interface is shown as in Figure 4 151 Figure 4 151 ...
Страница 214: ...203 Figure 5 55 Figure 5 56 ...
Страница 215: ...204 Figure 5 57 Figure 5 58 Figure 5 59 ...
Страница 226: ...215 Figure 5 73 Figure 5 74 ...


