


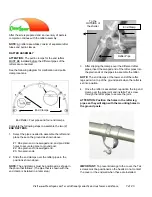

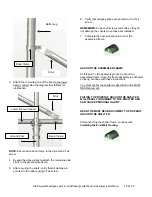


9. Verify that the rafter spacing is forty-eight inches
(48") on-center and tighten the cross connector.
10. Secure the cross connector to the rafter using a Tek
screw.
11. Repeat Steps 5-10 to install the first section of the
remaining purlin assemblies for the first two rafters.
12. Choose another rafter assembly and set it in
position.
13. Secure the rafter legs of the third rafter to the ground
posts as previously described.
14. Remove another section of purlin pipe from the pre-
marked purlin assembly and attach it to the rafter as
previously described.
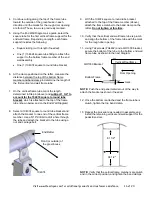
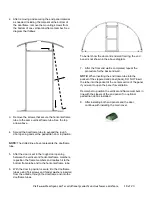
15. Verify that the distance between the rafters is 48"
center-to-center. Adjust the rafter forward or
backward as needed to maintain this dimension.
16. Repeat the above steps as needed to stand, place,
and secure the remaining rafters to complete the
frame assembly.
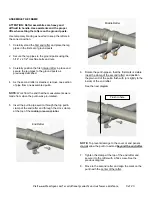
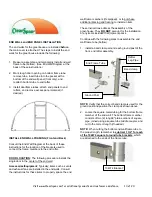
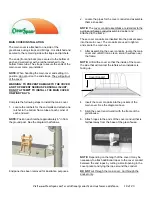
NOTE:
If the last rafter is plumb and the purlin extends
beyond the end of the rafter, cut the last section of purlin
pipe to the required length.
DO NOT
allow the purlin to extend
beyond the end
rafter
.
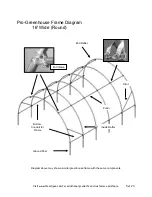
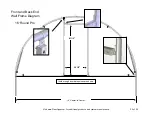
Diagram may show a similar shelter of a different length.
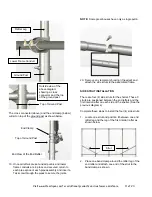
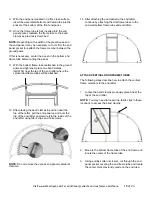
17. After the center purlin is in place, assemble the next
length of 1.315 pipe for use along the bottom of
each side of the frame assembly. See the arrows in
the above diagram.
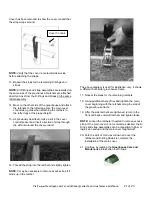
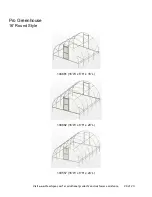
18. Using cross connectors positioned at each rafter leg,
insert the frame conduit through each connector as
shown below.
Middle Rafter
Purlin
Purlins
End View of the Frame
Visit www.ClearSpan.com for additional products and customer assistance.
10 of 24


