41
FieldSmart
®
Fiber Active Cabinet (FAC) 400
__________________________________________________________
Installation Manual
Direct: 763.476.6866 • National: 800.422.2537 • www.SeeClearfield.com • [email protected]
Manual 020419 REV A - Feb 2019
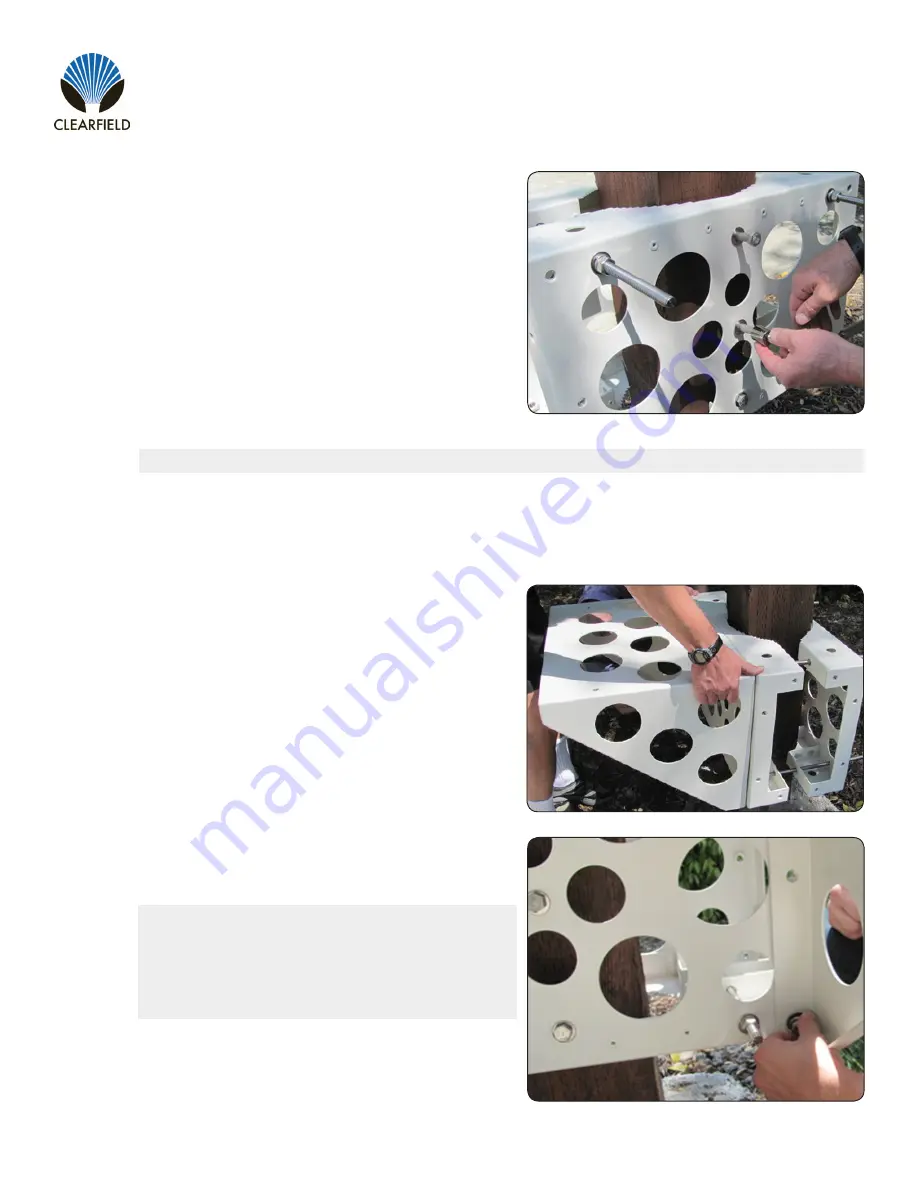
Attach the rear mounting bracket to the pole as follows:
a.
Position the rear mounting bracket against the oppo
site side of the pole, fitting the (4) threaded rods
through the counterpart holes in the rear bracket.
b.
Loosely install a 1/2-inch flat washer, lock washer,
and nut onto each rod.
c.
Verify that the bracket is level, and then drill (3)
3/8-inch pilot holes into the pole through the holes in
the center of the rear bracket.
Note:
Remove the bracket and deepen the pilot holes, if needed.
d.
Install (3) 1/2 x 5-inch lag screws (with 1/2-inch flat washers) into the pilot holes to attach the rear bracket to
the pole. Tighten the screws to secure the bracket in place.
e.
Verify that the mounting brackets are level, and then
tighten all hardware to secure in place.
Step 2:
Attach the pedestal to the front mounting bracket
as follows:
a.
Position the pedestal against the front bracket, as
shown below.
b
. Attach the pedestal to the bracket using (6) 1/2-inch
hex head screws, (6) flat washers, and (6) lock
washers.
c.
Verify that the fixture is level, and then tighten all
hardware to secure in place.
Note:
Clearfield recommends using cold-shrink tubing
on the conduit entry ducts to seal the conduit entry. If
any of the individual conduit entry ducts are not used,
remove and replace the duct plates with blank plates
from the installation kit.
Perform the following task only after the cabinet is onsite
and ready to install on the mounting fixture.
Step 3:


