United Kingdom • www.clasohlson.co.uk
English
1
2
Ver
. 2
022
05
10
LED Christmas Tree
Art.no 44-4810 Model HJT44-4532
44-4813
HJT103
Please read the entire instruction manual before using the product
and then save it for future reference. We reserve the right for any
errors in text or images and any necessary changes made to
technical data. If you experience any technical problems or have
questions, please contact our customer service team.
Safety
Warning
• The LED lights cannot be replaced.
• The product must only be connected to the included
AC/DC power adapter.
• The AC/DC power adapter is only intended for use with
the included product. Never connect additional string lights or
other types of products to the included AC/DC power adapter.
• The power cord must never be replaced. If the power cord is
damaged the entire product must be discarded.
Assembly
The tree is made up of 4 parts: the stand and the 3 sections of
the tree.
1. Open up the stand, line up the holes and screw in
the screws loosely.
Instructions for use
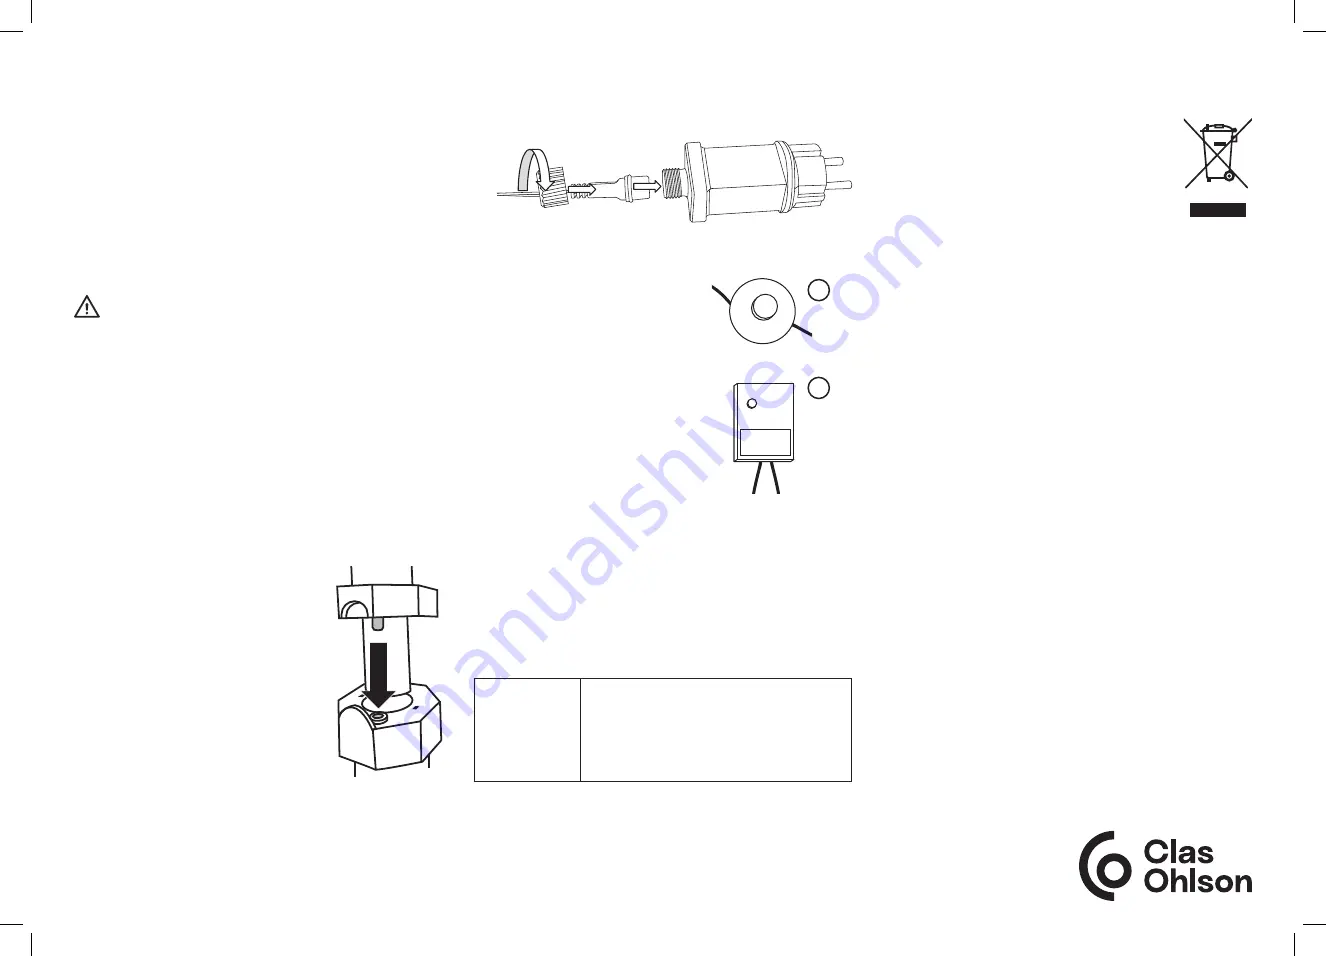
• The tree has a foot switch (1) a
control box (2), 8 light modes, a
6-hour timer and memory function.
The various light modes can be
changed by short-pressing the
button on the control box.
• The timer is started by long-pressing
the button on the control box for
3 seconds until the light flashes.
Once activated, the timer will keep
the tree lights on for 6 hours. After
6 hours the lights will switch off
and remain off for 18 hours before
coming back on again, and shine
for another 6 hours and so on.
2. The lights built into the different
sections of the tree connect
together when the sections of the
tree are pushed together.
Insert the
bottom section, the part with the
longest branches, into the stand and
tighten the screws. Then
carefully
insert the middle section into the
bottom section and the top section
into the middle section. Make sure
that the sections are joined correctly,
as in the picture.
Responsible disposal
This symbol indicates that the product should not
be disposed of with general household waste. This
applies throughout the entire EU. In order to prevent
any harm to the environment or health hazards
caused by incorrect waste disposal, the product
must be handed in for recycling so that the material
can be disposed of in a responsible manner. When
recycling the product, take it to your local collection facility or
contact the place of purchase. They will ensure that it is disposed
of in an environmentally sound manner.
Specifications
44-4810
Power adapter
Input 220–240 V AC, 50/60 Hz, 300 mA
Output 31 V DC, max 9 W
IP rating
For indoor use
Size
210
× 140 cm
44-4813
Power adapter
Input 220–240 V AC 50/60 Hz, 600 mA
Output 31 V DC, max 24 W
IP rating
For indoor use
Size
220
× 160 cm
3. Bend out the branches, connect the AC/DC power adapter to
the lights and then plug it into a power outlet.
• The memory function starts the lights in the light mode they
were in when switched off.
Care and maintenance
The product can be cleaned using a damp cloth or vacuum
cleaner. Use only mild cleaning agents, never solvents or
corrosive chemicals.
Troubleshooting
The lights don't
come on.
• Check that the power cord is properly
connected to the power adapter.
• Check that the tree sections are joined
correctly.
• The tree has screw connectors on every
section. Are they screwed together?


