background image

2.

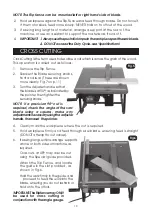
Hold workpiece against the Rip Fence and feed through blade. Do not force it.
If the motor slows, feed more slowly. NEVER hold on to offcut of the wood.

3.

If sawing long lengths of material, arrange a support at the rear of the
machine, or use an assistant to support the material as it runs off.

4.

IMPORTANT! 1. Always use the push stick to push the workpiece past the saw blade.

2.. DO NOT exceed the Duty Cycle..see ‘Specifications’

10

This operation is carried out as follows:

1.

Remove the Rip Fence.

2.

Slacken the Blade securing  knobs,
front and rear. (These are shown
more clearly  Fig.7 on p.11)

3.

Turn the Adjuster handle so that
the blade is at 90

O

, as indicated by

the pointer, then tighten the
securing knobs.

NOTE: If a precision 90

cut is

required, check the angle of the saw
blade using a square, make any
adjustments necessary using the adjuster
handle, then reset  the pointer.

4.

Clearly mark the workpiece where the cut is required.

5.

Hold workpiece firmly and feed through saw blade, ensuring feed is straight
(DO NOT attempt to cut curves).

6.

If sawing long sections arrange  supports
at one or both  sides of machine, as
required.

Cross cuts at 45

O

 may also be cut

using the Special guide provided.

Attach the Rip Fence, and locate
the guide in the slot provided, as
shown  in Fig.6.

Hold the work firmly in the guide, and

proceed to feed the work into the

blade, ensuring you do not restrain or
hold on to the offcut.

I

MPORTANT: The Ripfence may ONLY

be used for cross cutting in
conjunction with the angle gauge.

Fig.6

CROSS CUTTING

Cross Cutting is the term used to describe a cut which is across the grain of the wood.

Fig.5

NOTE: The Rip fence can be mounted left or right hand side of blade.

Содержание WOODWORKER CTS800B

Страница 1: ...8 200mm TABLE SAW 8 200mm TABLE SAW Model CTS800B OPERATING MAINTENANCE INSTRUCTIONS 0606 ...

Страница 2: ... affect your statutory rights 020 8988 7400 PLEASE READ THIS MANUAL THOROUGHLY BEFORE USE If you have any problems using or setting up this machine please ring the CLARKE helpline 020 8988 7400 Press 1 for Parts Press 2 for Technical Assistance DECLARATION OF CONFORMITY We declare that this product complies with the following standards directives 89 336 EEC 98 68 EEC 73 23 EEC 98 37 EEC ANNEX IV E...

Страница 3: ...Table Saw RESTRICTIONS OF USE This saw is NOT suitable for cutting Timber greater than 40mm Metal stone rubber plastic bones etc Logs or round timber DO NOT fit any other tool or combination of blades DO NOT use as a free standing machine or as a hand held machine DO NOT modify the machine or its guards controls in any way DO NOT use with any covers guards removed CONTENTS Page Safety Precautions ...

Страница 4: ...RS AWAY All children and visitors should be kept a safe distance from work area 8 MAKE WORKSHOP CHILDPROOF with padlocks master switches or by removing starter keys 9 DON T FORCE THE MACHINE It will do the job better and safer at the rate for which it was designed 10 WEAR PROPER APPAREL Loose clothing gloves neckties rings bracelets or other jewellery may get caught in moving parts Nonslip footwea...

Страница 5: ...he path of the saw blade 28 NEVER reach behind or over the cutting tool for any reason 29 ALWAYS remove the Rip Fence when cross cutting unless using the angle guide 30 NEVER use the Rip Fence as a cut off when cross cutting 31 NEVER attempt to free a stalled saw blade without first turning the saw OFF Switchoffanddisconnectfrompowersupplyimmediatelytopreventmotordamage 32 PROVIDE adequate support...

Страница 6: ...EEN YELLOW Connect BROWN cord to terminal marked letter L or coloured RED Connect BLUE cord to plug marked letter N or coloured BLACK FUSE RATING The fuse for the plug in this appliance must be rated at 5 amps We recommend that this machine is connected to the mains supply via a Residual Current Device RCD EXTENSION CABLES If an extension cable is used always ensure that it is fully unwound The ma...

Страница 7: ...Crank Handle C w Screw 1 F Knob Headed Screws with clamp 2 For use with Ripfence 7 Some minor assembly work is required as follows 1 Attach the handle arrowed in the illustration above using the screw to secure 2 The Rip Fence Simply insert the knob headed screws through the holes in the end of the fence and screw on the clamp plates BEFORE USE the Table Saw MUST be bolted firmly to either a workb...

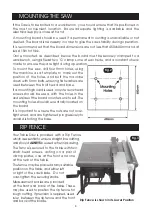
Страница 8: ...tween the bolt head and base If a mounting board is used countersunk head screws should be used with the holes in the underside of the board countersunk to suit The mounting holes should be centrally located on the board It is important to ensure the nuts are not over tightened and are tightened progressively to avoid distorting the base RIP FENCE Fig 2 Fig 3 Your Table Saw is provided with a Rip ...

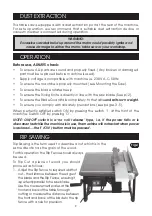
Страница 9: ...letely to the table under its own weight To ensure you comply with all safety precautions see pages 3 5 When perfectly satisfied switch ON by pressing the switch I at the front of the machine Switch OFF by pressing O NOTE ON OFF switch is a no volt release type i e if the power fails or is disconnected while the machine is in use the machine will not restart when power is restored the I ON button ...

Страница 10: ... check the angle of the saw blade using a square make any adjustments necessary using the adjuster handle then reset the pointer 4 Clearly mark the workpiece where the cut is required 5 Hold workpiece firmly and feed through saw blade ensuring feed is straight DO NOT attempt to cut curves 6 Ifsawinglongsectionsarrange supports at one or both sides of machine as required Cross cuts at 45O may also ...

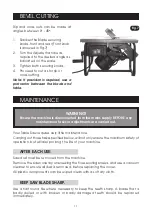
Страница 11: ...g 7 2 Turn the Adjuster handle as required to the desired angle as indicated on the scale 3 Tighten both securing knobs 4 Proceed to cut as for rip or cross cutting Note If precision is required use a protractor between the blade and table AFTER EACH USE Saw dust must be removed from the machine Remove the side cover by unscrewing the five securing screws and use a vacuum cleaner to ensure all dus...

Страница 12: ... knife is 5mm maximum Inspect at regular intervals to ensure the gap is correctly maintained and adjust as required It may also be necessary to remove the Riving Knife and bend back into shape if it is not exactly in line with the saw blade Fig 8 1 Remove the side cover by unscrewing the five securing screws 2 Place a steel bar or screwdriver blade between the table top and one of the saw blade te...

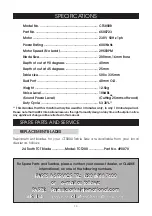
Страница 13: ...able from your local dealer as follows 24 Tooth TCT Blade Model TCT200 Part No 490070 SPECIFICATIONS Model No CTS800B Part No 6500723 Motor 230V 50Hz 1ph Power Rating 600Watts Motor Speed No Load 2950RPM Blade Size 200mm 16mm Bore Depth of cut at 90 degrees 40mm Depth of cut at 45 degrees 25mm Table size 500 x 335mm Dust Port 40mm O D Weight 12 5kg Noise Level 108dBLWA Sound Power Level Cutting 25...

Страница 14: ...ee Page 13 26 Outer Flange GRCTS800B26 27 Centre Nut GRCTS800B27 28 Side Cover GRCTS800B28 29 Washer GRCTS800B29 30 Screw GRCTS800B30 31 Handle GRCTS800B31 32 Screw GRCTS800B32 33 Sleeve GRCTS800B33 34 Shaft GRCTS800B34 35 Box GRCTS800B35 36 Screw GRCTS800B36 37 Nut GRCTS800B37 38 Washer GRCTS800B38 39 Connecting Rod GRCTS800B39 40 Washer GRCTS800B40 41 Pin GRCTS800B41 42 Locking Pin GRCTS800B42 4...

Страница 15: ...15 PARTS DIAGRAM ...

Отзывы: