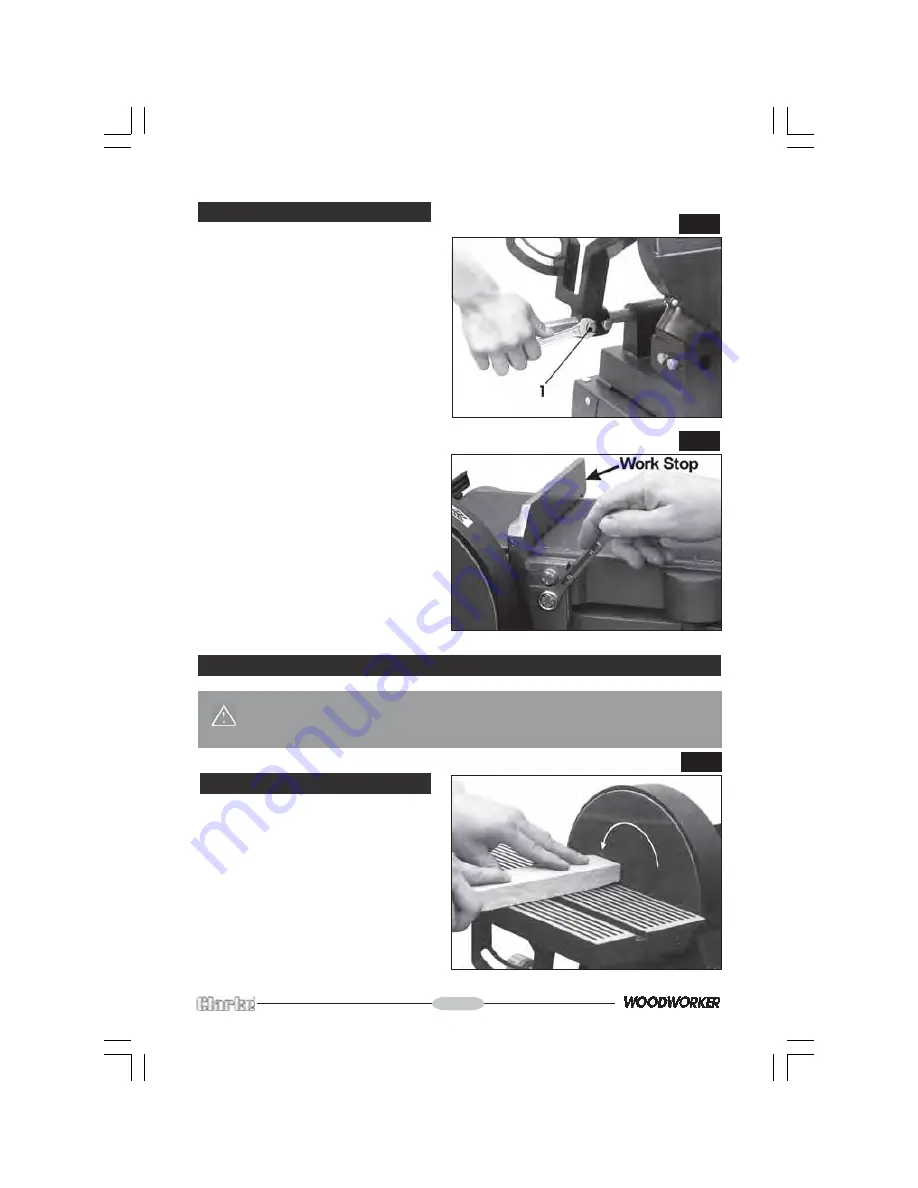
B...to the Belt
Before attempting to attach the table to
the belt mounting, raise the belt arm and
secure with the two securing screws, as
explained under ‘Checks Before Use’, p7.
Slide the Table Support bar into the
mounting as shown in
fig. 6
with the shorter
flat on the end of the bar - inwards. Tighten
the two securing screws.
Mount the table on the support bar, bring
to within 2mm of the belt and tighten the
securing screws
(1, fig 6)
.
To ensure the table is square, proceed
as previously described for squaring the
table to the disc.
When using the table with the sanding
belt, remove the work stop from the belt
by removing the two securing bolts as
shown in
fig. 7.
Ensure the screws are replaced and
tightened before use. The lower screw
also secures the Lower Belt Guard. Ensure
this is properly in place when tightening.
Ensure also, the flat washer is used with
the upper bolt.
ENSURE the work stop is relaced correctly
- see Using the Belt on page 10.
Fig. 7
METHODS OF USE
WARNING! Always observe the proper safety precautions before use.
Remember, failure to observe these precautions could be extremely
hazardous.
A. Using the Disc
Check to ensure the table is no more
than 2mm from the disc, before switching
ON.
Hold the work firmly, as shown in
fig. 8
and
ALWAYS hold the workpiece against the
left half of the disc. i.e. that half moving
downwards towards the table.
DO NOT exert too much pressure. A light
touch is all that is required.
- 9 -
Fig. 6
Fig. 8
Содержание Woodworker CS6-9C
Страница 2: ...2...
Страница 15: ...PARTS DIAGRAM 15...


