


-5-
-14-
14. ALWAYS wear proper apparel. loose clothing or jewellery may
get caught in moving parts. wear protective hair covering to
contain long hair.
15. ALWAYS use recommended accessories. the use of improper
accessories could be hazardous.
16. ALWAYS remove plug from electrical outlet when adjusting,
changing parts, or working on the machine.
17. NEVER operate machine while under the influence of drugs, alcohol or any medication.
18. NEVER leave machine running unattended. turn power off.
Do not leave the machine until it comes to a complete stop.
19. NEVER force the machine. it will do a better and safer job at
the rate for which it was designed.
20. NEVER use power tools in damp or wet locations or expose
them to rain. Keep your work area well illuminated. do not
use in explosive atmosphere (around paint, flammable liquids
etc.). Avoid dangerous environment.
Additional Precautions For Power Tools
1.
ALWAYS wear ear protectors/defenders as the noise level of this machine can exceed
70dB (A).
2.
ALWAYS use the appropriate cutter for the material being cut.
3.
DO NOT use the machine if the electric cable, plug or motor is in poor condition.
4.
DO NOT allow the ventilation slots in the machine to become blocked.
5.
DO NOT touch the cutter immediately after use, allow time for it to cool.
6.
Replacement cutters are available from your CLARKE dealer.
7.
Ensure the cutter is fully tightened before use.
8.
Switch the machine OFF immediately the task is completed.
9.
NEVER leave chuck keys in situ, always remove and store safely when finished
tightenining or loosening the chuck.
10. NEVER Change from high to low speed and vice versa whilst the machine is still
running, always ensure the machine has come to a complete stop before doing so.
11. NEVER change from forward to reverse and vice versa whilst the machine is still
running, always ensure the machine has come to a full stop before doing so.
Additionally, please keep these instructions in a safe place for future reference.
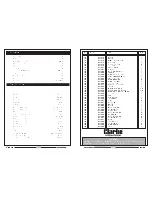
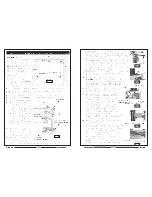
Item
Part No
Description
Qty
Parts List
1
SG10001
Screw M4 x 12
2
2
SG10002
Protect Cover for Motor
1
3
SG10003
Screw M6 x 12
3
4
SG10004
Spring Washer 6
3
5
SG10005
Washer 6
3
6
SG10006
Motor
1
7
SG10007
Round Key 3 x 16
1
8
SG10008
Circlip
2
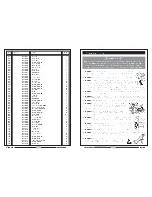
10
SG10010
Motor Gear
1
11
SG10011
Safety Cover
1
12
SG10012
Screw M4 x 6
1
13
SG10013
Screw M4 x 8
4
14
SG10014
Washer 4
4
15
SG10015
Up Cover
1
16
SG10016
Sleeve Support Table
1
17
SG10017
Screw M6 x 5
1
18
SG10018
Compression Spring
1
19
SG10019
Steel ball 5
1
20
SG10020
Gear Box
1
21
SG10021
Spindle Sleeve
1
22
SG10022
Screw M6 x 14
2
23
SG10023
Bearing 61905-2Z
2
24
SG10024
Spindle Box
1
25
SG10025
Circlip
2
26
SG10026
Spring Seat Ring
1
27
SG10027
Compression Ring
1
28
SG10028
Round Nut Stop Gasket
1
29
SG10029
Round Nut M24 x 1.5
1
30
SG10030
Spindle Gear
1
31
SG10031
Spacer
1
32
SG10032
Spindle Gear
1
33
SG10033
Circlip
1
34
SG10034
Powder Bearing
2
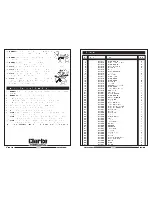
35
SG10035
Gear
1
36
SG10036
Circlip
1
37
SG10037
Change Gear
1
38
SG10038
Shift Shaft
1
39
SG10039
Key 4 x 8
1
40
SG10040
Key 4 x 12
1
41
SG10041
Change Gear
1
42
SG10042
Dila Fork
1
43
SG10043
Flange Lining
2
44
SG10044
Circlip
1
45
SG10045
Spacer
1
46
SG10046
High/Low Speed Knob
1
47
SG10047
Spring Pin 2 x 12
1
48
SG10048
Wedge
1
49
SG10049
Screw
4
50
SG10050
Nut M5
4
Содержание Metalworker CMD10
Страница 2: ... 1 18 NOTES ...


