background image

  Page  12

                       Clarke

®


 American Sanders

 EZ - 8  Sander  Operator's  Manual

Routine Maintenance

The following items need to be periodically inspected
and maintained to keep your sander in good working
condition.

Sanding Chamber

Periodically blow out the sanding chamber to prevent
large accumulations of debris which could interfere
with the performance of the dust recovery system.

Wheels

Periodically remove the debris from the truck and
caster wheels.  Debris can cause waves on a sanded
surface.

Dust Bag

Remove the dust bag from the machine and shake it
thoroughly to remove the sanding dust from the dust
bag.  Turn the dust bag inside out and machine wash
in cold water to prevent pore blockage and loss of
dust recovery.

Drive Belt

Periodically check the drive belts for broken cogs or
frayed edges.  Frayed edges may indicate poor
tracking.  Realign effected belt.

Bearings

     Periodically check the bearings for wear or

damage according to the following schedule:

Arbor shaft

Relubricate every 150 hrs.
w/.10 oz. of a NLGI grade
2, -30

0

F to 250

0

F, 58-75

SUS at 210

0

 F, grease

lubricant.

Motor shaft

after 1

st

 5000 hrs.

Fan shaft

After first 1500 hrs.

Содержание EZ-8

Страница 1: ...sultininjurytoyouortootherpersonnel damagetothemachine or to other property could occur as well You must have training in the operation of this machine before using it If your operator s cannot read this manual have it explained fully before attempting to operate this machine All directions given in this book are as seen from the operator s position at the rear of the machine For new books write t...

Страница 2: ...ransport the Machine 6 MachineSet Up 7 How to Operate the Machine 9 Sanding Cuts and Sandpaper 10 SanderAdjustmentProcedures 11 RoutineMaintenance 12 Troubleshooting 13 Section II Parts and Service Manual Assembly Drawing 1 16 Assembly Parts List 1 17 Assembly Drawing 2 18 Assembly Parts List 2 19 Wiring Diagram 20 Contents of this Book ...

Страница 3: ...s unable to read this manual have it explained fully before they attempt to use this equip ment DANGER Sanding finishing wood floors can create an environment that can be explosive The following safety procedures must be adhered to Cigarette lighters pilot lights and any other source of ignition can create an explosion when active during a sanding session All sources of ignition should be extingui...

Страница 4: ... the event of a bag fire injury can occur to the operator if the operator is tied or strapped to equipment Use operating belt properly follow procedure on page 11 WARNING Injury to the operator or bystander can occur if protective gear is not worn while sanding Always use eye ear and respiratory protection while performing any sanding operation WARNING Bodily injury could occur if power is applied...

Страница 5: ...et sheet sleeve Abrasive Rate 680m min 680m min 720m min Drum Rate 1500RPM 1500RPM 1500 RPM Dust Control Rate 30 2l sec 30 2l sec 30 2l sec DrumPressure 11 4kg 11 4kg 11 4kg Leveling Controls Externally Externally Externally Adjustable Adjustable Adjustablel OperatingControls Lever Lever Lever Operated Operated Operated Motor 1 1KW TEFC 1 1KW TEFC 1 1KW TEFC Thermally Thermally Thermally Protected...

Страница 6: ...m notch See figure 2 3 Twist and remove handle pigtail from motor cord See figure 3 4 Release handle latches and remove handle from chassis See figure 2 5 Remove dust pipe from chassis 6 Lift chassis with transport handles and place in cargo area See figure 4 WARNING Machine is heavy 43 2kg To avoid injury or damage grasp transport handles firmly use proper lifting technique 7 Secure chassis to pr...

Страница 7: ...nstall dust tube 5 Connect the handle pigtail to the motor cord Align ground pin insert and twist See figure 7 6 To install abrasive on sanding drum equipped with paper clamp loosen screws to paper clamp with a coin Do not remove screws or clamp from the sanding drum Insert one edge of abrasive under paper clamp Rotate sanding drum to wrap abrasive around drum Insert other edge of abrasive under p...

Страница 8: ... vacuum collection system beforeoperation Preparing to use the included dust bag To prepare the machine for use with the included dust bag followthisprocedure 1 Install the dust bag by pressing the end onto the exhaust tube until the ring locks into the groove figure 10 This is best done by pressing on the back of the bag opening with the palm of your hand 2 The exhaust tube can be rotated for opt...

Страница 9: ...nder is in motion 4 When sanding drum is fully engaged with the surface release control lever and adjust your pace for adequate stock removal Keep sander in motion while the sanding drum is engaged with the surface or dwell marks will occur 5 Move the machine in the direction of the grain in the wood whenever possible Sand the surface at a constant pace 6 Gradually feather cut out at the terminati...

Страница 10: ... should be used If the surface is severely damaged by deep scratches pre existing dwell marks uneven planks etc it may be necessary to sand across or diagonally to the grain to restore evenness to the surface If these conditions are not present the initial cut should be done in the direction of the grain If glazing loading or burning takes place immediately into an initial cut select a coarser abr...

Страница 11: ...s controls of the sander Dust Shoe To adjust the dust shoe follow this procedure 1 Disconnect machine from power supply 2 Loosen the four screws fastening the dust shoe to the chassis 3 Adjust the dust shoe towards the drum to improve recovery of fine particles 4 Adjust the dust shoe away from the drum to improverecoveryofcoarseparticles 5 Align the dust shoe with the drum and tighten screws See f...

Страница 12: ...s on a sanded surface Dust Bag Remove the dust bag from the machine and shake it thoroughly to remove the sanding dust from the dust bag Turn the dust bag inside out and machine wash in cold water to prevent pore blockage and loss of dustrecovery Drive Belt Periodically check the drive belts for broken cogs or frayed edges Frayed edges may indicate poor tracking Realign effected belt Bearings Peri...

Страница 13: ...rke American Sanders dealer No power Check power supply and connections Motor runs sluggishly Low voltage from excessive length Locate power source nearer to work undersized extension cord or poor site Check connections connection Defective run capacitor Contact an authorized Clarke American Sanders dealer Defective motor Contact an authorized Clarke American Sanders dealer Motoroverloadtrips repe...

Страница 14: ...Page 14 Clarke American Sanders EZ 8 Sander Operator s Manual ...

Страница 15: ...Clarke American Sanders EZ 8 Sander Operator s Manual Page 15 EZ 8 Section II Parts and Service Manual 78599C ...

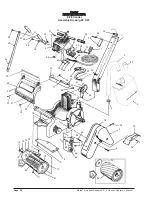
Страница 16: ...nder Operator s Manual EZ 8 Sander Assembly Drawing 1 11 01 1 2 4 53 5 52 55 51 56 6 8 9 7 10 11 12 13 14 15 16 19 12 18 11 17 20 21 23 24 25 26 29 7 31 32 33 4 28 27 32 34 35 36 46 49 48 47 54 45 44 43 25 22 23 30 37 38 42 41 40 39 50 57 58 ...

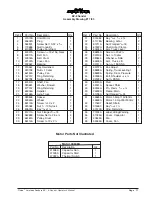
Страница 17: ...LiftingWarning 1 56 51095A Cover Capacitor 1 57 40545A Fan 1 58 52465A Cover Fan 1 EZ 8 Sander Assembly Drawing 1 7 03 Ref Part No Description Qty 1 41970A Cord Motor 1 2 45602A Plug 1 4 962831 Screw Set 10 32 x 5 16 3 5 170686 Nut Conduit 1 6 61089A Pulley Fan Drum 1 7 80027A Screw 5 16 18x1 Sq Neck 6 8 50917A Belt Fan 1 9 50916A Belt Drum 1 10 22122A Cover Fan 1 11 902567 Bearing 2 12 915561 Key...

Страница 18: ...ander Assembly Drawing 2 2 07 26 25 27 26 28 29 30 31 41 42 32 33 40 39 38 37 77 34 36 35 1 2 3 50 49 55 51 52 69 71 56 70 48 47 45 44 57 46 43 75 5 6 76 4 66 67 68 64 62 7 58 8 9 10 61 11 60 12 13 14 15 16 20 19 74 53 54 73 21 59 22 23 24 17 18 65 63 78 34 79 34 34 80 ...

Страница 19: ...this manual EZ 8 Sander Assembly Parts List 2 2 07 AccessoriesAvailable 13509A Three hole paper clamp bar packaged with three clamp screws Ref Part No Description Qty 40 47387B Switch Control 1 41 24525A HousingControl 1 42 81210A Nut Fixture 3 8 PT 1 43 980675 Washer 1 44 962677 Screw 10 24 x 3 4 6 45 962826 Screw 10 24 x 3 8 1 46 962109 Screw 10 24 x 5 8 2 47 337504 Relief Strain 1 48 41708A Ada...

Страница 20: ...EZ 8Sander Wiring Diagram 11 95 ...

Страница 21: ...derland B V Postbus 65 3370 AB Hardinxveld Giessendam The Netherlands 31 184 677 200 ALTO Sverige AB Molndal Sweden Aminogatan 18 Box 4029 S 431 04 Molndal 46 31 706 73 00 ALTO Norge A S Oslo Norway Bjornerudveien 24 N 1266 47 2275 1770 U S A Locations European Locations CORPO PRODUCTION FACILITIES Clarke Springdale Arkansas 2100 Highway 265 Springdale Arkansas 72764 479 750 1000 Customer Service ...

Страница 22: ...n Transportation charges to and from the repair location must be prepaid by the purchaser c Clarke American Sanders will repair the product and or replace any defective parts without charge within a reasonable time after receipt of the product Clarke American Sanders liability under this warranty is limited to repair of the product and or replacement of parts and is given to purchaser in lieu of a...

Отзывы: