Installation
CAUTION
Your compressor is heavy,take care when moving or transporting it.
•
Locate the compressor on a firm, flat, level surface, in a dry and dust free
area. Do not use the compressor in a damp or wet environment.
•
The compressor must have adequate ventilation to allow a fresh air intake to
the compressor and cooling air to the motor.
•
Ensure that the air available to the compressor is as clean as possible.
Dusty or damp air at the inlet will reduce the compressor’s performance and
affect the quality of air supplied to your tools.
•
Do not place any strain on electrical cables or air hoses connected to the
compressor.
Starting the compressor
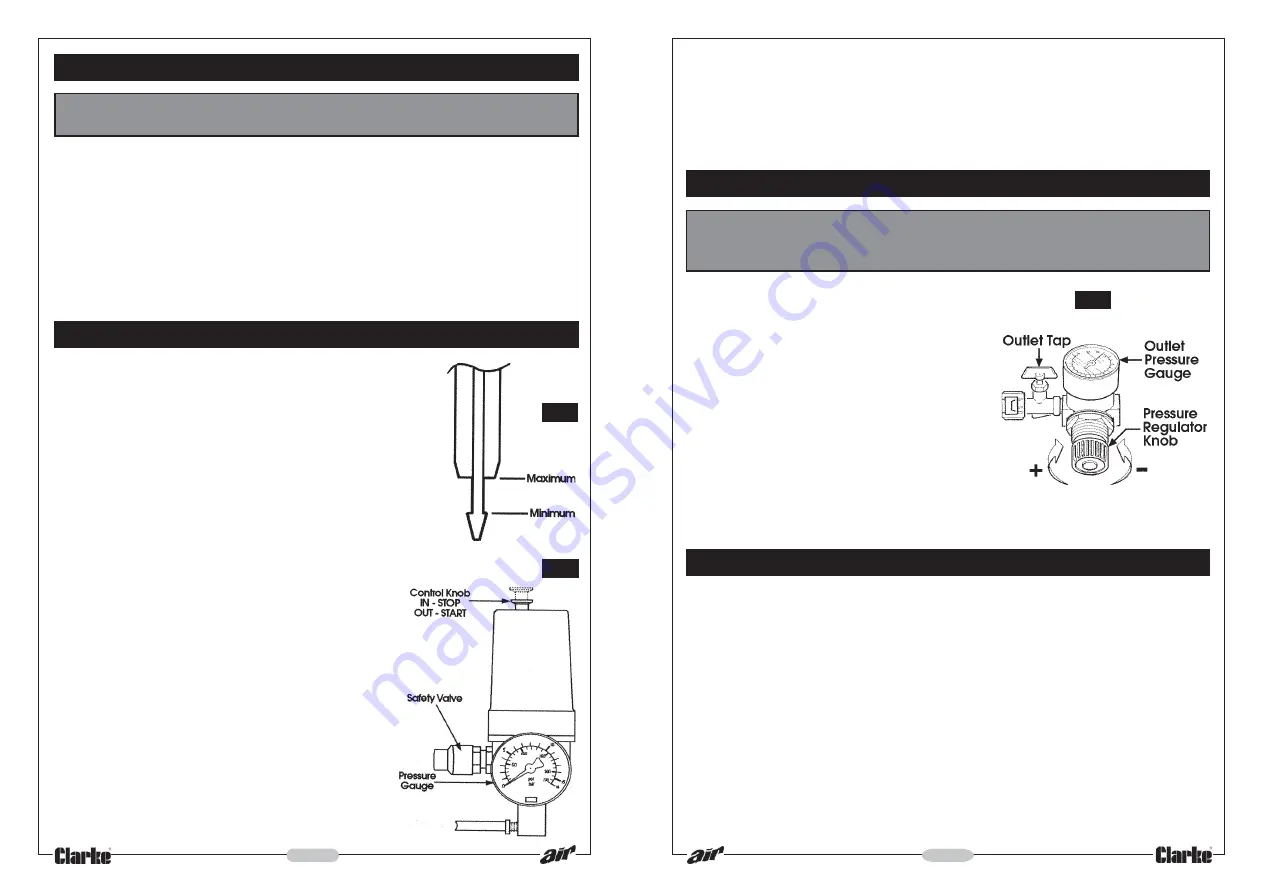
Before starting the compressor, check the oil level, and
top up if necessary with Clarke SAE 40 compressor oil.
The oil level should be between the minimum and
maximum marks on the dipstick (see figure 2).
Note: The compressor has an automatic pressure switch
which will start the compressor when the air pressure in
the receiver is low, and stop the compressor when the
air receiver is at its maximum pressure. This switch also
controls a breather valve which vents the compressor
outlet when the compresor stops, to prevent overloading
the motor when restarting.
Never switch the compressor on or off using the mains switch
.
Always use the control knob on the automatic pressure switch.
1.
Make sure the control knob on the automatic
pressure switch is in the OFF (‘0’) position (control
knob pushed in - see figure 3).
2.
Switch on the mains supply.
3.
Lift the control knob on the automatic pressure
switch to the ON (‘I’) position. The motor should
start immediately. If it does not, it may be
because the air receiver is already up to
pressure. Check the tank pressure gauge and
release some air by opening the outlet valve if
necessary.
4.
Run the compressor with the outlet valve open
for a few moments. This allows the compressor
lubricating oil to circulate before the compressor
is placed under load.
6
5.
Close the outlet valve, and allow the pressure in the receiver to rise before
connecting your air hose and tools to the compressor.
Note: The compressor should start and stop automatically as air is used from the receiver. If
the compressor runs continuously it may be because the compressor is too small for your
application. Consult your dealer for advice.
Adjusting the air pressure
CAUTION!
Always follow the air tool manufacturer’s guidelines on the maximum
operating pressure for their equipment.
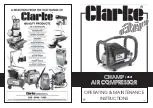
The pressure in the air receiver is controlled by
the automatic pressure switch. You can control
the pressure supplied to your air hose and tools
by adjusting the outlet pressure regulator (see
figure 4). Turn the pressure regulator knob
clockwise to increase the pressure and anti-
clockwise to decrease.
As a rough guide to operating pressure, Clarke
paint spray guns typically operate at between
30 and 60 psi (approximately 2 to 4 bar). Most
Clarke air tools operate at around 90 psi
(approximately 6 bar), but if in any doubt about
operating pressure consult the equipment
manufacturer.
Stopping the compressor
1.
Push in the control knob on the automatic pressure switch, to the OFF(‘0’)
position. This will open the breather valve and stop the compressor. You may
hear a release of air as the breather valve opens.
2.
Switch off and unplug from the mains supply.
If the compressor is not going to be used for some time, for example overnight,
or if you are transporting the compressor, drain the air from the receiver.
7
Fig.4
Fig.3
Fig.2


