background image

15

English

Color tone (Display only when CJ-7600 is connected) 


Brightness 

5

Tone 

5

Vividness 

5

Dimmer 

Daytime

Color tone


Brightness 

5

Tone 

5

Vividness 

5

Dimmer 

Daytime

5

Color tone


Brightness 

5

Tone 

5

Vividness 

5

Dimmer 

Daytime

Color tone


Brightness 

5

Tone 

5

Vividness 

5

Dimmer 

Daytime

5

Color tone


Brightness 

5

Tone 

5

Vividness 

5

Dimmer 

Daytime

Color tone


Brightness 

5

Tone 

5

Vividness 

5

Dimmer 

Daytime

Color tone


Daytime 

Night 

Auto

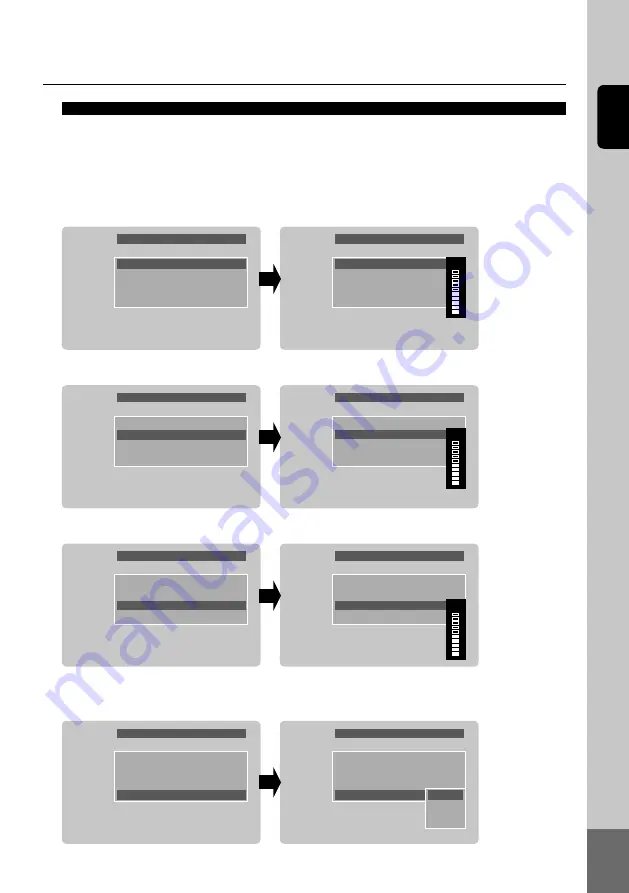
①  Select “Brightness”, “Tone”, “Vividness” and “Dimmer” in the “Color tone” menu with the ▲/▼ buttons 

and press the ENT(VOL) button (OK or ▶ button on the remote control). Press the ▲/▼ buttons to 
adjust the “Brightness”, “Tone” and “Vividness”.

②  Select “Daytime”, “Night”, “Auto” and press the ENT(VOL) button(OK or ▶ button on the remote control) 

to change the “Dimmer” setting.

1) Brightness

2) Tone

3) Vividness

4) Dimmer sensor setting

※ User can choose “Daytime”/”Night”/”Auto”. (Factory default setting is “Daytime”)


Brightness 

5

Tone 

5

Vividness 

5

Dimmer 

Daytime

Color tone


Brightness 

5

Tone 

5

Vividness 

5

Dimmer 

Daytime

5

Color tone

Содержание EA-2182E

Страница 1: ...stallation manual Mode dʼemploi et manuel dʼinstallation Manual de instrucciones y manual de instalación Manuale dellʼutente e manuale di installazione Bedienungsanleitung und Installationshandbuch Bruksanvisning och installationsmanual ...

Страница 2: ...ence in a residential installation This unit generates uses and can radiate radio frequency energy and if not installed and used in accordance with the instructions may cause harmful interference to radio communications However there is no guarantee that interference will not occur in a particular installation If this unit does cause harmful interference to radio or television reception which can ...

Страница 3: ...his product Following the safety rules pre vents users from damages related with the misuse of the product It is very important to follow these safety rules We state Caution and Warning to clarify any potential risk of damage as sociated with the misuse of the product This information is for preventing damage or shortening the life time of the products It may cause malfunction or injury and may vo...

Страница 4: ...by short circuit due to overheating Unplug product when not in use for a long time It may cause malfunction or picture distortion Do not place near magnet The battery for remote controller is not rechargeable and should be replaced by the same or similar model Used battery may cause envi ronmental pollution so trash it carefully Incorrect battery may cause malfunction or damage The rear view monit...

Страница 5: ...r electric shock When you install the product in a vehicle and watch the monitor the car engine should be running to avoid flattening the battery Any liquid leaking into product may cause malfunction Precautions when you use the product in a vehicle The driver should not use the product while he she is driving Be cautious of humidity and shock when you use the product in a vehicle Cover the product...

Страница 6: ...mal Mirror mode A V input Video Mono Audio The cameras can be operated on the monitor side when the CJ 7600 monitor is connected Output can be sent to an external monitor via a remote control receiver sold separately and oper ated by the remote control The images of Camera 1 4 can be automatically switched in all the screens Opening and closing of the shutter camera can be fully controlled using t...

Страница 7: ...put Connection terminal Operations can be carried out remotely by connecting an external remote control receiver sold separately Camera 1 4 input terminals Audio visual input terminal for AV2 display Camera AV2 image output terminal for connecting to external monitor Dedicated connection terminal for CJ 7600 DC12 24V input terminal TRIGGER 1 4 terminal parking input terminal remote out terminal ...

Страница 8: ...h AUX Confirm button Return button Switch camera inputs Set SUB MENU Volume control Works only when CJ 7600 is connected Not in use Switch main menu Display actual settings Go into 2 split screen and change split form Go into 3 split screen and change split form Go into 4 split screen and change split form ...

Страница 9: ...t is switched in the reverse order with the but ton The AV1 and Sub display screen is displayed only when the CJ 7600 monitor is connected The AV external input or screen for non con nected cameras will turn blank 1 Basic screen switching Switch input video 3 Volume control CJ 7600 connection 2 PressandholdtheENT VOL buttononthemonitortodisplaythesetvolumeand adjust the volume with the buttons Whe...

Страница 10: ...e remote control toswitchbetweenfullscreen 2 split 3 splitor4 split screen display User can choose split screen directly with split button on remote control Each split screen has two options In split mode press button on the monitor or split screen button on the remote control then the screen switches between both options 2 Sprit screen switching CJ 7600connection CJ 7600connection The split scree...

Страница 11: ... on the remote control Confirm button MENU BACK button button on the remote control Return to previous screen button If the buttons are not pressed for 5 seconds the settings will be saved even if they have not been completed and the menu screen will disappear automatically When CJ 7600 is connected changes in the settings can be made on the monitor side When an external monitor is connected conne...

Страница 12: ... switched in full screen Select Switch time in the General menu with the buttons and press the ENT VOL button OK or button on the remote control Select with the buttons and press the ENT VOL button OK or button on the remote control to set the time Time can be selected from OFF 1 5 sec in 1 sec unit The default setting when shipped is OFF When the screen switching time is set between 1 to 5 sec it...

Страница 13: ...e buttons and press the ENT VOL button OK or button on the remote control Select NTSC or PAL with the buttons and press the ENT VOL button OK or button on the remote control You can not use both NTSC and PAL signals in the one split screen Select To initial settings in the General menu with the buttons and press the ENT VOL button OK or button on the remote control Select Reset with the buttons an...

Страница 14: ... Color tone Daytime Night Auto Select Brightness Tone Vividness and Dimmer in the Color tone menu with the buttons and press the ENT VOL button OK or button on the remote control Press the buttons to adjust the Brightness Tone and Vividness Select Daytime Night Auto and press the ENT VOL button OK or button on the remote control to change the Dimmer setting 1 Brightness 2 Tone 3 Vividness 4 Dimmer...

Страница 15: ...ferent from the conditions listed In such cases the display location should be set at the closest marker No Distance markers cannot be set if non Clarion cameras are used The markers may not indicate the exact position of the bumper the vehicleʼs width or the distance to the rear Use as a reference only Caution Warning Select Marker in the Marker menu and press the ENT VOL button OK or button on t...

Страница 16: ...icle Width Vehicle Width Type1 Type2 Type3 Type4 Type5 Type6 Type7 2 0 2 5 2 8 3 0 3 0 3 25 3 5 2 3 2 5 Type1 Type2 Type3 Type4 Type5 Type6 Type7 0 5 0 7 0 7 0 9 0 9 2 5 3 0 2 3 2 5 2 3 2 5 2 3 2 5 3 Marker type set the marker pattern Select Marker type in the Marker menu and press the ENT VOL button OK or button on the remote control Select Type 1 to Type 7 with the buttons and press the ENT VOL ...

Страница 17: ...th the buttons Up Down and press the ENT VOL button OK or button on the remote control V 10 10 Default setting V 0 Select L R in the Marker menu and press the ENT VOL button Adjust the H horizontal movement value with the buttons Right Left and press the ENT VOL button OK or button on the remote control H 10 10 Default setting H 0 If there is no button operation set up screen disappears even durin...

Страница 18: ... button OK or button on the remote control Select the image layout with the buttons and press the ENT VOL button OK or button on the remote control to set the screen display when split The 2 4 split screen display when the cameras are linked is displayed in this setting screen Select the 2 4 Screen display that you wish to change shaded screen with the buttons in the Camera when split screen and p...

Страница 19: ...or is connected Select the audio of the Camera 1 4 that you wish to output in the split screen or AV2 with the buttons in the Sound menu and press the ENT VOL button OK or button on the remote control Audio is output only when the camera whose audio you selected in the split screen or AV2 is dis played 2 When an external monitor is connected Selecttheaudioofthe Camera1 4 thatyouwishtooutputinthesp...

Страница 20: ...signalimagedisplayedbutthedisplaywill return to the previous screen upon the signal being terminated Former screen Former screen Former screen TRIGGER 2 signal Off AV2 screen 4 seconds later TRIGGER 1 signal Off TRIGGER 1 signal Off TRIGGER 1 signal Input TRIGGER 1 signal Input TRIGGER 2 signal Input 1 The camera image to be displayed can be set in the Link TRIGGER terminal 1 4 Select Link 1 4 or ...

Страница 21: ...poweroff Stand by status thescreenswitchesonanddisplayschosen trigger line camera And the screens turns off when the trigger signal switches off Former screen TRIGGER 1terminal Off TRIGGER 4 terminal Input TRIGGER 4 terminal Off TRIGGER 1and 4 terminal Input TRIGGER 4 terminal Off TRIGGER 3 terminal Off AV2 screen 4 seconds later TRIGGER 2 3 terminal Input When set to 3 screen display TRIGGER 2 te...

Страница 22: ...s connected to the carʼs ACC car with no B U Even when ACC is OFF the shutter of the shutter camera will not close automatically To close the shutter turn ACC OFF after setting the monitor to Standby Make sure the B U terminal is connected to the carʼs ACC together with the ACC terminal Yellow B U DC12 24V Black GND Ground Red ACC DC12 24V Green PARKING Connect to the earth line of the the parking...

Страница 23: ...ut Operating environment is inappropriate Measure SPECIFICATION 10 The design and specifications are subject to change without notice TROUBLESHOOTING 9 Current Voltage Video Signal Audio Signal Frequency Power Supply Horizental Vertical Language Display Selection Operating Temperature Dimension Weight Approx 630g 22 22oz Body only DC12V DC24V 10 8V 31 2V Approx 200mA DC24V in case of connecing four...

Страница 24: ...2014 11 EA 2182E All Rights Reserved Copyright 2014 Clarion Co Ltd Printed in Korea Gedruckt in Korea Stampato nella Corea del Sud Imprimé en Corée Impreso en Corea Tryckt i Korea Clarion Co Ltd ...

Отзывы: