background image

App

Step 1

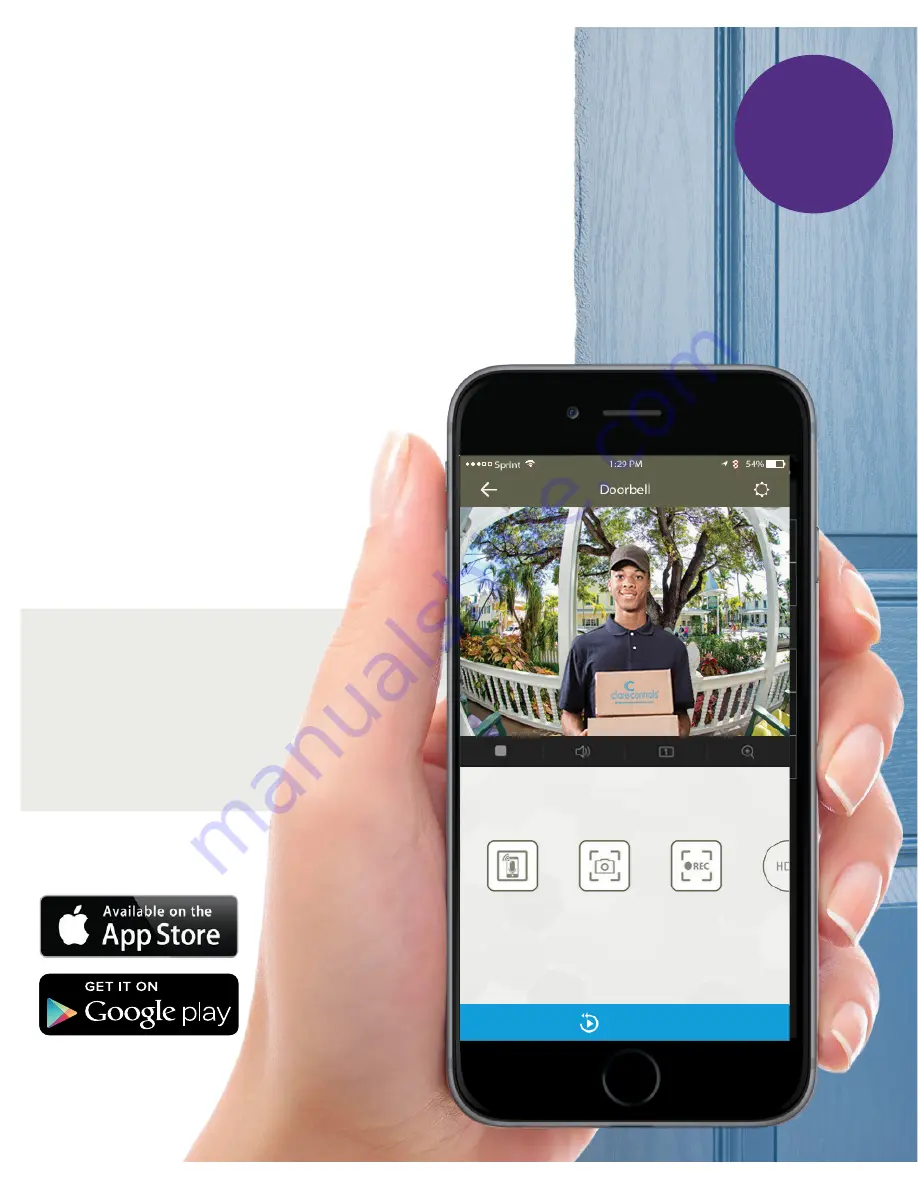
Getting Started With The 

ClareVision Plus App

Download and open the ClareVision 
Plus App for iOS and Android. 

After opening the App,  
tap on the cloud device icon  
on the bottom menu bar  
and follow the on-screen  
instructions to create a  
new account.

Playback

Note: 

Before 

proceeding, ensure that 
your mobile device is 
connected to a 2.4GHz  
wireless network only.

12

Содержание Clare Video Doorbell Version 2

Страница 1: ...Clare Video Doorbell Version 2 User Manual...

Страница 2: ......

Страница 3: ...orbell and restoring power 10 Installation when using a digital doorbell chime 11 Getting started with the ClareVision Plus App 12 Setting up the Video Doorbell in the ClareVision Plus App 13 14 Insta...

Страница 4: ...Welcome To Your New Clare Video Doorbell 180 2MP HD Camera Omni directional Microphone Doorbell Button Mode Button Uses Existing Doorbell Wiring Micro SD card Getting Started 3...

Страница 5: ...terchangeable faceplates Mounting template Clare Video Doorbell camera 4 Terminal screws 3 Mounting screws 2 Wire extensions 2 Security screws 3 Wall anchors 1 Security key 1 Drill bit 4 Wire connecto...

Страница 6: ...s most likely a digital doorbell and you must install the supplied resistor Refer to Install Step 4 for more information on installing the resistor Mechanical vs Digital Doorbells The Clare Video Doo...

Страница 7: ...eo doorbell will be installed and test the strength of the Wi Fi If a 60dBM signal or better is not achievable we recommend installation of a Wi Fi range extender or Wireless Access Point WAP to ensur...

Страница 8: ...rting installation make sure to shut off the power being supplied to your doorbell at the breaker panel Next remove your existing doorbell and disconnect the wires connected to the screws on the back...

Страница 9: ...ily remove the faceplate Next refer to diagram 3 to mount the supplied spacer or wedge plate to the doorbell location using the supplied wedge or spacer mounting screws The angled wedge plate can be u...

Страница 10: ...d easy to use connectors Insert the wires into the connectors as shown in diagram 5 and use pliers to snap the button into place There is no need to strip any wires as the connectors will pierce the i...

Страница 11: ...s complete install the doorbell using the supplied mounting screws Restore the power at the breaker and follow the instructions for setting up theVideo Doorbell in the ClareVision Plus App Wedge or sp...

Страница 12: ...will just not ring properly If this is the case simply reverse the direction of the resistor and verify proper installation by ringing the doorbell Installing The Supplied Resistor The resistor must...

Страница 13: ...lareVision Plus App for iOS and Android After opening the App tap on the cloud device icon on the bottom menu bar and follow the on screen instructions to create a new account Playback Note Before pro...

Страница 14: ...and then scan the QR code on the front of the video doorbell Ensure that your mobile device is connected to a 2 4GHz network only 3 The camera is ready to configure once the LED on the front of the do...

Страница 15: ...e QR code on the screen of your mobile device The Doorbell will beep when it recognizes the QR code Once connected to the Wi Fi network the camera will say TheWi Fi is connected 5 14 6 After connected...

Страница 16: ...theVideo Doorbell has been installed reinstall the faceplate by pressing gently until it clicks into place Refer to diagram 6 to install the security set screw located on the bottom of the doorbell f...

Страница 17: ...ng mode Factory Reset Updating Doorbell Firmware Statusaftercameraisregistered SolidBlue Normaloperation FlashingBlue Doorbellis callingthemobileApp FlashingRed Firmwareis updating Statusbeforecamerai...

Страница 18: ...to adjust the motion detection area of the doorbell Only receive notifications if an object enters the view of the camera that is highlighted Adjust the motion detection area by selecting desired gre...

Страница 19: ...ons from insects or small moving objects Medium Sensitivity Notifications from pets or medium moving objects Low Sensitivity Notifications from people or large moving objects Open the doorbell live vi...

Страница 20: ...e ClareVision Plus App Live and RecordedVideo Settings 2 Way Audio Take Photo TakeVideo HD BasicVideo LiveView Configuration Stop Start Volume CameraView Zoom Main Menu Settings Back Settings Add Devi...

Страница 21: ...VAC and has a max power draw of 12 watts 7 amps at 15 5VAC Q A How do I increase the volume of the microphone and speaker You can adjust these settings under the device settings in the App under louds...

Страница 22: ...s a week You can also visit www ClareControls com to learn more and watch helpful installation setup videos ClareCare Support Dealer Technical Support US 941 404 1072 Canada 844 360 4806 claresupport...

Страница 23: ......

Страница 24: ...www clarecontrols com Doc ID 2017 11 1563 07...

Отзывы: