13
CLAGE
4. Installation
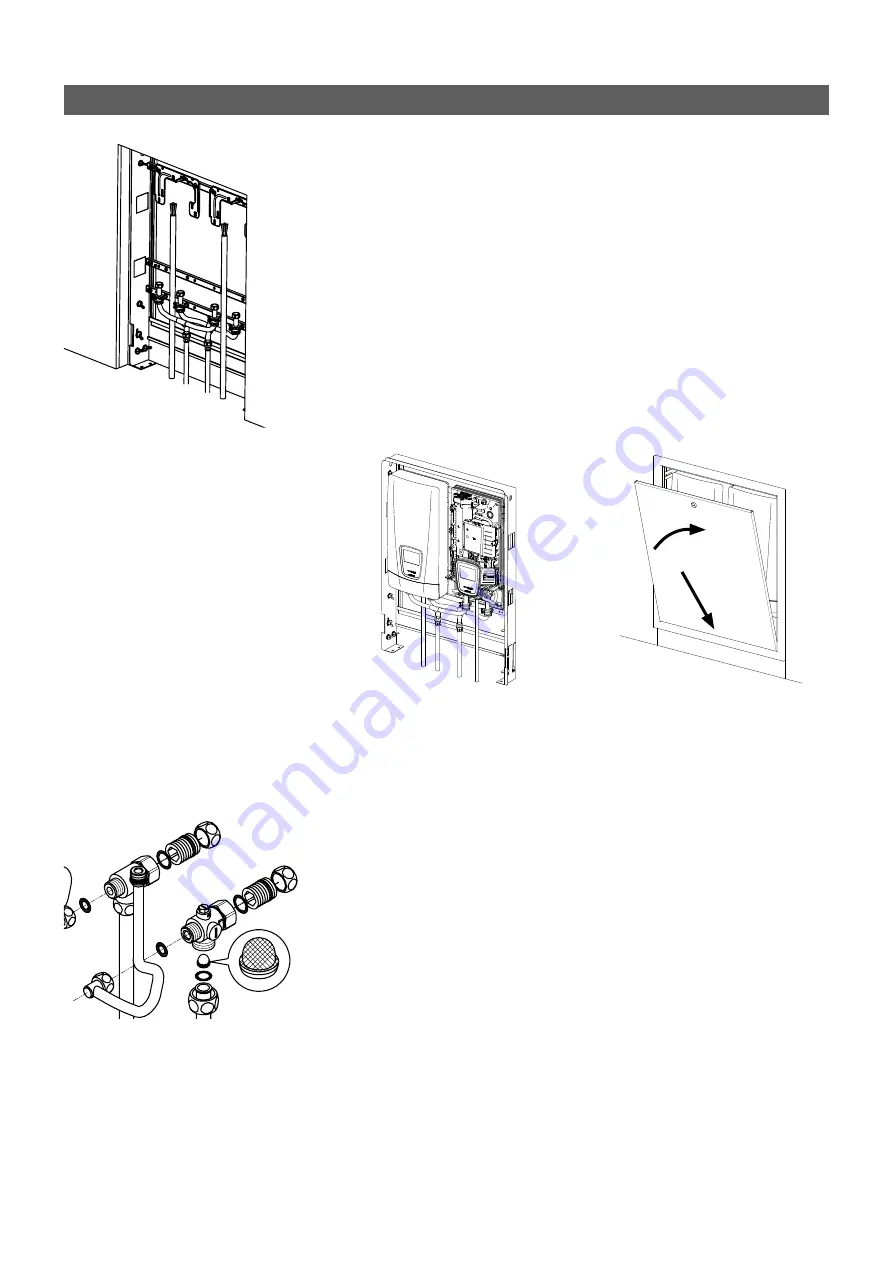
Note: The flush-mount cabinet must be submerged into the wall at least
130 mm. If the cabinet only is set to the first stop frame in the wall, a wall-
flush installation is not possible!
1. Dimension the hole in the wall according to the dimensions of the flush-
mount cabinet.
2. Install the cabinet in the wall.
3. Route the water supply lines centrally in the cabinet from below.
4. Connect the water supply lines with the pre-assembled manifolds.
5. If necessary, fill open spaces between wall and cabinet with polyurethane
foam or other suitable heat-resistant filler.
6. Install the cabinet panels once both DSX are installed and flooring and wall
plastering has been completed. Snap the cover at the frame bottom edge
first, than close it.
Installing the flush-mount cabinet
Note: Fasten the screw nuts with caution, to avoid damage to the valves or
the piping system.
1. The two ½ inch screw-in nipples and the ½ inch seals must be screwed into
the ½ inch union nuts of the hot-water and cold-water connectors.
2. Remove the two ½ inch caps of the side outlets of the hot-water and cold-
water connectors and mount them onto the open end of the screw-in nip-
ples.
3. Screw the ½ inch side outlets of the hot-water and cold-water connectors
with the ½ inch union nuts of the preassembled manifolds, together with
the ½ inch seals.
4. Repeat the steps 1 - 3 with the connecting pieces of the second appliance.
The hot-water and cold-water connectors must then be screwed into the
3
/
8
inch union nut of the appliance, together with the
3
/
8
inch seals.
Note until installation: put the strainer into the cold water connection!
Install the DSX as described in the installing instructions of the appliance
(chapter: “Installing the appliance”).
Installing connection pieces
Installing DSX
1
2
www.clage
-
com.ru
Содержание DSX Touch Twin
Страница 3: ...3 CLAGE Einbaurahmen Blendrahmen Deckel Blende 1 bersichtsdarstellung www clage com ru...
Страница 5: ...5 CLAGE 3 Abmessungen Maximaler Abstand vom Kabelende zur Schrankoberseite www clage com ru...
Страница 9: ...9 CLAGE Mounting frame Panel frame Cover Panel 1 Overview www clage com ru...
Страница 14: ...www clage com ru...
Страница 15: ...www clage com ru...


