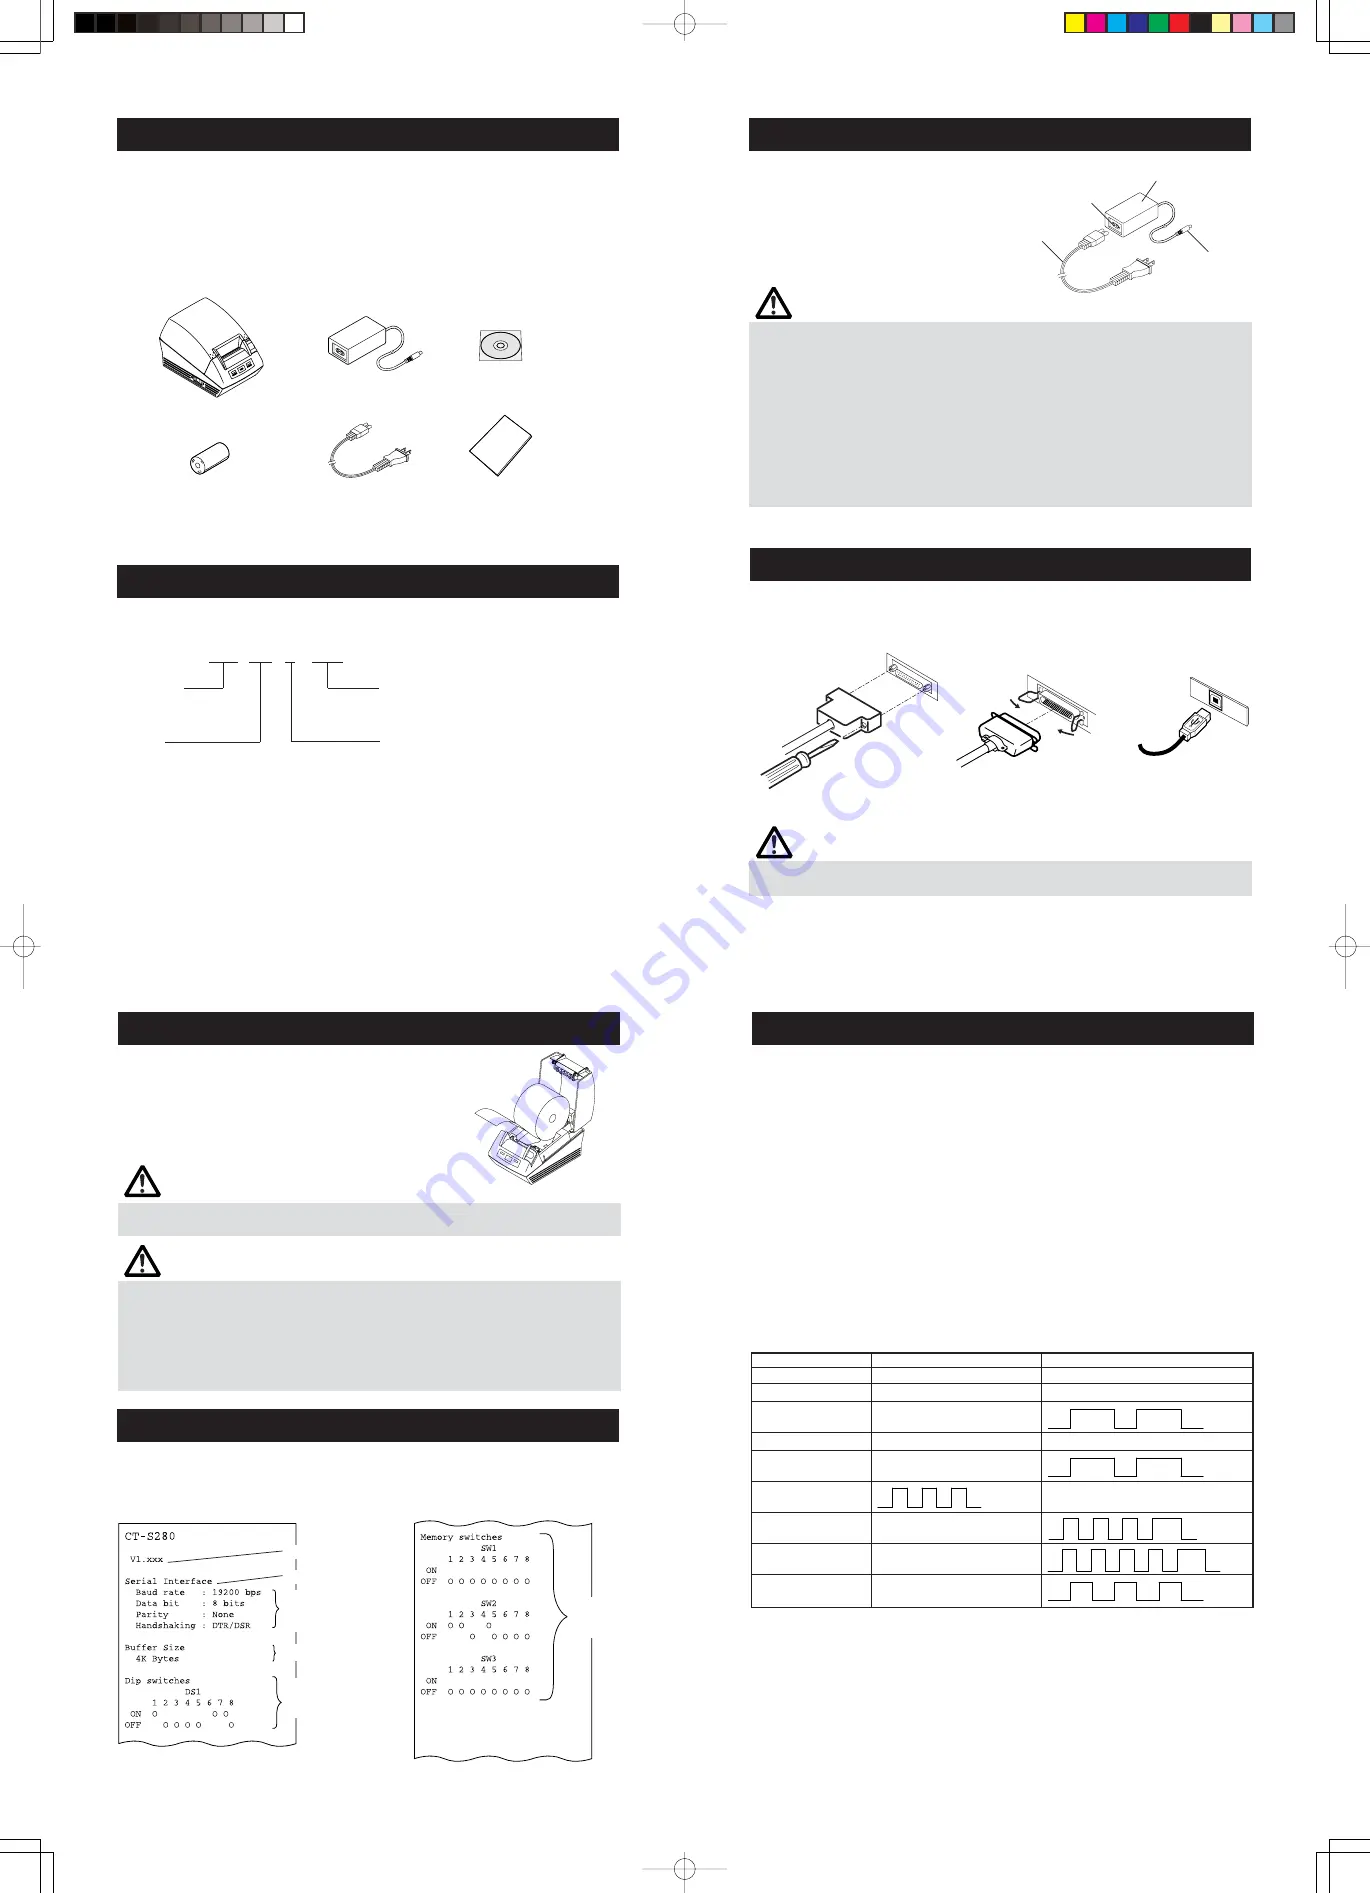
2 Model Classification
The printer models are classified by the following designation method:
1 Unpacking
When unpacking the printer, confirm that the following are provided:
●
Printer:
1
●
AC adapter:
1
●
AC power cord:
1
●
Sample paper roll:
1 roll
●
Quick start guide(This guide):
1
●
CD-ROM:
1
Printer
AC adapter
Sample paper roll
AC power cord
CD-ROM
Quick start guide
* The AC power cord plug will vary depending of the region.
3 Connecting the AC Adapter and AC Power Cord
CAUTION!
●
Use only the specified AC adapter with the printer.
●
When disconnecting a cable, do not pull out by the cable. Always hold the plug.
●
Always keep the AC power supply away from other noise generating equipment.
●
Do not pull the power cord. Otherwise fire, electric shock, or power disconnection
may result.
●
If lightning is approaching, unplug the AC power cord from the wall outlet. Otherwise
fire or electric shock may result.
●
Keep the power cord away from heat generating appliances. Otherwise the shield of
power cord may be fused resulting in a fire or electric shock.
●
If the printer is not to be used for a long time, leave it disconnected from its supply
outlet.
●
Lay the cable not to be caught by the leg or the like.
1.
Turn off the printer power.
2.
Plug in the cable connector of the
AC adapter to the power connector
at the rear of the printer.
3.
Connect the AC power cord to the
inlet of the printer, and insert the
AC power-cord plug into a suitable
wall outlet.
4 Connecting Interface Cables
Turn off the printer and unplug the power connector. Then follow the procedure for
interface cable connection.
Orient the interface cable terminal correctly and insert it into the interface connector.
CAUTION!
●
When disconnecting the cable, always hold the connector.
●
Lay the cable not to be caught by the leg or the like.
Serial Interface
Parallel Interface
USB Interface
5 Setting/Replacing Paper Rolls
WARNING
●
When opening the paper cover, take care not to touch the print head or cutter blade.
Otherwise, burning or injury of hand may result.
1.
Pull the cover open button fully toward you.
2.
Open the paper cover.
3.
Insert a paper roll with is print area facing down
as shown in the figure and pull out the paper
end straightforward by several cm out of the
printer.
4.
Close the paper cover until a click can be heard.
6 Self-printing
Insert paper into the printer. With the FEED switch pressed and held, turn the printer
power on, keep the FEED switch held for about 1 second, and then release the FEED
switch. The printer starts self-printing. The printer prints model name, version, DIP
switch setting, memory switch setting, and built-in fonts.
Memory
switch
setting
Serial communication
condition (Only serial
interface model)
DIP switch setting
(Only serial interface
model)
Firmware version
Interface
Buffer size
CAUTION!
●
Always use the specified types of paper roll.
●
Confirm that the paper roll is set correctly.
●
When the paper is skewed and not extended straightforward from under the cover,
open the cover and adjust the paper correctly.
●
When closing the cover, press on the center part of the cover to close it firmly.
●
When setting paper, pay attention not to let your fingers get injured by the edge of
paper.
7 Error Indication
●
Paper end
Paper empty is detected in two steps: paper near-end and paper end. It causes the
ERROR LED to light. If paper end is detected, refill the paper. If the paper cover is
open, a paper-end is detected.
●
Paper cover open
When the paper cover is opened, Paper cover open is detected and the ERROR LED
goes on.
During printing, do not open the paper cover. If you open the paper cover accidentally,
the ERROR LED blinks. Confirm the paper and close the cover. Printing resumes
automatically.
●
Thermal head overheat
When you print dense characters or dark image, the head temperature rises. If the
head temperature exceeds a specified level, the printer stops printing operation and
waits till the head temperature is lowered. During waiting, the ERROR LED blinks.
When the head temperature is lowered, printing resumes automatically.
The status of LED, lighting or blinking, including other errors is shown below.
Status
POWER LED
ERROR LED
Paper-end
Lights
Lights
Paper near-end
Lights
Lights
Cover open error *1
Lights
Cover open error
Lights
Lights
Head overheat error
Lights
Memory check error
OFF
Low voltage error
Lights
High voltage error
Lights
Macro execution
Lights
wait *2
*1: When the printer is printing.
*2: The ERROR LED may blink even in the execution of macro function.
CT-S 280 RS U - WH
Case color
WH: Cool white
BK: Black
Destination (L Power cord)
J: Japan
E: Europe
U: USA
Interface
PA: Parallel IEEE 1284 compliant
RS: Serial RS-232C compliant
UB: USB
Model name
AC
power cord
Inlet
Cable
connector
AC adapter


