


23
7 Setting IP Address
The IP address that is used to connect the printer to the network can be automatically obtained by
the DHCP server or It can be manually set. When it leaves the factory, the device is programmed
to have the DHCP server automatically obtain the IP address. To change the IP address, enter it
manually.
IP address when connecting to the network for the first time
After the printer is turned on, the device will automatically obtain the IP address from the DHCP
server within 60 seconds. If the IP address cannot be obtained automatically, the static IP address
(169.254.1.10, set in this device at the factory) will be applied.
Setting IP address manually
1) Using your Web browser, access the print server homepage. See 5, Using the Print Server
Homepage (p.16) for how to access the homepage.
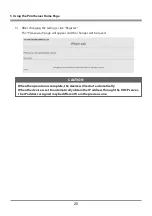
2) Open the “Print server configuration” page and click “Edit.”
3) Click “Disable” for “IP address from DHCP” under “TCP/IP settings.” The automatic obtaining
of the IP address by the DHCP server will be disabled.
4) Enter the IP address in “IP address” under “TCP/IP settings.”
5) Click “Register” to save the change.
Setting the IP address automatically
1) Using your Web browser, access the print server homepage. See 5, Using the Print Server
Homepage (p.16) for how to access the homepage.
2) Open the “Print server configuration” page and click “Edit.”
3) Click “Enable” for “IP address from DHCP” under “TCP/IP settings”.
The automatic obtaining of the IP address by the DHCP server will be enabled.
4) Click “Register” to save the change.
The “Please wait” page will appear and the change will be saved.
5) Turn on the printer.
After the printer is turned on, the device will automatically obtain the IP address from the
DHCP server within 60 seconds.
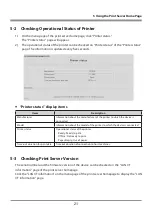
Checking the IP address
To check, print the settings information. See 6-1, Printing Print Server Configuration (p.22) for
details.
Содержание IF1-ET01
Страница 1: ...Print Server IF1 ET01 User s Manual ...
Страница 25: ......


